Setting up a grow light is not complicated, but the details matter. Get the height wrong and your seedlings stretch toward the light like they're trying to escape. Run it too long and you risk heat stress. Run it too short and nothing grows well. This guide walks you through the full process: picking the right light, installing it safely, dialing in placement and intensity, setting a schedule, and fixing the problems that trip up most beginners. You'll have actionable numbers to work with at every step, not vague suggestions.
Grow Light Instructions: Setup, Placement, and Schedule

Marcus Tillman
11 Apr 2026
How to choose a grow light for your indoor plants
The first decision is matching the light to what you're actually growing. Seedlings and clones need very little light intensity: aim for less than 100 PPFD (micromoles per square meter per second). Vegetative houseplants want somewhere between 100 and 400 PPFD. Flowering or fruiting plants need the most, typically 400 to 1,200 PPFD. If you're starting seeds under a light or just keeping tropical houseplants happy through winter, a modest LED panel or light bar in the low-to-mid wattage range (30 to 100 watts true draw) will do the job without overspending.
LED is the right technology for most home growers today. LEDs run cooler than fluorescent or HID fixtures, use less electricity, and last tens of thousands of hours. Full-spectrum LEDs that cover both the blue (400 to 500 nm) and red (600 to 700 nm) ranges are suitable for all growth stages. If you're shopping for a specific brand and want detailed setup guidance, there are brand-specific walkthroughs worth checking out: the LED plant grow light instructions cover the setup process for standard LED panel fixtures in detail. Budget matters too: a $30 to $80 LED bar or panel from a reputable brand is perfectly capable for a few plants or a small seedling tray.
Before you buy, think about coverage area. Most manufacturers list a recommended footprint, such as a 2x2 or 4x4 foot area. Match that to the actual shelf, tent, or table you're working with. A light rated for 4x4 feet producing 600 PPFD at 18 inches will produce a very different intensity if you're trying to stretch it over a 5x5 space. Stick within the recommended footprint.
What you need before installation (safety, tools, space)
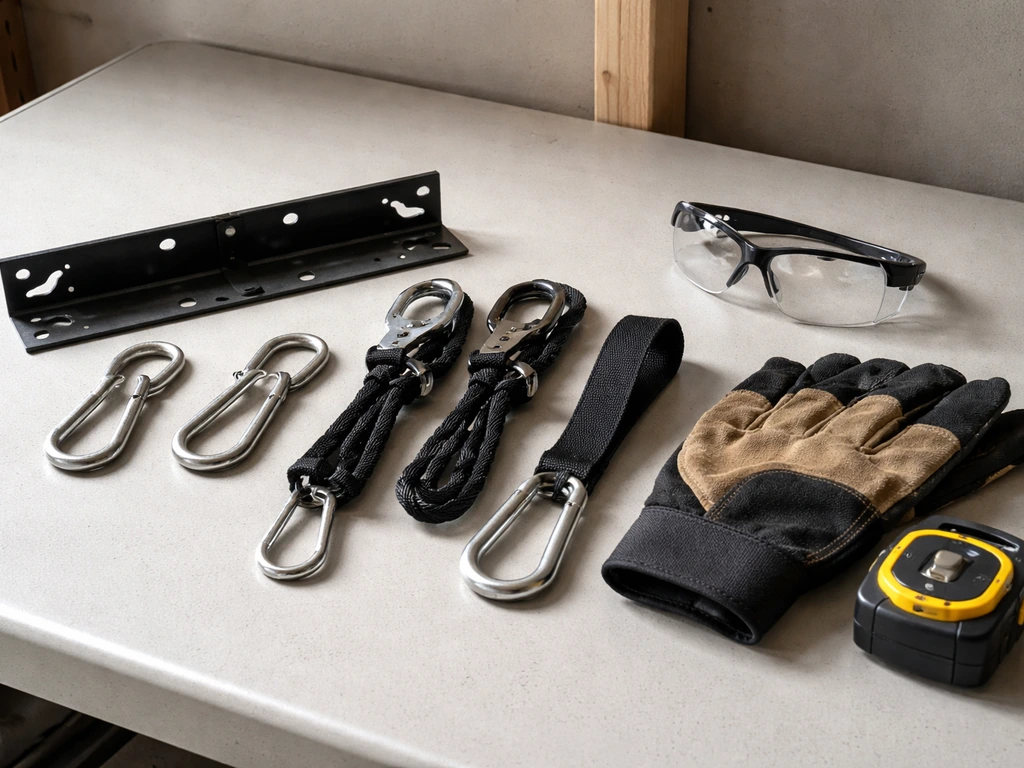
Before you hang anything, gather what you'll need. Most LED grow lights come with hanging hardware (hooks, rope ratchets, or a mounting bracket), but you'll want a few things ready regardless.
- A sturdy overhead anchor point: a ceiling joist, grow tent cross bar, wire shelving rack, or wall-mounted hook rated for at least 2x the light's weight
- Adjustable rope ratchets or zip ties for height adjustment (most budget lights include these; if not, a $5 pair from a hardware store works)
- A tape measure for setting the correct height above your plant canopy
- A surge-protecting power strip with enough outlets for the light and any timers
- A plug-in outlet timer if your light doesn't have a built-in timer
- A clear working space free of water or moisture near the outlet
Safety first: never hang a grow light directly above standing water or over a wet surface without adequate splash protection. Make sure the power cord isn't under strain when the light is at its lowest position. If you're working with a brand-specific fixture you're less familiar with, checking the manufacturer's documentation is worth the five minutes. For example, the Feit Electric grow light instructions walk through the mounting hardware and cord routing specifics for that lineup, which is helpful if you've picked up one of their popular shop-light-style bars.
Step-by-step installation and setup (mounting, positioning, coverage)
- Identify your mounting point. For grow tents, the top crossbar is your anchor. For shelves, a ceiling hook over the shelf works well. Make sure the anchor can hold the fixture's weight with some margin.
- Attach the hanging hardware. Thread rope ratchets through the light's hanging holes or bracket loops. Keep both sides equal length so the fixture hangs level.
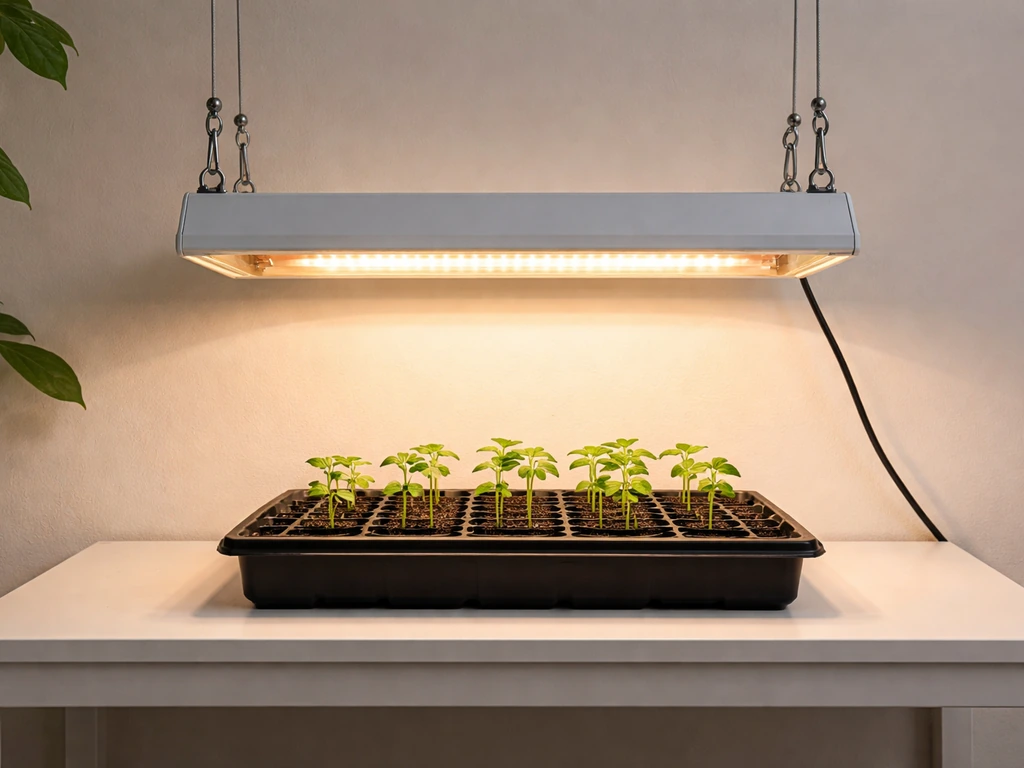
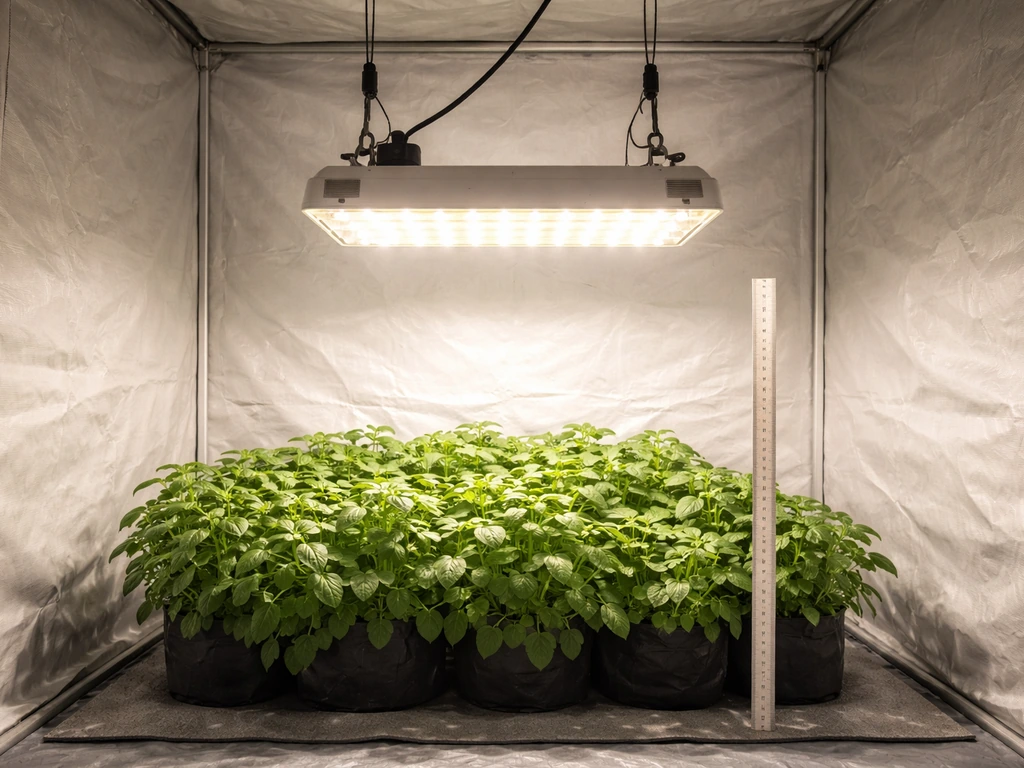
- Set an initial height. For seedlings, start at 6 to 8 inches above the tray. For vegetative plants or houseplants, start at 12 to 18 inches above the canopy. You'll fine-tune this later.
- Route the power cord safely. Run it along a wall or tent corner so it's not dangling across the growing area. Secure it with a zip tie or cord clip.
- Plug into a timer, then into the outlet. Never bypass the timer and just plug directly into the wall long-term. The timer is how you keep a consistent schedule without relying on memory.
- Turn the light on and inspect coverage. Look at your plant canopy from above. You want even light distribution with no dark corners or hot bright spots on one side. Adjust the height or horizontal position until coverage looks uniform.
- Mark your height setting. Once you've found a good starting position, mark the rope ratchet with a piece of tape so you can return to it after adjustments.
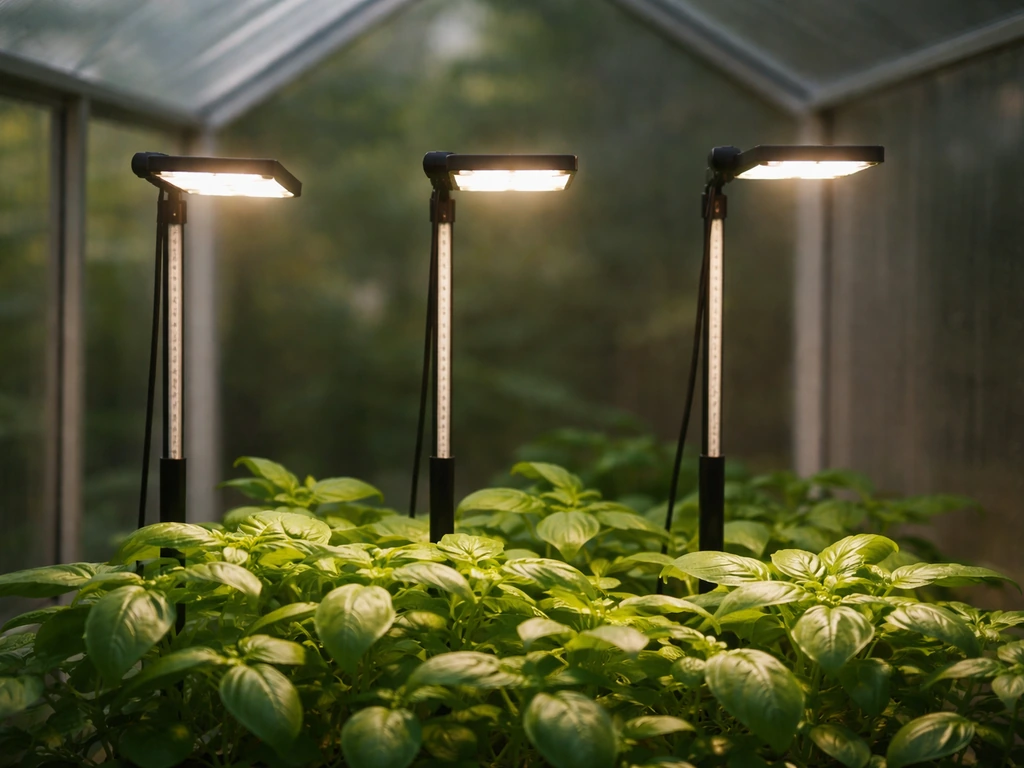
If you're working with a gooseneck-style clip light or a multi-head panel, the process is slightly different. Clip lights attach to a pot rim or shelf edge, and you adjust the flexible neck to aim the head at your plants. Multi-head fixtures often have individual arms you can reposition. The Fecida grow light instructions are a good reference if you have a multi-arm LED panel, as they detail how to position each head for even coverage across a wider tray.
Dialing in intensity (height/distance, aiming, even lighting)
Height above the canopy is your main tool for controlling intensity. The closer the light, the more intense the light at the plant surface. The farther away, the weaker it gets (light intensity drops roughly with the square of distance). The practical consequence: dropping your light from 20 inches to 8 inches above seedlings dramatically increases what the plants receive, and at 8 inches you may only need 8 hours per day to hit the same daily total that would require 16 hours at 20 inches. That relationship between distance and required run time is one of the most useful things to understand about grow light operation.
Use these starting heights as a reference and adjust based on plant response:
| Plant Stage | Recommended Height Above Canopy | Notes |
|---|---|---|
| Seedlings / clones | 6 to 10 inches | Low PPFD needed; start higher and lower if stretching occurs |
| Young vegetative / houseplants | 12 to 18 inches | Good general starting point for most LED panels |
| Mature vegetative plants | 10 to 16 inches | Lower if light has dimmer; raise if leaves show stress |
| Flowering / fruiting plants | 8 to 14 inches | Higher intensity needed; watch for heat stress |
If your light has a dimmer, use it. Start at 50 to 75 percent intensity for seedlings, and ramp up as the plants grow and the canopy fills in. For even coverage, make sure the light is centered over the grow area, not offset to one side. If one corner of your tray looks dimmer, either reposition the fixture horizontally or rotate the tray every few days to compensate. Some fixtures, like the clip-on or gooseneck designs covered in the Lordem grow light instructions, let you aim individual heads precisely at plants that need more light, which is handy when you have a mix of plant sizes.
Light schedules and timing (seedlings vs veg/houseplants)
Daily Light Integral (DLI) is the concept you need here, even if the math sounds intimidating. DLI is simply the total amount of light a plant receives over a full day, and it's driven by two things: how intense the light is (PPFD) and how many hours you run it. Daily light integral (DLI) can be calculated from PPFD and photoperiod using the relationship DLI (mol/m²/day) = 3.6×10^-3 × PPFD (µmol/m²/s) × light-hours/day DLI can be calculated from PPFD and photoperiod. You don't need to calculate DLI precisely, but understanding the relationship helps you make smart adjustments. A plant getting 200 PPFD for 16 hours is getting the same daily total as a plant getting 400 PPFD for 8 hours.
Here are practical schedules that work for most home setups:
| Plant Type | Daily Light Hours | Notes |
|---|---|---|
| Seedlings and cuttings | 14 to 16 hours | Low intensity, longer duration; seedlings prefer consistent low light |
| Tropical houseplants | 12 to 14 hours | Mimic natural day length; most houseplants don't need more |
| Vegetative growth stage | 16 to 18 hours | Promotes leafy growth; keep dark period to at least 6 hours |
| Flowering / fruiting plants | 12 hours on / 12 off | Many flowering plants need a dark trigger; don't skip the dark period |
| Succulents and cacti | 10 to 12 hours | These prefer drier, lower-light conditions; don't overdo it |
Set your timer to run lights during the day, ideally aligned with your natural daylight hours. Plants benefit from the same routine every day, so consistency matters more than perfection. A simple $8 mechanical outlet timer is all you need. If you're using a smart plug with a schedule app, that works too and gives you more flexibility. The Vogek grow light instructions include built-in timer setup steps if you have one of their fixtures with an integrated scheduling function.
One more timing note: don't run lights 24 hours a day. Plants need a dark period. Continuous light stresses most species, disrupts cellular repair, and can cause leaf curl or bleaching over time. The only exception is a small handful of plants like lettuce, which can tolerate near-continuous light, but even then it's not ideal long-term. A peer-reviewed study found that continuous light for 24 hours can enhance lettuce growth at a fixed daily light integral compared with an 18-hour photoperiod, with the size of the effect varying by cultivar continuous light (24 h) enhanced lettuce growth at a fixed daily light integral versus an 18-hour photoperiod.
Troubleshooting common growth problems (stretching, color, heat stress)
Plants are tall and spindly (etiolation / stretching)
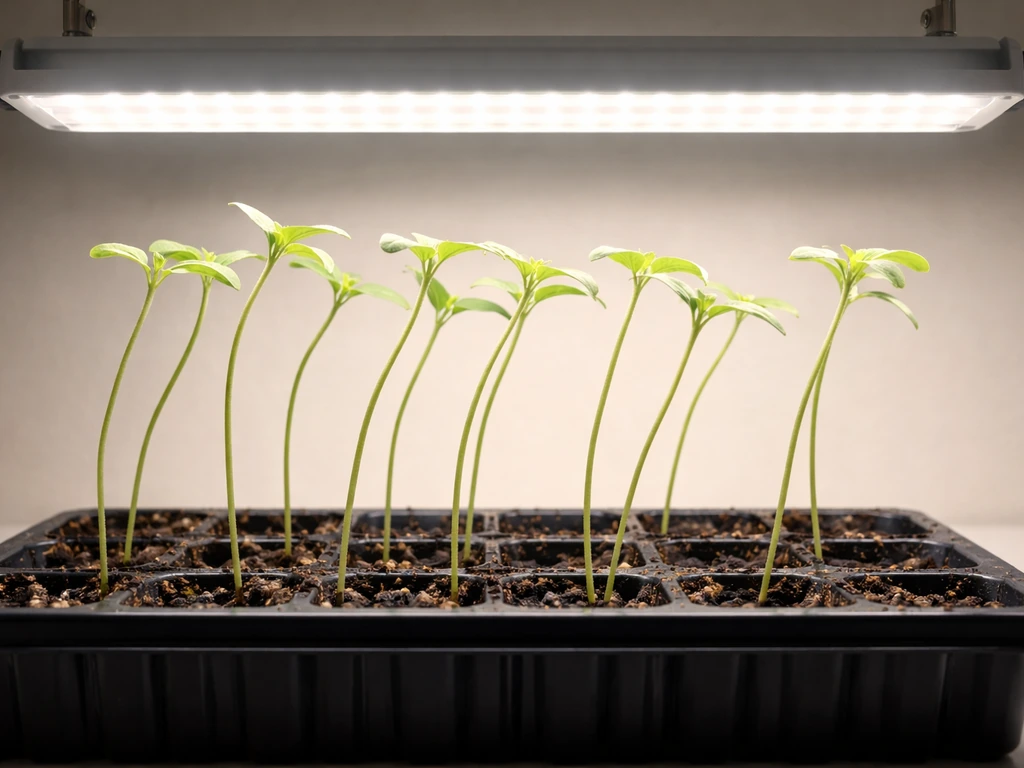
Stretching means the plant is not getting enough light. The plant is literally reaching toward the source. Fix: lower the light closer to the canopy (try dropping it by 2 to 4 inches at a time), increase light intensity if your fixture has a dimmer, or add more hours to the schedule. If you're at maximum intensity and the plant still stretches, you may need a more powerful fixture. This is the most common beginner mistake, and it's usually solved by simply moving the light down.
Leaves are yellowing or pale
Yellowing can mean under-lighting, but it can also mean overwatering or nutrient deficiency. To isolate the cause: if the yellowing is uniform across the whole plant and new growth looks pale, light is likely the issue. If only lower, older leaves are yellowing, it's probably a nutrient or watering problem, not light. If light is the cause, raise the intensity or reduce the height slightly. If you have a brand-specific fixture and want to rule out a hardware issue first, reviewing setup guides like the Ferry-Morse grow light instructions can help confirm the fixture is operating at its rated output.
Leaf edges are brown or crispy (heat stress or light burn)
If the top leaves (closest to the light) show bleaching, browning at edges, or upward curling, the light is too close or too intense. Fix: raise the light by 2 to 4 inches, or dial back the dimmer by 25 percent. Feel the air temperature at canopy level with your hand. If it feels warm or hot after 30 seconds, the light is too close. LED lights generally run cooler than HID, but budget LEDs can still cause heat stress if hung at 4 to 6 inches over dense plants.
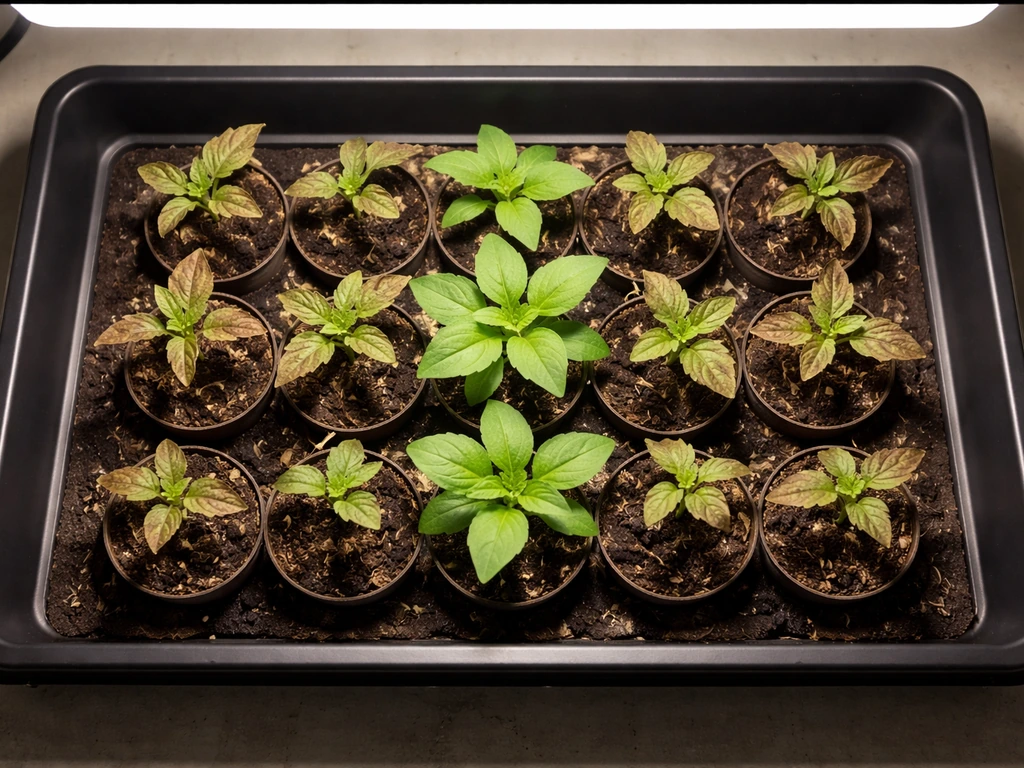
Uneven growth across the tray
Plants in the center of the tray thrive while edge plants lag behind: this is a coverage problem. Either the light is too small for the area, hung too high (reducing edge intensity), or positioned off-center. Start by centering the fixture over the tray, then lower it incrementally to improve edge coverage. Rotating the tray 180 degrees every three to four days also helps even things out. If you want a more uniform setup, adding a second fixture or switching to a wider bar-style light solves edge fall-off better than any positioning trick.
Light turns off randomly or doesn't follow the schedule
This is almost always a timer issue. Mechanical timers can slip over time, especially cheap ones. Check that the timer pins are fully depressed, that the current time dial is set correctly, and that the outlet has consistent power. If you're using a smart plug, check for app or WiFi connectivity issues that might have reset the schedule. Replace a mechanical timer annually if you're running a serious grow.
Quick-start checklist and next-step upgrades
Use this checklist when setting up a new light or diagnosing a struggling plant:
- Light is hung level and centered over the plant area
- Height above canopy matches the stage: 6 to 10 inches for seedlings, 12 to 18 inches for veg/houseplants
- Timer is set and confirmed working (check it after 24 hours)
- Schedule matches plant stage: 14 to 16 hours for seedlings, 12 to 14 hours for houseplants, 12/12 for flowering
- Coverage looks even across the whole tray or grow area
- Power cord is routed safely and not under tension
- No signs of stretching, heat stress, or edge browning after the first week
Once your basic setup is dialed in, here are the upgrades that make the biggest difference. A digital outlet timer with a battery backup is a worthwhile $15 to $20 upgrade from a mechanical one. A basic lux meter or PPFD meter (around $30 to $50) lets you verify the actual light intensity at canopy level instead of guessing. Rope ratchet hangers (if your light didn't come with good ones) make height adjustments much easier. And if you're expanding to more plants or a second shelf, a longer bar-style LED fixture often gives more even coverage per dollar than multiple small clip lights.
If you've picked up a specific fixture recently and want setup guidance tailored to that hardware, brand-specific walkthroughs are worth a look. The Fecida grow light instructions are useful for multi-head panels, and there are similarly detailed guides for other popular brands. Getting the basics right: right height, right schedule, right intensity for your plant stage, handles the vast majority of problems before they start. Adjust one variable at a time, give plants a few days to respond, and you'll figure out your specific setup faster than you'd expect.
FAQ
How do I know if my light is actually delivering the intensity I think it is at the canopy?
Rely on measurement, not the advertised wattage or “footprint” alone. Measure at canopy height with a PPFD meter (or a basic lux meter as a rough first check), then adjust height and dimmer until you hit your target PPFD range for the plant stage. Recheck after you rotate the tray or if you change anything about distance or angle.
What should I do if my plants are stretching but my schedule already matches the guide?
Increase received light before you keep adding hours. If the fixture has a dimmer, raise intensity in small steps (about 10 to 15 percent at a time). If you do not have a dimmer or you are already near maximum, lower the light by 2 to 4 inches, then wait several days to confirm the change, since plant response is not instant.
Can I run the lights at night to avoid heat during the day?
You can, but keep the routine consistent and avoid continuous lighting. If you switch from day hours to night hours, adjust the schedule so plants still receive the same daily light integral (DLI), meaning the same combination of hours and intensity. Also watch room temperature at canopy level during the new lighting window.
How much dark time do plants need if I want to use a 12 to 16 hour schedule?
Avoid 24-hour operation for most species. For typical seedlings, vegetative growth, and flowering, include a real dark period of at least 8 hours. If you notice stress like curling, bleaching, or slow recovery, shorten the photoperiod rather than pushing intensity higher.
Is it better to use multiple small lights or one larger light for an even canopy?
If your issue is edge lag, one wider bar-style fixture (or a second fixture placed to overlap coverage) usually reduces the uneven fall-off better than simply adding more small clip lights. With multiple fixtures, you still need to align them so overlapping zones have similar PPFD at canopy height across the whole tray.
My timer is on the right schedule, but the plants still look inconsistent. What’s the most common non-timer cause?
Check that the light is level and centered, and that you have not accidentally changed the distance. Even small height differences from uneven shelving, bent hanging hardware, or tray placement can create hotspots that make some plants stretch less and others bleach. Rotating the tray helps, but correcting physical placement is the first step.
Why do my yellowing leaves look different across the plant?
Uniform yellowing across the whole plant often points to insufficient light or overall stress, especially if new growth is pale. Yellowing only on older, lower leaves is more often linked to watering or nutrient availability rather than light. If the top leaves show browning or edge burn, that suggests intensity is too high or the light is too close.
What’s a safe way to adjust light height if I’m worried about harming seedlings?
Change height gradually. Drop or raise the light by about 2 inches at a time, then observe for several days. If you see immediate signs of bleaching or upward curling, raise the fixture right away by 2 to 4 inches or reduce the dimmer by roughly 25 percent.
How do I tell whether my fixture is too close versus the temperature is the real problem?
Use your hand test at canopy level after the lights have been on for about 30 seconds, if you can do so safely. If the area feels warm or hot, distance is likely too short, especially with budget LEDs. If it does not feel hot but plants still show stress, check PPFD and DLI, since light intensity can be the main driver.
Should I rotate the tray even when my light has multiple heads or a wide footprint?
Yes, rotation still helps because real-world intensity can vary due to fixture geometry and small placement differences. Rotate 180 degrees every 3 to 4 days if you notice center-versus-edge differences. If you use multiple heads, ensure each head is aimed so overlaps create even coverage rather than leaving a “shadow” zone.
What should I do if my fixture has no dimmer and plants are still stretching?
If you are already at the lowest recommended hanging height (from the manufacturer) and plants still stretch, you likely need more output. Options include using a brighter, higher-PPFD fixture, increasing the number of fixtures to cover the same area, or reducing the plant footprint so each plant receives the intended intensity.
How do I choose a schedule if I’m not sure my PPFD is exactly right?
Start with a conservative photoperiod and then adjust based on plant response. If plants stretch, increase received light by lowering height or raising intensity (and only then, extending hours). If plants bleach or curl upward, back off immediately by raising height or reducing dimmer, then keep the new schedule steady for several days.
Do I need to worry about splash protection or cord strain only at setup?
No, keep it an ongoing check. Make sure the cord never runs tight or becomes stressed when the light is adjusted to the lowest position, and avoid hanging over wet areas where runoff or condensation could reach the fixture. If you frequently water trays, add extra clearance and keep the fixture above any drip path.
Next Article
Lordem Grow Light Instructions: Setup, Mounting, Controls
Step-by-step Lordem grow light setup: unbox, mount height, controls, scheduling, and troubleshooting for seedlings to ve