If you just unboxed a Fecida grow light and are staring at it wondering what to do next, here is the short answer: identify your exact model, hang it at the right height for your plant stage, set the dimmer to the recommended intensity, plug it into a timer, and let it run. The details below will walk you through every one of those steps with real numbers so you are not guessing. And if something is already going wrong (plants stretching, leaves yellowing, light not responding), there is a full troubleshooting section waiting for you further down.
Fecida Grow Light Instructions: Setup, Schedule, Tuning

Marcus Tillman
11 Apr 2026
Find Your Exact Fecida Model First
Fecida sells quite a few different lights, and the controls and instructions are not all the same. Their lineup includes the Cruiser Series panel lights (CR600 at 130W, CR600 at 1000W equivalent, CR1200 at 2000W equivalent, and the CR4000 at 8000W), plus UFO600 and UFO1000 round models, plus the Zinqolay desk and tabletop series, plus clip-on multi-head lights (2-head, 3-head, 4-head in red/blue or red/white configurations). That is a wide range, and the controls are genuinely different across them.
The panel lights like the GL-CR600 use a stepless dimming knob. The desk and tabletop versions in the Zinqolay line often have a built-in automatic timer with 4-hour, 8-hour, and 12-hour settings baked right into the unit. Clip-on models are simpler still.
Find your model number on the sticker on the back or bottom of the light, or on the box. The most commonly referenced model in Fecida's documentation is the GL-CR600, and most of the specific numbers in this guide come from that model's manual. If you have a different model, the setup process is structurally the same, but your exact coverage area, wattage draw, and timer options may differ slightly. Check your included manual or the Fecida website for model-specific tables.
Electrical and Safety Checks Before You Plug Anything In
Before you power on, run through these checks. They take about two minutes and prevent most of the problems people run into on day one.
- Make sure your outlet is on a grounded circuit. Grow lights are pulling real wattage (the GL-CR600 draws around 130W at full power), and an ungrounded outlet is a genuine fire hazard.
- Check that the cord and plug show no cuts, kinks, or exposed wiring. Fecida lights are UL/FCC-listed models, but physical damage to a cord overrides any certification.
- Do not use a multi-tap power strip with other high-draw appliances. A dedicated outlet or a heavy-duty surge-protected power strip rated for at least 15 amps is the right move.
- If your model has a hanging kit, inspect the steel cables or ratchet hangers before putting any weight on them. The light should feel secure with zero sway.
- For desk and clip-on models, make sure the clamp or base is stable before you turn it on. A falling grow light can damage plants, pots, and the light itself.
- Keep the light unplugged during installation and any time you are adjusting or cleaning it. If you ever wipe down the unit, use a dry soft cloth only, and always unplug first.
One thing worth noting for panel lights specifically: the GL-CR600 manual mentions that the dimming knob doubles as the power switch. Turning the knob all the way counterclockwise to the OFF position cuts power. That means if your light does not turn on, the first thing to check is whether the knob is actually past the off detent. It is an easy thing to miss when you first set it up.
Hanging Height and Placement: Get This Right First
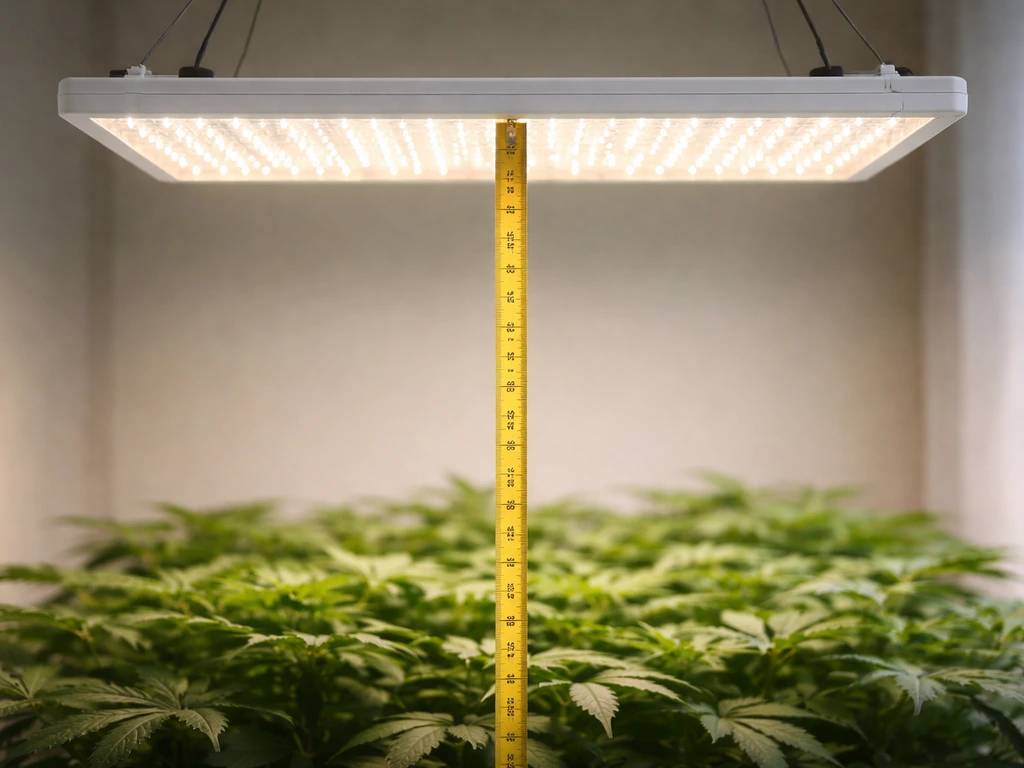
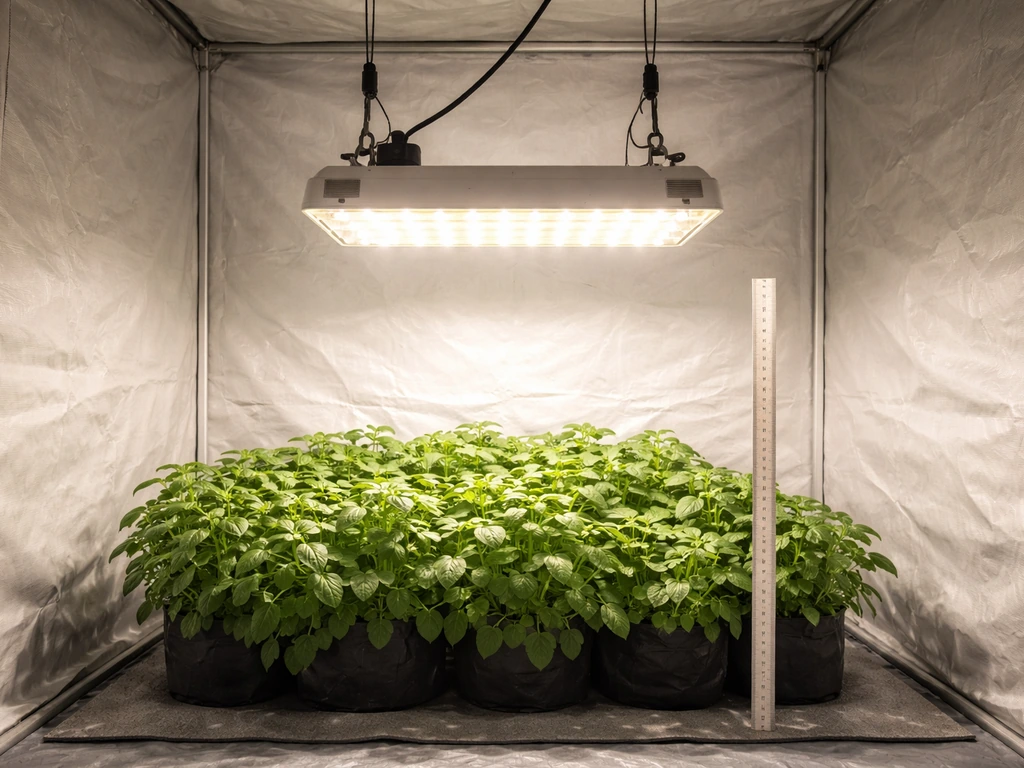
Height is the single biggest variable you control, and getting it wrong causes most of the problems people blame on the light itself. The GL-CR600 manual recommends a hanging height of roughly 35 to 40 cm (about 14 to 16 inches) above the plant canopy as a general starting point, with coverage of approximately 60x40 cm at that height during seedling and vegetative stages. That is not a huge footprint, so if you are trying to cover a 2x2 ft space, you are in the right zone. If you are covering more area, you will need the light higher, but understand that PPFD (light intensity reaching the plants) drops off quickly as you raise the fixture.
For panel lights like the GL-CR600, center the light over your canopy and keep it as level as possible. Fecida includes a PPFD intensity map in their manual for this model, and it shows that the sweet spot of coverage is directly under the center of the panel. If you tilt the light at an angle to try to cover a longer row, you will get uneven intensity, with one end of the canopy getting too much and the other too little. Keep it flat and centered.
For tent setups, hang the light from the top bar using the included ratchet straps or adjustable cables. These let you raise or lower the light in seconds as your plants grow, which you will want to do regularly. Freestanding grow rooms without a tent can use a light rail or a fixed hook, but make sure whatever you anchor to can handle the weight. For desk and clip-on models, the placement logic is simpler: position the head 6 to 12 inches above the plant and aim it directly at the canopy without shadowing any leaves.
Setting the Intensity: Using the Dimmer Correctly
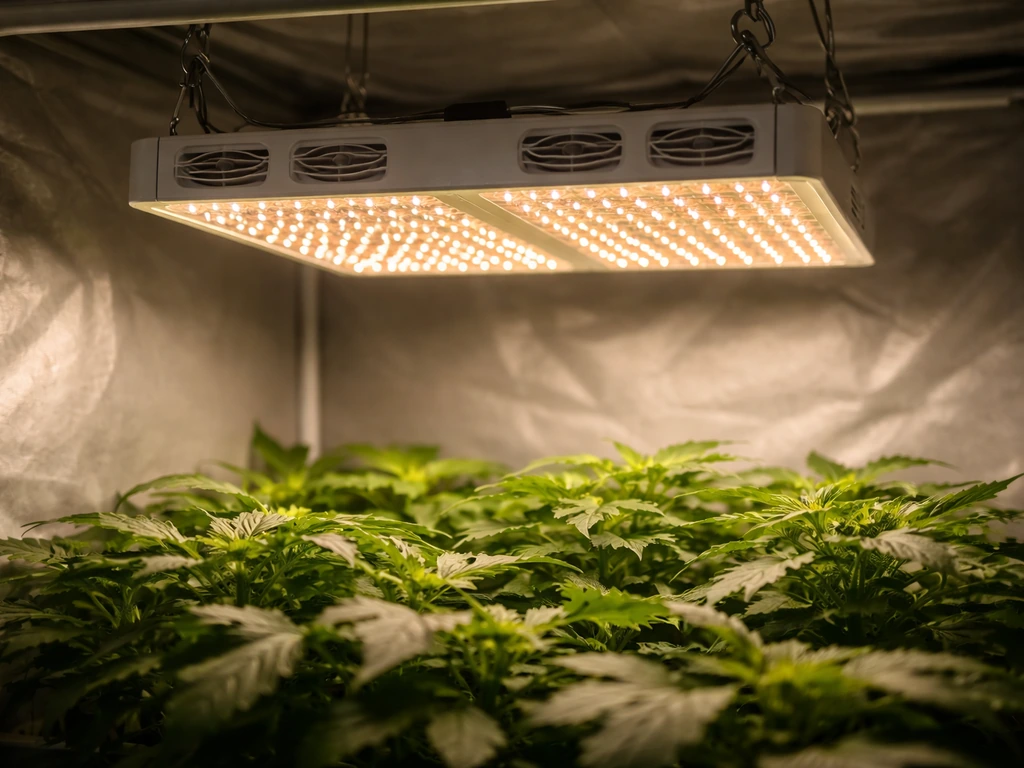
On the GL-CR600 and similar Cruiser Series panels, the dimming knob goes from 0% (off) to 100% (full power) continuously with no steps or clicks in between. That is what Fecida means by "stepless" dimming. You turn it clockwise to increase intensity, counterclockwise to decrease it, and all the way counterclockwise to turn it off. The knob is your only control on these models, so it is doing a lot of work.
One detail from the manual that most people miss: the UV LEDs in the GL-CR600 do not activate until you are above 40% brightness. Below that threshold, you are running without UV contribution, which is fine for seedlings but worth knowing if you are targeting vegetative or bloom stages. IR LEDs are always present but appear much dimmer than the red diodes to the human eye. Do not let that fool you into cranking the knob higher than needed.
The intensity settings from the GL-CR600 manual by growth stage are listed in the table below. These are the numbers to use as your starting point, not guesses.
| Growth Stage | Brightness Setting | Approx. Wattage Draw | Daily Hours | Hang Height |
|---|---|---|---|---|
| Seed Starting / Seedlings | 30–40% | ~39W | 12 hours/day | 35–40 cm (14–16 in) |
| Vegetative / Growing | 60% | ~78W | 14 hours/day | 35–40 cm (14–16 in) |
| Flower / Blooming | 90% | ~117W | 16 hours/day | 35–40 cm (14–16 in) |
If you are new to grow lights and have no idea where to start, begin at 30% for the first week regardless of plant stage. This lets your plants acclimate to artificial light without stress. Then step up intensity gradually over 7 to 10 days toward your target percentage. Jumping straight to 90% on seedlings is the fastest way to fry them.
Timers, Schedules, and When to Change Them
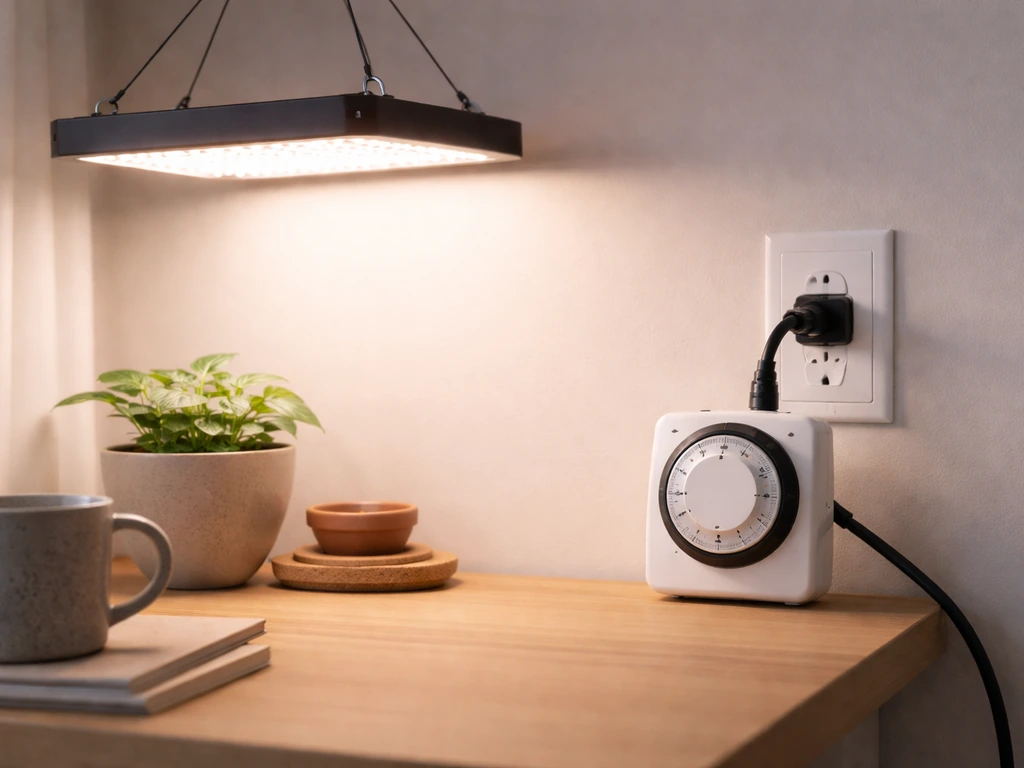
Panel lights: use an external timer
The GL-CR600 and other Cruiser Series panel lights do not have a built-in timer. You need to plug the light into a mechanical or digital outlet timer. A basic mechanical 24-hour timer from any hardware store works perfectly. Set it to turn the light on and off at the same times every day, seven days a week. Plants respond to consistency in their light cycle, and manual switching every day is one of those things that sounds easy until you forget it twice in a week.
Desk and tabletop models: built-in timer
If you have a Zinqolay desk or tabletop Fecida light, you likely have a built-in automatic timer with three settings: 4 hours, 8 hours, or 12 hours. The Zinqolay desk light instruction manual describes an auto ON/OFF timer with 4, 8, and 12 hour settings.
Press the timer button to cycle through these options. The light will remember the setting and repeat it automatically each day after that first cycle completes. This is convenient, but keep in mind these shorter cycles (4 hours especially) are really only appropriate for supplemental lighting situations where your plants are also getting natural light. For a plant that depends entirely on the grow light, 12 hours is your minimum, and most plants want more during flowering.
When to adjust your schedule
Change your schedule when you change stages, not before. Move from 12 to 14 hours when you transition from seedling to vegetative growth, and move from 14 to 16 hours when you shift to flowering. If you are growing leafy greens or herbs that you never intend to flower, keep them at 14 hours and 60% indefinitely. Avoid the temptation to run lights 18 to 20 hours because you think more light equals faster growth. Plants need a dark period. The dark cycle is when certain metabolic processes happen, and skipping it regularly leads to stressed, poorly rooted plants.
Step-by-Step Startup and Daily Operating Checklist
Run through this the first time you set up, and then glance at it each week as a quick maintenance check.
- Identify your model number from the label on the unit or packaging.
- Mount the light at 35 to 40 cm above where your plant canopy will be. Adjust ratchet straps so the light is level and centered.
- Inspect the power cord and plug for any damage before connecting.
- Plug the light into your external timer (or for desk/tabletop models, set the built-in timer to 12 hours).
- With the timer in the OFF position, turn the dimming knob to the OFF position (full counterclockwise) before connecting power.
- Connect power to the outlet. The unit should be cold and off at this point.
- Set your timer's ON window (for example, 7am to 7pm for a 12-hour cycle).
- When the timer triggers, turn the dimming knob clockwise to your target intensity (start at 30% for new setups).
- Check your plants after 24 hours. Leaves should be angled toward the light, not curling away or drooping.
- Raise or lower the light by 5 cm increments based on plant response over the first week.
- Once per week: wipe dust off the lens and vents with a dry cloth (light unplugged). Check that the mounting hardware is still tight.
- Adjust intensity and schedule when transitioning growth stages.
Troubleshooting: What to Do When Things Go Wrong
Plants are stretching or growing leggy
Leggy, stretched growth with long internodal spacing means the plants are not getting enough light. Either the light is too far away, the intensity is too low, or the daily hours are insufficient. Lower the light by 5 to 10 cm, increase intensity by 10 to 15%, or add an extra hour to your timer cycle. Do all three changes at once and you risk stressing the plant, so pick the most likely cause first. If your light is already at 14 inches and running at 60%, add time before anything else.
Leaves are yellowing, bleaching, or curling away from the light
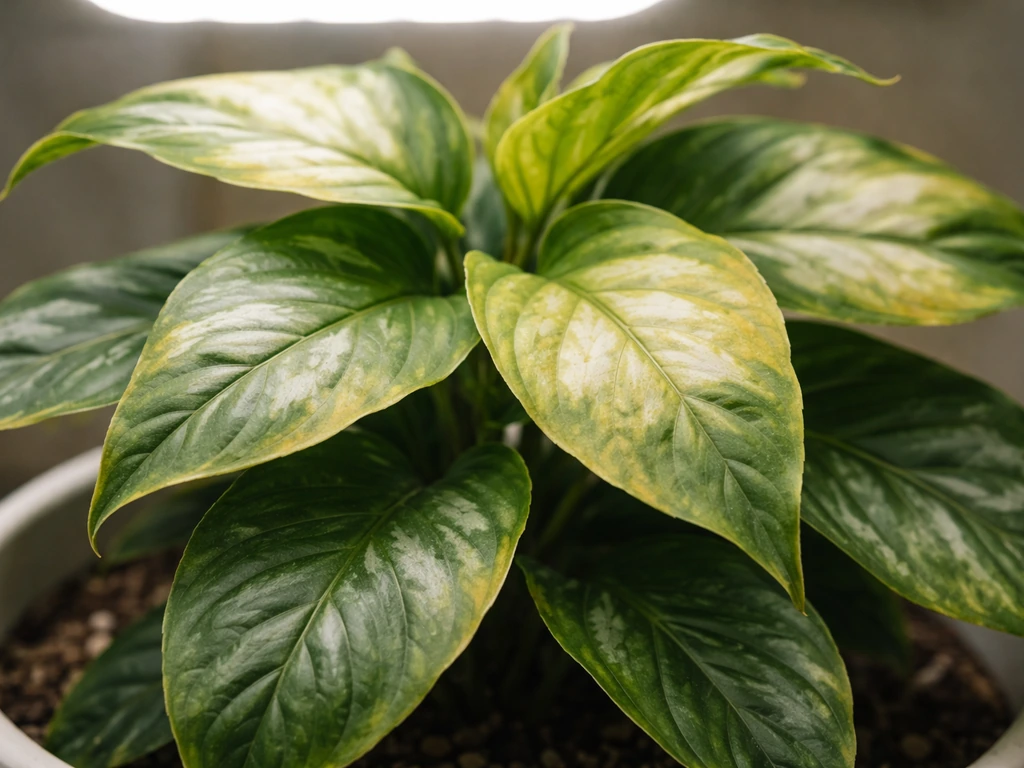
This is the opposite problem: too much intensity or the light is too close. Bleaching (white or pale patches on leaves closest to the light) almost always means the light is too close or the dimmer is cranked too high for the current stage. Raise the light by 5 to 10 cm or dial back intensity by 10 to 20%. If you are at 90% intensity on seedlings, that is your problem immediately. Back down to 30 to 40% and give the plant a few days to recover. Yellow leaves lower on the plant (away from the light source) can also be nitrogen deficiency, so rule out nutrition before blaming the light.
Slow or weak growth across the whole canopy
If everything is growing slowly and evenly (not just one side), your daily light hours are probably too short, or your overall intensity is too low for the coverage area you are trying to fill. Check that your timer is actually cycling correctly by watching it through a full cycle. Also check the PPFD map in your GL-CR600 manual: if your coverage area is larger than the recommended 60x40 cm footprint at 14 inches, the edges of your canopy are getting significantly less light than the center. Either add a second light for wider coverage or consolidate your plants into a tighter area.
The light feels hot or is running warmer than expected
The GL-CR600 has built-in fans and an aluminum housing with ventilation slots for passive heat dissipation. If the unit feels excessively hot to the touch or the fans sound labored, check that nothing is blocking the vents on the top and sides of the housing. Make sure the light has at least a few inches of clearance above it, especially in a tent. Running at 90% for 16 hours in a sealed space with no airflow will push temperatures up. Add an oscillating fan in the tent or room if ambient temperatures exceed 85 degrees Fahrenheit, because heat stress affects plants even if the light itself is functioning perfectly.
Light is flickering or not turning on
First check the obvious things: is the dimming knob past the OFF position? Is the timer actually in an ON window? Is the outlet live (test it with another device)? If those check out and the light still flickers intermittently, the most common cause is a loose connection at the plug or a failing outlet. Try a different outlet before assuming the light is defective. A steady flicker that happens at a fixed rhythm often indicates a power quality issue or a failing driver inside the unit, which will require a warranty claim.
Remote or timer controls not responding
On models with remote controls or built-in timer buttons, an unresponsive button usually means the device reset itself after a power interruption. Unplug the unit for 30 seconds, replug it, and reconfigure your timer settings. Some Fecida models that support multi-unit linking (where several lights sync to one timer) can lose sync after a power outage, and each unit needs to be re-paired individually according to the manual. If you bought a Fecida model with smart or wireless controls, the FCC compliance documentation for your model (findable on the FCC database using your model number) can help you confirm whether your remote operates on a frequency that is being interfered with by nearby devices.
Plant-Specific Setup: Seedlings, Leafy Greens, and Flowering Plants
Seedlings and propagation
Start at 30% intensity, 12 hours per day, and 35 to 40 cm above the tray. Seedlings are fragile and their root systems are not yet developed enough to handle high light stress. The goal at this stage is gentle, consistent light that encourages the seedling to grow upright and develop true leaves. If your seedlings are germinating under the light from day one, keep it at 30% until the first set of true leaves appears, then step up to 40% and watch for any signs of stress. Do not rush this stage.
Leafy greens and herbs
Lettuce, basil, spinach, kale, and similar plants live in the vegetative zone indefinitely. Set intensity to 60%, run 14 hours per day, and keep the light at 35 to 40 cm above the canopy. As your plants grow taller, raise the light to maintain that distance from the top of the canopy, not from the pot. These plants do not need the high-intensity bloom stage and actually do better without it. Consistent, moderate light produces steady, compact growth without bolting. If you notice basil or lettuce starting to flower (bolt), it is often a sign of too many light hours rather than too much intensity.
Flowering and fruiting plants
Tomatoes, peppers, cannabis, and other flowering plants need the full bloom protocol: 90% intensity for 16 hours per day once they enter the flowering phase. If you are transitioning from vegetative to bloom, step up intensity by 15% per week rather than jumping straight to 90%, and increase your timer from 14 to 16 hours at the same time you make the switch. These plants respond to the longer photoperiod as a flowering trigger. Make sure your coverage area matches the canopy size at this stage, because the GL-CR600's effective bloom coverage at full power may require you to lower the light slightly or add a reflective material around the perimeter of your grow space to prevent edge light loss.
A Few More Things Worth Knowing
If you are comparing Fecida's setup process to other brands you may have heard of, the approach is broadly similar across most LED panel grow lights. You can see how the same stage-based logic applies when you look at general grow light instructions that work across multiple brands and setups. The core principles of hanging height, intensity by stage, and consistent daily cycles apply regardless of what name is on the housing.
If you have used other consumer-grade LED grow lights before and are curious how Fecida compares in terms of setup, the Feit Electric grow light instructions cover a similar dimmer-based panel format and are worth a quick read for comparison. Both brands land in the same category of stepless-dimmer panel lights with similar setup logic.
For readers working with a more basic LED strip or bulb-style fixture rather than a full panel, the setup fundamentals for any LED plant grow light still follow the same intensity and schedule framework described here. The hardware differs but the plant biology does not.
If you recently picked up a Lordem light alongside your Fecida unit and are setting up a mixed grow space, the Lordem grow light instructions walk through that brand's specific controls, which differ from Fecida's dimmer knob approach. Running two different brands in the same tent is totally workable, but you need to dial each one in independently rather than assuming they behave identically.
Readers who bought a clip-on or gooseneck-style unit may find the Vogek grow light instructions useful as a parallel reference, since Vogek makes a similar clip-on format with comparable timer and intensity setups. The category is the same even if the brand name is different.
And if you are using your Fecida light specifically for seed starting and have a Ferry-Morse seed kit or tray system, the Ferry-Morse grow light instructions pair well with this guide since they address the specific height and intensity needs for germination trays in detail.
The bottom line on Fecida grow lights is that they are well-documented, consistently built, and genuinely capable for the price. The setup is not complicated once you know which model you have and what the recommended numbers are. Hang it at the right height, match intensity to your plant stage, put it on a timer, and check your plants every few days. Most problems trace back to one of those four things being off, and all four of them are adjustable without buying anything new.
FAQ
How do I confirm I have the right Fecida model before setting height and intensity?
Use the sticker on the back or bottom to match the exact model code, then verify whether it is a Cruiser panel, UFO round, Zinqolay desk/tabletop (with built-in timer), or a clip-on unit. The control type matters, for example, GL-CR600 uses the dimmer knob as the power switch, and panels do not have a built-in timer.
My light turns on when I plug it in, but my timer seems to do nothing. What should I check?
Test the timer by plugging in a different device (like a lamp) to confirm the outlet is actually switching. Then make sure the light’s dimmer knob is not left in the OFF detent, because timer power may be present while the knob still blocks output on models that treat the knob as the switch.
What’s the best way to choose hanging height if my plants vary in height or I’m using multiple trays?
Set height based on the tallest part you want to light evenly, then adjust intensity slightly downward to avoid bleaching the tallest canopy. For uneven canopies, consider staggering plants or using reflectors, because a single flat panel centered over one zone will produce stronger PPFD in the middle than at the edges.
If UV LEDs only activate above a brightness threshold, should I ever run below 40% for flowering?
For the GL-CR600 specifically, running below 40% means you are not getting the UV portion, and the grow may still function but you will not be using the full LED spectrum the manual targets for later stages. If you are aiming for the manual’s flowering conditions, raise brightness to the stage targets rather than staying in the lower acclimation range.
Can I use a longer photoperiod (18 to 20 hours) to speed up growth?
It usually backfires. Plants rely on a dark period for normal metabolism and stress response cycles. If you want faster growth, adjust intensity and height first, then add time in small increments, for example 1 hour, rather than jumping to continuous or near-continuous light.
What should I do if only the edges of my canopy look pale or weak?
First confirm your coverage area matches the stage footprint for your mounting height. If your setup is wider than the recommended coverage for the GL-CR600, the center gets more PPFD than the edges. The practical fixes are tightening the plant area, adding a second light, or adding reflective material around the perimeter to recover lost side light.
How can I tell whether the problem is intensity versus light distance?
Use the symptom pattern. Leggy stretching with big gaps between nodes points to too little light, which is often distance too high or dimmer too low. White or pale patches closest to the fixture indicate too much intensity at the leaf surface, which is usually distance too close or dimmer too high. Make one variable change at a time (height, intensity, or timer hours) to avoid overshooting.
Is it safe to run the light at 90% all day to maximize yield?
It can raise heat and increase leaf stress, especially in a tent with limited airflow. If you are already using the manual’s flowering schedule and still want more vigor, try increasing only one lever gradually (for example, 10% intensity or +1 hour) while watching for bleaching or curling, then reassess after a few days.
What counts as “too hot,” and how do I fix it?
If the housing feels excessively hot to the touch or the fans sound labored, check for blocked vents and ensure there is several inches of clearance above and around the unit, especially in tents. Also monitor room temperature, if ambient air regularly exceeds about 85°F, add airflow (like an oscillating fan) because plant stress can come from heat even when the LEDs are functioning normally.
My light flickers intermittently. Should I assume it’s defective right away?
Not yet. Try a known-good outlet first, because loose connections at the plug or a failing outlet can cause flicker. If flicker is steady at a repeatable rhythm after swapping outlets, then it is more likely a driver issue inside the light and may warrant warranty support.
I have a model with remotes or linking, and after a power outage the controls stopped matching. How do I recover?
Unplug the unit for about 30 seconds, replug it, and then re-enter or reconfigure the timer settings. If you used multi-unit linking, each light may need to be re-paired individually, since power loss can break sync.
What’s the safest starting point if I don’t know my plant stage or I just moved seedlings under the light?
Start low to prevent shock, for example set intensity around 30% and keep the height near the seedling target, then step up gradually over about a week. Watch leaves closely, if you see stress signs, pause increases and let the plants acclimate for several days before adjusting again.
For herbs and leafy greens that I’ll never flower, can I keep the same schedule indefinitely?
Yes, for many common greens you can run a stable vegetative schedule. A practical approach is around 60% intensity for about 14 hours per day while maintaining the recommended canopy distance, and adjust height as plants rise rather than changing intensity every few days.
Next Article
Grow Light Instructions: Setup, Placement, and Schedule
Step-by-step grow light instructions for setup, placement height, coverage, timing schedules, and quick fixes for common