Most Juhefa grow lights mount 6 to 12 inches above your plant canopy, run on a built-in timer set to 4, 8, or 12 hours depending on plant stage, and plug directly into a standard 120V outlet with no extra hardware needed. If you lost the manual, can't read it, or just want to get set up correctly today without guessing, this guide covers every step from unboxing to dialing in your daily schedule. If you need the exact start-up steps, settings, and troubleshooting details for your Sunraise Grow Light, follow the Sunraise grow light manual for your model. If you are specifically using the vivosun 4000 grow light, follow the same timing and height approach as you dial in your schedule This guide covers every step from unboxing to dialing in your daily schedule..
Juhefa Grow Lights Manual: Setup, Controls, Placement and Fixes


Figure out which Juhefa model you actually have
Juhefa sells several LED grow light models under slightly different names, and the controls, wattage, and timer options vary between them. Before you follow any setup steps, take 60 seconds to identify your exact model. This matters because a step that applies to the Juhefa 25 Full Spectrum Growth Light may not match the Juhefa Full Spectrum Plant Grow Light, even though both use similar language on the packaging.
Here is how to pin down your model quickly. Flip the light over or check the back of the unit for a label. It will show a model number, sometimes formatted like a product code (the Juhefa 25 series, for example, references an identifier like B07FKF6BT4 on its manual cover). Write that number down. Then check your Amazon or retailer order history and match the product listing name to what's on the label. If you bought it on Amazon, the ASIN in the URL is the fastest identifier.
- Check the back or underside of the light for a printed model number or product code
- Look at your order confirmation email or Amazon order history for the exact product name
- Match the ASIN from your purchase URL to the Juhefa model listed on the manual PDF (available on Manuals+ by searching the model name)
- Note the number of LED bulbs or panels, the wattage, and whether the unit has one switch or multiple
- Check whether your light has a built-in timer dial, a button-based timer, or no timer at all, since this varies by model
Once you know your model, everything else in this guide maps directly. For the two most common Juhefa types (the clip-style gooseneck panel lights and the bar/panel overhead lights), the setup process is nearly identical, so the steps below apply universally unless noted otherwise.
Unboxing checklist: what should be in the box
Open the box on a flat surface and lay everything out before you start. Juhefa lights are typically sold as fairly complete kits, but it is easy to miss a small part buried in the packaging foam. Here is what you should find.
- The grow light unit itself (panel, bar, or gooseneck clip depending on model)
- A power cord or AC adapter (most Juhefa models plug directly into a standard wall outlet at 120V/60Hz)
- Mounting hardware: this usually includes a hanging kit with adjustable rope hangers or ratchet clips, or a mounting bracket for fixed installation
- A user manual or quick-start card (often a folded sheet; full PDF versions are available online if yours is missing)
- For clip-style models: a flexible gooseneck arm and clamp already attached to the light head
If anything is missing, especially the power cord or mounting hardware, contact the seller before proceeding. Running the light without the correct power cable or hanging it with improvised hardware are two of the most common causes of early problems. Also check the power requirements on the label. Most Juhefa consumer-grade lights run on standard North American 120V outlets and draw between 10 and 45 watts depending on the model, so no special wiring or adapter is needed for typical home use.
How to install and position your Juhefa grow light
Mounting options
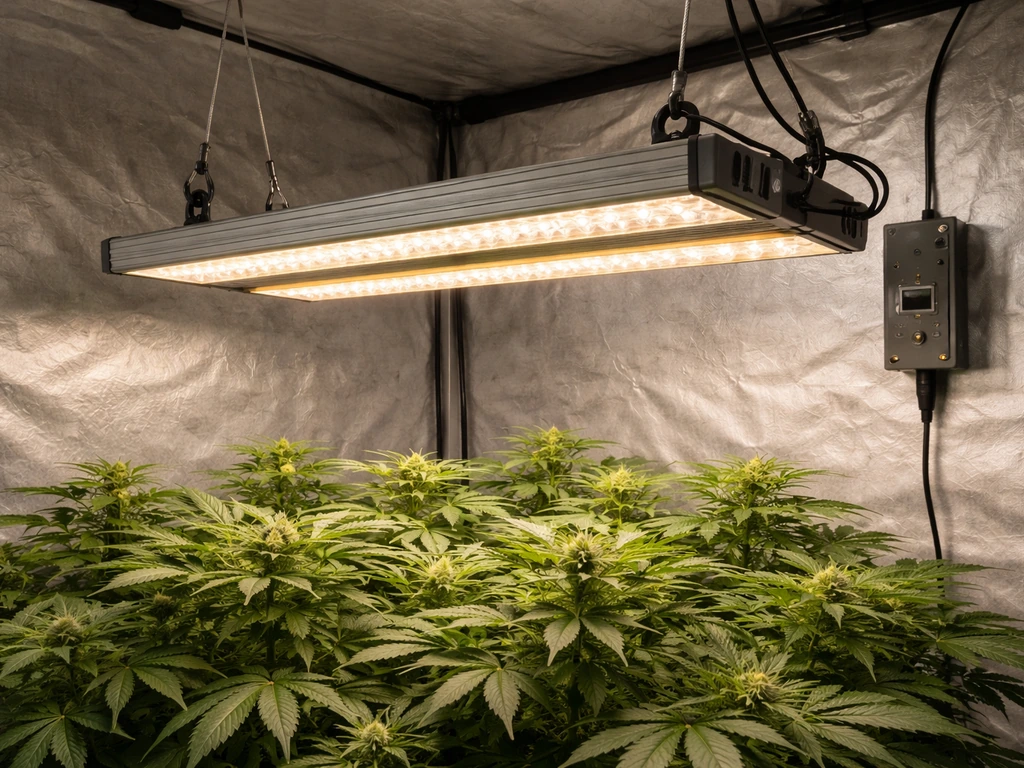
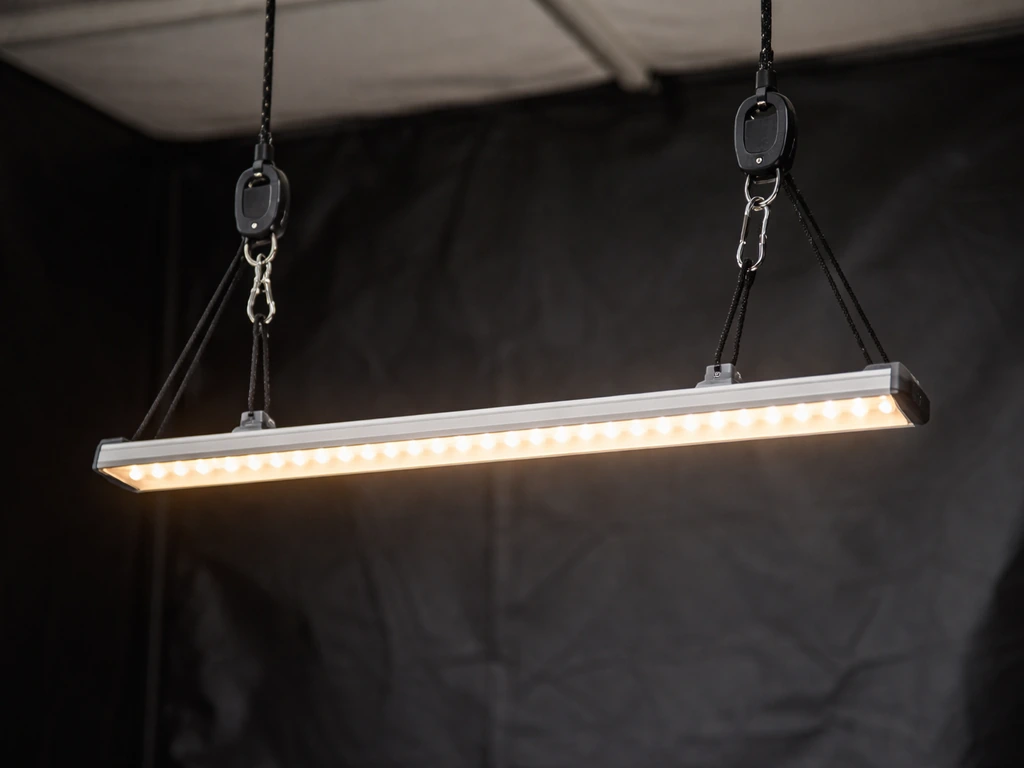
Panel and bar-style Juhefa lights typically hang from a ceiling hook, shelf lip, or grow tent bar using the included rope ratchets. Thread the rope through the hanging brackets on the light, clip the ratchet mechanism to your anchor point, and adjust the length so the light sits at the correct height. Clip-style models with gooseneck arms clamp to a pot rim, shelf edge, or table side, then bend the arm to aim the light head directly over the plant.
Height and distance from the canopy
The Juhefa manual is specific here: position the light 6 to 12 inches above the plant for best growth. If you are using a Vivosun 600W LED grow light, the same height principle applies, and the Vivosun 600W LED grow light manual will guide your exact settings Juhefa manual. In practice, where you land in that range depends on the growth stage. Start at 12 inches for seedlings and young plants, then lower to 6 to 8 inches once the plant is established and showing healthy vegetative growth. If you see leaf curl, bleaching, or the tips of leaves turning light yellow or white, raise the light 2 to 3 inches immediately. If leaves are stretching toward the light or looking pale and leggy, lower it by the same amount.
The Juhefa 25 manual specifically calls out adjusting height frequently as plants grow, which is good advice across all models. Check the distance every few days during rapid growth phases. A plant that was fine at 10 inches last week may be showing stress at 4 inches this week if it put on significant new growth.
Coverage area and angle
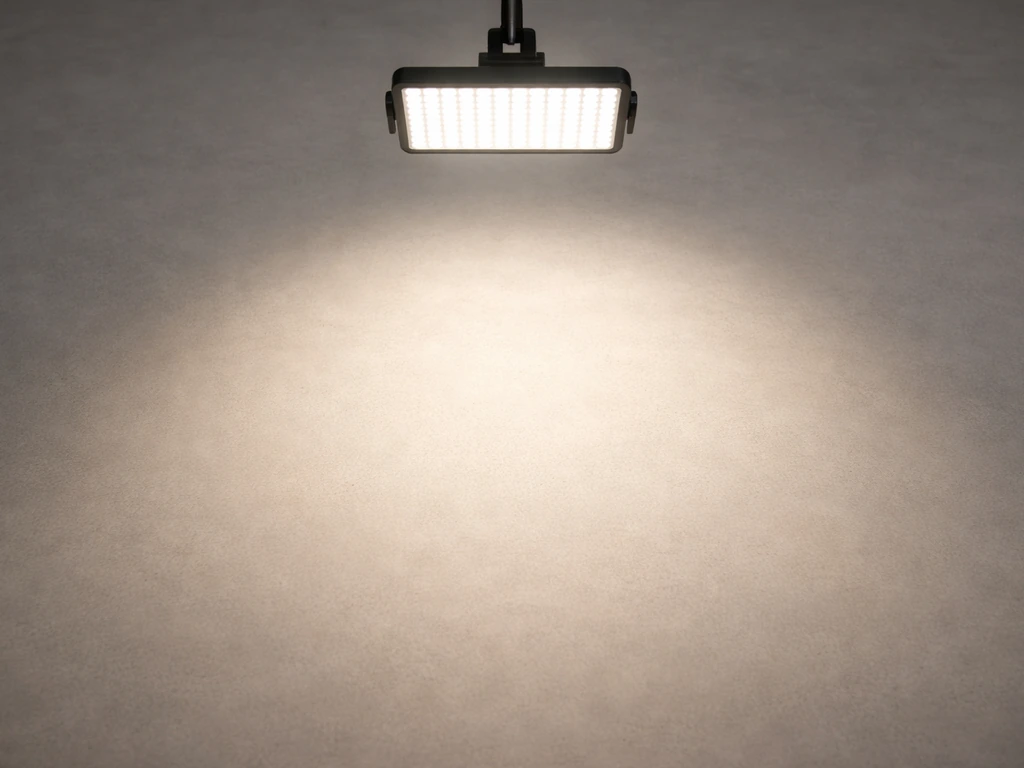
Most Juhefa LED panels are designed to cover a footprint of roughly 1 to 2 square feet at the recommended hanging height. For clip-style models, the light is directional, so angle the head so the beam centers over the plant's crown rather than shining from the side. For panel or bar lights, keep the unit level and centered over the grow area. If you are covering multiple plants, space them so all fall within the cone of light. Plants at the edges of the coverage zone will receive less intensity than those directly below, so rotate pots every few days to prevent uneven growth.
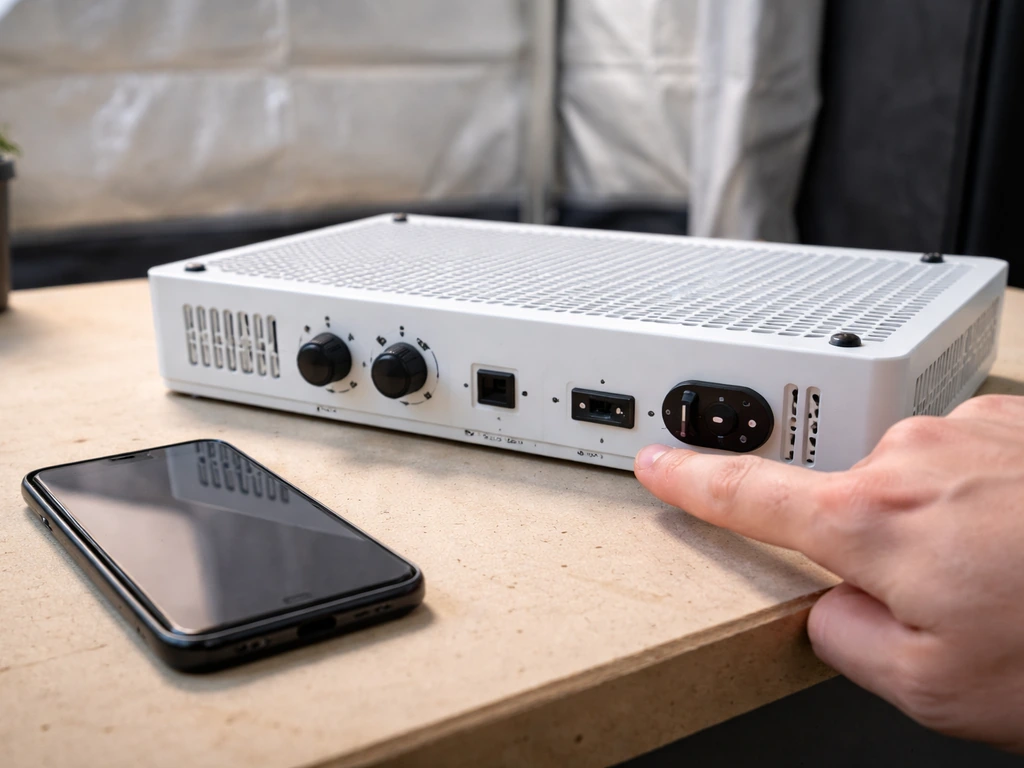
Controls explained: timer, dimming, and switches
This is where Juhefa models differ the most from each other, so match these descriptions to what you physically see on your unit.
Built-in timer
The Juhefa Full Spectrum Plant Grow Light series includes a built-in timer with selectable on-time options of 4, 8, or 12 hours. To use it, plug the light in, press or turn the timer control to your desired on-time, and the light will automatically cycle on and off on that schedule. The off-time is paired to the on-time, meaning the light completes the remainder of the 24-hour cycle in the off state. So if you select 8 hours on, the light stays on for 8 hours, then stays off for 16 hours, repeating daily without manual intervention.
One important note: the timer begins counting from the moment you plug the light in or press the timer button. If you plug it in at 10 PM and set it to 8 hours on, it will run until 6 AM. Plan your first plug-in time accordingly so the light cycle aligns with when you want daylight hours to start for your plants. Most growers prefer the light to come on in the morning, around 6 AM to 8 AM, to mimic natural sunrise.
Dimming controls
Some Juhefa models include a dimming dial or button that lets you reduce light intensity. If your unit has a dial, turning it clockwise increases brightness and counterclockwise dims it. If it has a button, pressing it typically cycles through preset brightness levels (often 25%, 50%, 75%, and 100%). For seedlings and clones, staying at 50% intensity and gradually stepping up to 100% over a week or two reduces the risk of light stress. If your model has no dimming function, manage intensity by raising the light height instead.
Power switch and spectrum modes
Basic Juhefa models have a single on/off switch or simply plug in and light up. More advanced models may have two switches: one for red-spectrum LEDs and one for blue-spectrum, or a combined full-spectrum mode. If you see two switches, run both simultaneously for most plant stages. The blue-dominant spectrum supports leafy vegetative growth, while red supports flowering and fruiting, but for general-purpose indoor growing, full spectrum (both switches on) is the right default. Only experiment with single-spectrum modes if you have a specific reason to do so.
Daily light schedules by plant type and growth stage
The timer settings on your Juhefa light directly map to real plant needs. Here is how to match them.
| Plant Stage / Type | Recommended Daily Hours | Timer Setting to Use | Height from Canopy |
|---|---|---|---|
| Seedlings and cuttings | 14 to 16 hours | Use 12-hour setting + external timer, or 12-hour built-in max | 10 to 12 inches |
| Vegetative growth (most houseplants) | 12 to 16 hours | 12-hour built-in timer | 6 to 10 inches |
| Flowering and fruiting plants | 8 to 12 hours | 8-hour or 12-hour timer setting | 6 to 8 inches |
| Succulents and cacti | 8 to 10 hours | 8-hour timer setting | 8 to 12 inches |
| Low-light houseplants (pothos, snake plant) | 6 to 8 hours | 4-hour or 8-hour timer setting | 10 to 14 inches |
If the built-in timer maxes out at 12 hours and you need 16 hours for seedlings, plug the Juhefa light into a separate outlet timer (available for a few dollars at any hardware store) and set the Juhefa's built-in timer to the always-on or longest available setting. A Juhefa 25 Full Spectrum Growth Lights manual on Manuals+ also advises using an external timer when you need longer light cycles than the built-in timer supports, such as 12h/12h scheduling plug the Juhefa light into a separate outlet timer. Let the external timer control the actual cycle duration. This gives you full flexibility without needing a different light.
Watch your plants for the first week after any schedule change. Healthy response looks like upright, green, compact new growth pointing toward the light. Problem signs include upward-curling leaves (too much light or heat), drooping or yellowing (too little light or too many hours), and stretching or leaning (not enough intensity or light coming from the wrong angle).
Troubleshooting when things go wrong
Light won't turn on
Start with the basics. Check that the power cord is fully seated at both ends, the outlet is live (test it with a phone charger), and the power switch is in the on position. If your model has a timer, check that it is not stuck in an off-cycle period: unplug it, wait 10 seconds, and plug it back in to reset the timer. In a r/cannabiscultivation thread about cheap LED grow lights with built-in timers, commenters discuss real-world quirks and differences versus lights that require manual restarts timer stuck in an off-cycle period. Some units will not light up if plugged in mid-cycle. If the light still does not come on, try a different outlet on a different circuit.
Flickering or intermittent light
Flickering almost always points to a loose connection, a failing driver, or an overloaded circuit. First, check that the power cord plug is fully inserted and not loose in the outlet. If the cord has an inline connector or adapter, make sure those are firmly joined. The Juhefa manual specifically notes that flickering can result from timer setting conflicts or improper power linkage, so try resetting the timer by unplugging completely for 30 seconds. If it flickers only when other high-draw appliances are running on the same circuit, move it to a dedicated outlet.
Uneven light coverage
If some plants or parts of your canopy are receiving noticeably more light than others, the fix is usually repositioning. Raise the light 2 to 4 inches to widen the coverage cone, or add a second light for larger grow areas. For clip-style models, re-angle the gooseneck so the light head is directly overhead rather than aimed at an angle. Rotating your pots every 2 to 3 days also evens out any remaining coverage gaps over time.
Dimming not responding
If the dimmer dial or button is not changing the brightness, first make sure the light is fully powered on and not in a timer off-cycle. Some Juhefa models only allow dimming adjustment when the light is actively on. Try pressing the dim button while the light is clearly illuminated. If it still does not respond, a factory reset (unplug, hold the dim button if applicable, plug back in) sometimes clears a stuck setting. If the dimmer is physically damaged or the unit shipped with a non-functional dimmer, contact the seller for a replacement.
Overheating
Juhefa LEDs run warm but should not be too hot to briefly touch on the housing after an hour of use. If the unit feels extremely hot, check that it has at least 6 inches of clearance above it for heat to dissipate, is not enclosed in a box or cabinet without ventilation, and is not stacked with other heat-producing devices. LED grow lights have long lifespans (Juhefa's own documentation references up to 50,000 hours), but heat buildup shortens that considerably. A small USB fan aimed at the housing can help significantly in warm or enclosed spaces.
Dialing it in: avoiding light burn, heat stress, and wasted energy
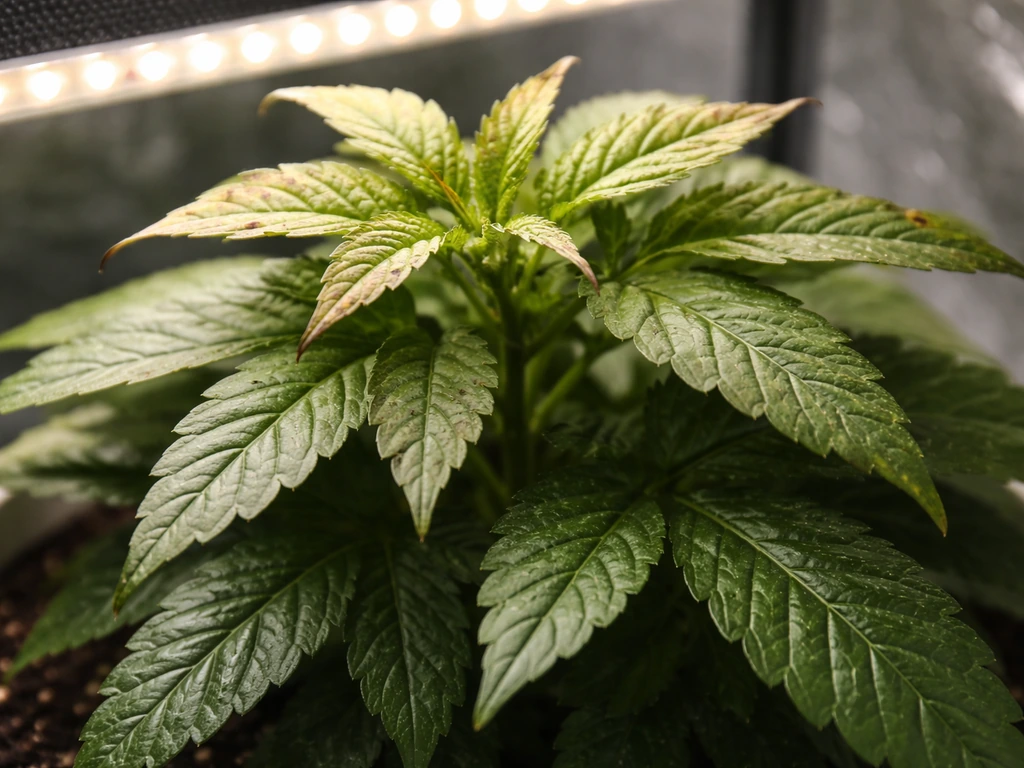
Light burn shows up as pale yellow or white patches on the tops of leaves closest to the light, even when the plant is otherwise healthy and well-watered. This is different from nutrient deficiency (which starts at leaf edges and older leaves) and is a direct sign the light is too close or too intense for the plant's current stage. The fix is always to raise the light or reduce intensity, not to water more or add nutrients.
Heat stress looks similar but comes with wilting, upward leaf curl, and sometimes a dry or crispy feel to affected leaves. Check the temperature at canopy level with a simple thermometer. Aim for 65 to 80 degrees Fahrenheit at the plant surface during light-on hours. If you are above 85 degrees consistently, something is wrong with heat management in your grow space, not just the light placement.
To maximize efficiency, always match the light schedule to your plant's actual needs rather than running the light longer out of habit. More hours does not always mean more growth, and overexposure can stress plants just as much as underexposure. The 50,000-hour lifespan Juhefa advertises assumes reasonable duty cycles, so running the light on a consistent timer rather than leaving it on 24 hours also protects your investment.
A practical dialing-in routine: after the first week of a new setup, look at your plants from the side. New growth should be the same color or slightly lighter green than older leaves, nodes should be compact (not stretched), and leaves should be flat and facing the light. If all three of those things are true, your height, intensity, and schedule are in a good place. If not, adjust one variable at a time and wait 3 to 5 days before judging the result. Changing height and schedule simultaneously makes it impossible to know what actually fixed the problem.
If you are comparing Juhefa to other budget LED brands, the setup logic here is nearly identical to what you'd follow with lights from brands like Sunraise, Likesuns, or Vivosun's entry-level lineup. The height ranges, schedule frameworks, and troubleshooting steps transfer directly, even if the specific controls look different on each unit. Juhefa's built-in timer is a genuine convenience that some comparable budget lights lack, so take advantage of it rather than relying on manual plug-in/plug-out routines.
FAQ
My Juhefa light won’t start when I set the timer, what should I check first?
Confirm the light is fully seated (plug firmly into the outlet, then check any inline connector) and that you selected an on-time that is not currently in its off portion. A practical reset is to unplug, wait 30 seconds, then plug back in and immediately reselect the on-time so the cycle starts cleanly.
Is it better to use the built-in timer or an external plug-in timer with Juhefa?
Use the external timer only when you need on-times beyond the Juhefa’s built-in limit (for example, needing 16 hours). For normal cycles within 4, 8, or 12 hours, the built-in timer is simplest and reduces the chance of timer overlap confusion.
Can I leave the light on 24 hours with a Juhefa timer?
Some models only allow up to a maximum on-time, and others do not support an always-on mode. If your model does not have an always-on or longest-available setting, avoid forcing it by repeated plug-in timing, instead use an external timer designed for 24-hour behavior if needed.
How do I know whether I should raise or lower the light based on leaf symptoms?
If you see pale yellow or white patches on the tops of leaves, raise the light or dim it, since that points to over-intensity. If you see stretching, leaning, or very pale, weak new growth, lower the light by a small amount and recheck after a few days.
What height should I start with if my plants are mixed stages (seedlings and established plants)?
Start at the higher-risk-safe end (around 8 to 12 inches) and then adjust in small increments, because seedlings are more sensitive. If the canopy is truly mixed, consider separating into zones or using multiple lights so you do not have to choose one height that fits everyone.
My plants look uneven, but the light is centered. What are the most common causes?
The two biggest causes are angle (clip-style heads not pointed directly over the crown) and coverage shape (posts or obstacles blocking part of the cone). Rotate pots every 2 to 3 days, and if unevenness persists, re-angle the head or move to a second light rather than continually changing height.
Does running a dimmer at 50% reduce heat and light stress the same way as raising the light?
Yes, dimming reduces intensity, which often prevents bleaching and leaf-tip whitening. However, raising the light also changes spread and uniformity, so if your issue is uneven coverage, height adjustments may help more than dimming alone.
What should I do if the dimmer changes nothing, but the light otherwise works?
Try dimming while the unit is definitely in the on state, since some models only allow dim control during active illumination. If it still won’t respond, unplug and look for model-specific reset behavior (some require holding the dim button during unplug or after replug), otherwise contact the seller for a replacement.
My light flickers, is it always a bad LED?
Not usually. Flicker is most often a loose plug-in at the outlet, a poorly seated connection at an inline adapter, or a circuit overload from high-draw appliances. Test by plugging into a different outlet on a different circuit before assuming the driver is failing.
How can I confirm the outlet is actually providing power?
Use a simple plug-in tester or a phone charger as a quick check. If the charger works but the light does not, the issue is likely with the timer cycle, wiring, or the light’s input connection rather than a dead wall outlet.
Will extra ventilation help, or is the 6-inch clearance enough?
Clearance helps, but fully enclosed tents, cabinets, or boxes can trap heat even with clearance above the housing. If the light housing feels unusually hot after an hour, add airflow (for example, a small fan aimed at the housing) and ensure the light is not pressed against insulated materials.
Do I need to rotate or move the light during the growth week, or only change height?
Rotation of plants is usually the more effective routine for uniformity, since many LED panels have a slightly stronger center beam. Adjust height based on symptoms, but rotate pots every few days to correct edge underexposure without disrupting the schedule.
If I change the timer schedule, how quickly should I expect to see improvement?
Watch for changes within the first week after a schedule adjustment. For plants that were stressed, give 3 to 5 days before judging, and change only one variable at a time (height, intensity, or schedule) so you can attribute the improvement accurately.
Vivosun 600W LED Grow Light Manual: Setup, Use, Troubleshoot
Step-by-step Vivosun 600W LED grow light manual for setup, mounting, dimming use, and quick troubleshooting fixes.