If you searched for a Sunraise grow light manual hoping to download an official PDF, here is the honest truth: Sunraise does not appear to host a dedicated, brand-official manual on their own website. Most of the PDFs floating around search results belong to similarly-named brands like Sunco or Sansi. That is frustrating, but it does not leave you stuck. Sunraise lights follow the same LED grow light design conventions as most budget-to-mid-range panels, and this guide walks you through every step a real manual would cover, from pulling the light out of the box to dialing in your daily schedule and fixing things when they go sideways.
Sunraise Grow Light Manual: Setup, Controls, Timing, Fixes

Marcus Tillman
15 Apr 2026
What a Sunraise manual should actually cover
A good grow light manual does six things: it tells you what you bought, how to hang it safely, how far to keep it from your plants, how bright to run it, how long to run it each day, and what to do when something goes wrong. That is the structure this guide follows. If you have already read generic instructions and felt like they skipped the parts that actually matter, that is because most manuals do. This one does not.
The core setup sequence looks like this: identify your exact model and its wattage, mount the light at the right height, connect power safely, set intensity based on plant stage, program a timer, and then watch your plants for the first week to confirm they are responding well. Each of those steps gets its own section below.
Unboxing and figuring out exactly which Sunraise model you have
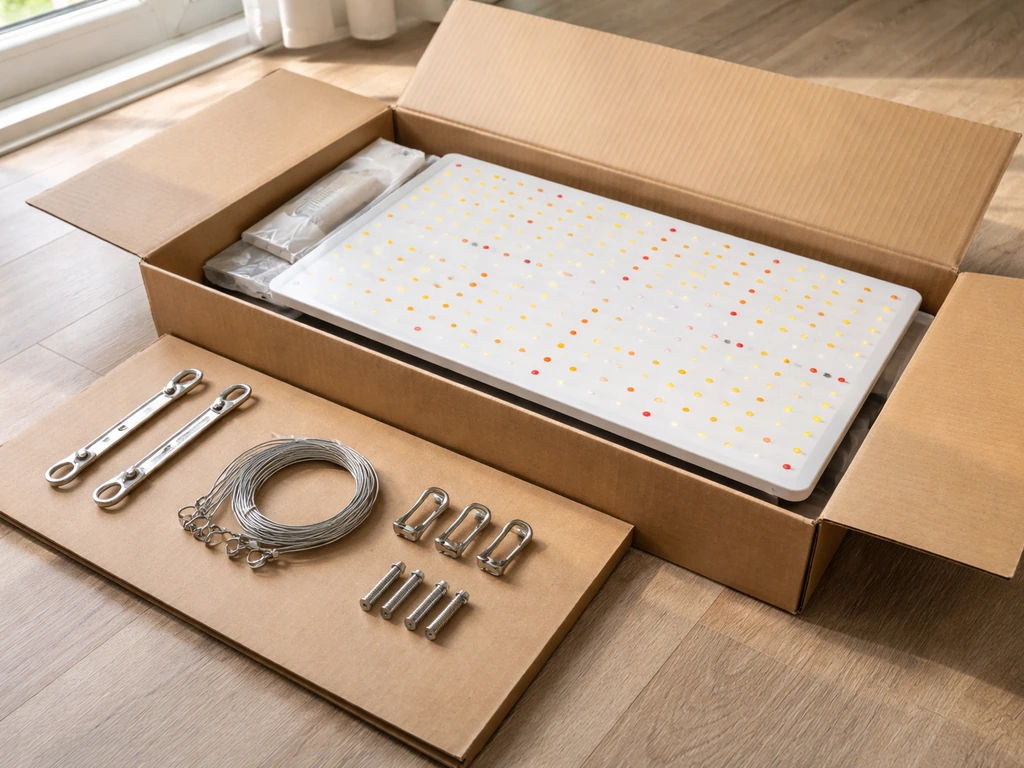
Before you do anything else, confirm which Sunraise model is in the box. Sunraise sells several panel sizes, and the coverage area, wattage draw, and hanging height recommendations differ between them. The model number is printed on a sticker on the back of the unit or on the side of the box. Common Sunraise models include 45W, 100W, 200W, and 300W panels, though naming conventions vary by retailer. Write down the actual wattage draw from the spec sticker, not the "equivalent" wattage sometimes listed in marketing copy.
When you open the box, you should find the light panel itself, a hanging kit (usually stainless steel or nylon rope ratchets), a power cord, and sometimes a small instruction card. If anything is missing or the panel has visible damage, do not power it on. Contact the seller immediately and document the damage with photos. Most Sunraise lights ship via Amazon or third-party retailers, and return windows are time-sensitive.
Check the spec sticker for these numbers before moving on: actual power draw in watts, input voltage (typically 100-240V for universal compatibility), and the recommended coverage area. A 45W Sunraise covers roughly 2x2 ft for flowering or 3x3 ft for seedlings. A 200W covers about 3x3 ft for flowering or 4x4 ft for veg. Knowing this upfront saves you from discovering poor coverage after you have already built out your grow space.
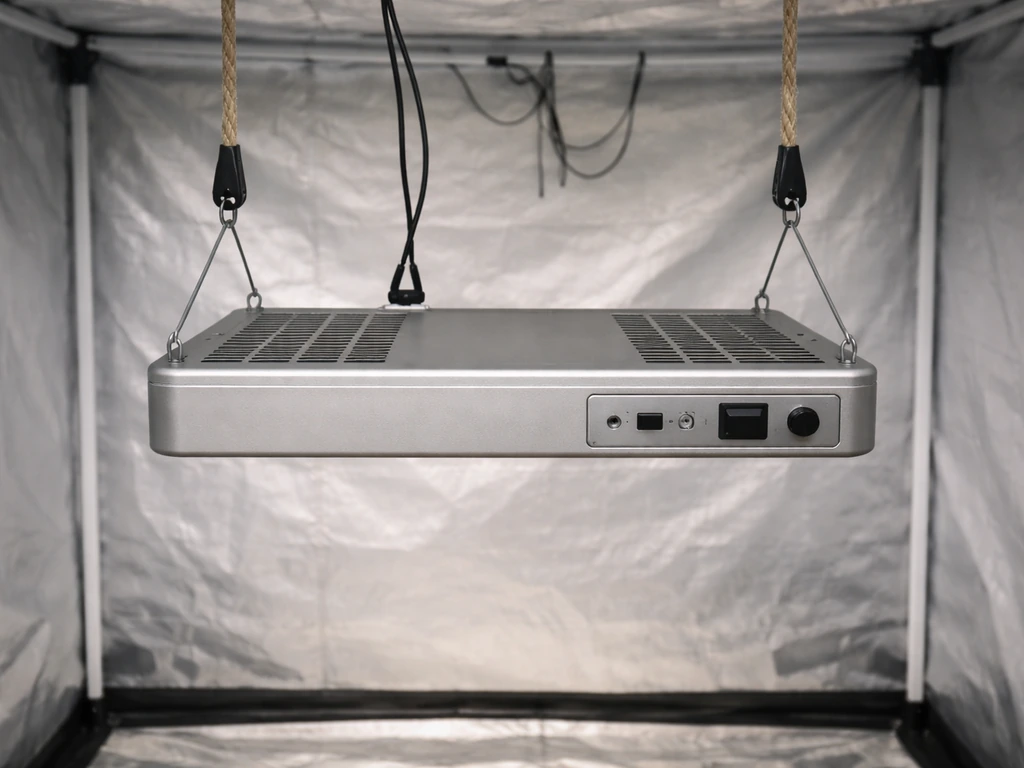
Hanging it right: mounting, distance, and electrical setup
Mounting options
Most Sunraise panels come with adjustable rope ratchets that clip onto hooks screwed into a ceiling joist, tent crossbar, or grow rack. If you are setting up in a grow tent, thread the hooks through the top vent holes and hang the ratchets from those. For open shelves or closets, use 1/4-inch screw hooks rated for at least 10 lbs, and make sure you are screwing into wood or a stud, not just drywall. Drywall alone will not hold the weight over time, especially with any vibration from fans.
Keep the ratchets adjusted so the light hangs level. A tilted panel creates uneven coverage, with one side of your canopy getting significantly more intensity than the other. Use a ruler or tape measure to check that both corners hang at the same height from the floor.
Safe electrical basics
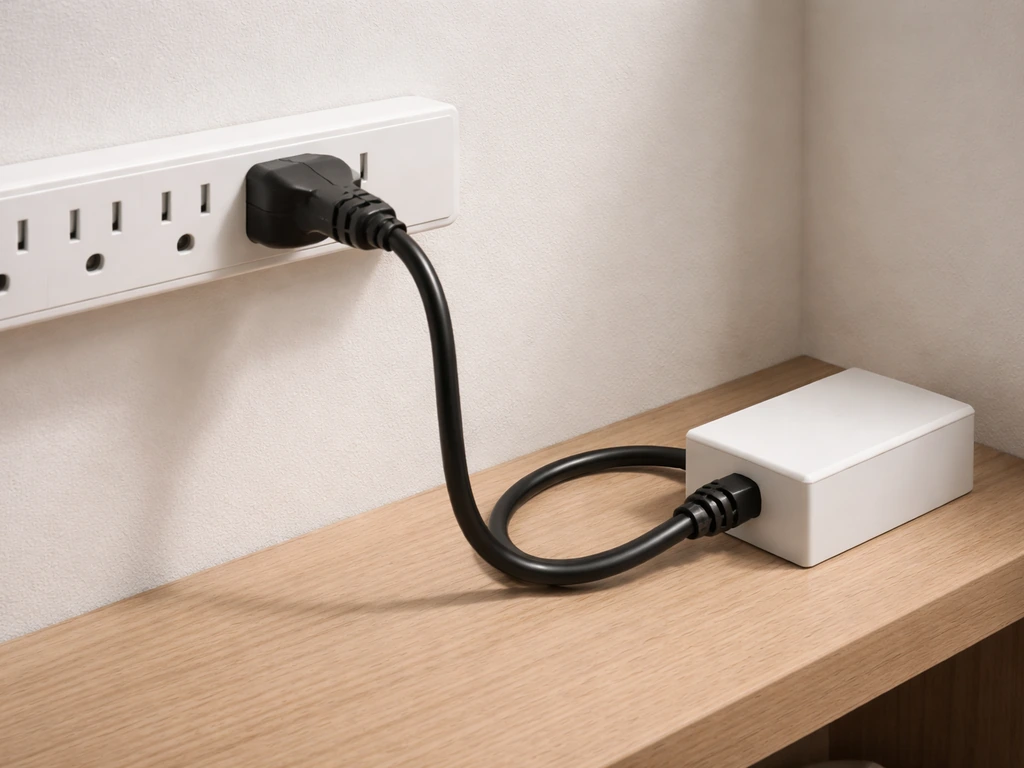
Sunraise panels plug into a standard 3-prong outlet. Do not use adapters that remove the grounding prong. Run the light on a dedicated outlet or a power strip with surge protection, and keep the cord routed away from standing water. In a grow tent, water drips happen, so zip-tie the cord to run upward toward the tent ceiling rather than hanging loose near the floor. Never plug or unplug the light with wet hands. If you are running multiple lights, check your circuit's amperage: a 15-amp household circuit can safely handle about 1,440 watts of continuous load, so do not exceed 80 percent of that (roughly 1,150W) to stay within safe electrical limits.
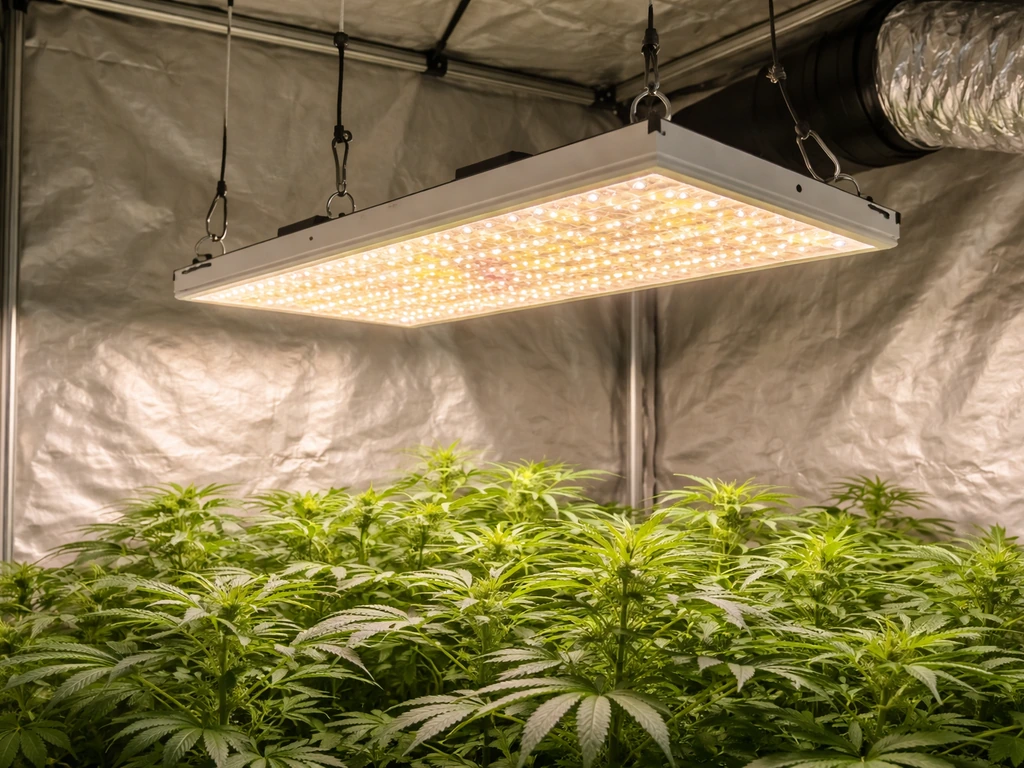
Starting distance from your canopy
Distance from canopy is one of the most critical settings you control, and most beginners hang their lights too close. Wikipedia explains that with LED grow lights, inverse-square behavior means the intensity a plant receives decreases as distance increases, so twice the distance yields about one-quarter the light intensity blank" rel="noopener noreferrer">inverse-square behavior with LED grow lights. Here are practical starting points based on wattage. These are starting positions, not fixed rules. Adjust based on how your plants respond in the first few days.
| Sunraise Wattage | Seedlings | Vegetative Stage | Flowering Stage |
|---|---|---|---|
| 45W | 24–30 inches | 18–24 inches | 16–20 inches |
| 100W | 24–30 inches | 18–24 inches | 14–18 inches |
| 200W | 30–36 inches | 20–26 inches | 16–20 inches |
| 300W | 36–42 inches | 22–28 inches | 18–22 inches |
Signs you are too close: leaf edges curl upward or turn white/yellow in the center, the top of the plant looks bleached, or you feel noticeable heat on the back of your hand when held at canopy height for 30 seconds. Signs you are too far: plants stretch aggressively toward the light (etiolation), stems become long and weak, and lower leaves receive almost no light. If either of those is happening, adjust height by 2–4 inches at a time and wait 48 hours before evaluating again.
Setting intensity for your plants: seedlings, veg, flowering, and houseplants
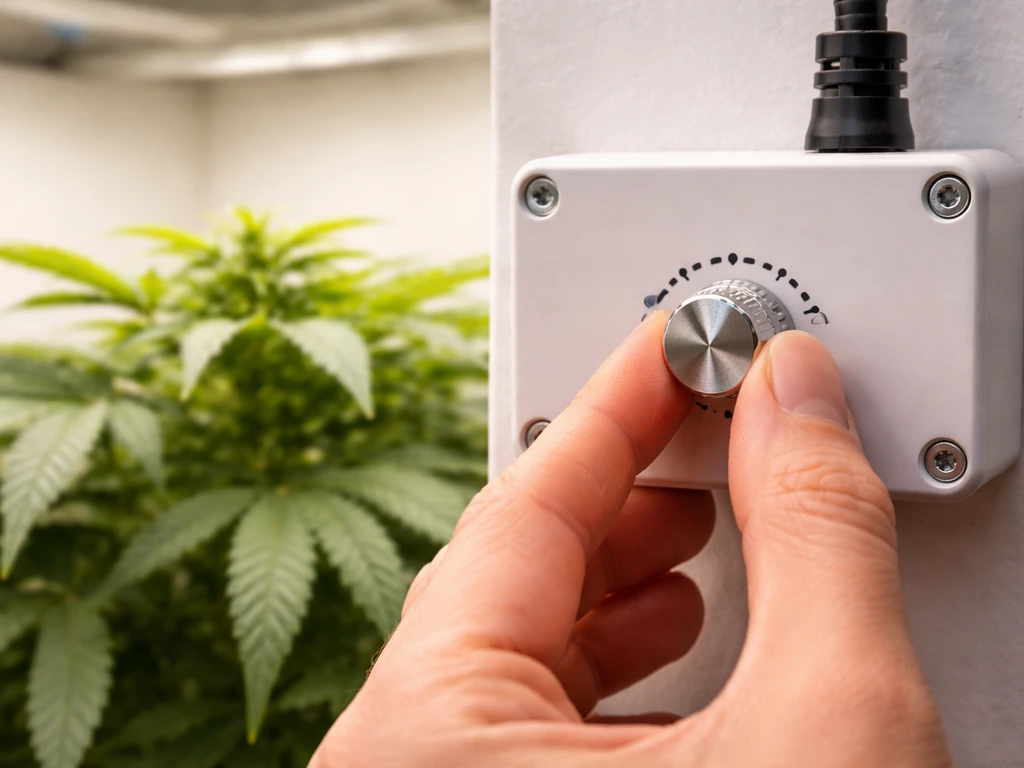
Some Sunraise models include a dimmer knob or switch on the driver box that lets you reduce output to 25%, 50%, 75%, or 100%. Others are full-power only. Check your unit for a knob or sliding switch on the driver (the small black box attached to the cord). If there is no dimmer, your only tool for controlling intensity is hang height.
For seedlings and clones, start at 25–50% intensity (or hang at the high end of the distance range above) for the first 1–2 weeks. Young plants have not developed the root system or leaf structure to handle full intensity, and frying seedlings in week one is one of the most common beginner mistakes. For vegetative growth, ramp up to 50–75% intensity and move the light 2–4 inches closer once plants have 4–6 true leaves. For flowering plants, run at 75–100% and tighten the distance to the lower end of the recommended range.
Houseplants are different from crops. Most tropical houseplants are adapted to dappled shade and do not need high intensity. Running a Sunraise panel at 25–50% intensity, 24–30 inches above the canopy, is plenty for pothos, philodendrons, ferns, and similar plants. Succulents and cacti want more light but still should not sit directly under a full-power panel at close range. A good rule: if the plant naturally grows in bright indirect light, treat it like a seedling in terms of intensity settings.
Just like choosing the right intensity settings for a Sunraise, other brands require the same kind of stage-by-stage thinking. If you are also working with a different panel in the same space, the Juhefa grow lights manual covers a very similar intensity adjustment process that translates well across budget LED panels.
Timing, scheduling, and getting the first week right
Daily hours by plant type
LED grow lights are efficient, but running them 24 hours a day does not produce better plants. Most plants need a dark period for metabolic recovery. Here are the daily light schedules that work consistently well.
| Plant Stage / Type | Light Hours Per Day | Dark Hours Per Day | Notes |
|---|---|---|---|
| Seedlings | 16–18 hours | 6–8 hours | Lower intensity; consistent schedule critical |
| Vegetative (photoperiod plants) | 18 hours | 6 hours | Promotes leaf and stem growth |
| Flowering (photoperiod plants) | 12 hours | 12 hours | 12/12 triggers flower production |
| Auto-flowering plants | 18–20 hours | 4–6 hours | No photoperiod sensitivity |
| Houseplants | 12–14 hours | 10–12 hours | Mimics natural day length; avoid 24-hr light |
Using a timer (and why it matters)
Set your timer on day one. Inconsistent light schedules stress plants and, for photoperiod varieties, can trigger premature flowering or re-vegetate a flowering plant. A basic mechanical outlet timer costs under $10 and is all you need. Program the ON time to start in the morning (or whenever your "lights on" period begins) and confirm the OFF time is correct before walking away. Double-check the timer's AM/PM settings if it uses a 12-hour format. It is an easy mistake to run your light from midnight to noon instead of 6am to midnight, and plants will not thank you for it.
The acclimation period: do not blast new plants on day one
Whether you are introducing new plants to the light or starting a fresh grow, run at reduced intensity and longer distance for the first 5–7 days. If your light has a dimmer, start at 25–50%. If it does not, hang it at the top of the recommended distance range. After one week with no stress signs, drop the height by 2 inches or bump intensity by 25%. Repeat the evaluation process. Acclimation takes about 2 weeks total for seedlings and about 1 week for established plants coming from lower-light conditions.
Troubleshooting: when things go wrong
Light will not power on
Start simple. Check that the outlet has power by plugging in something else. Confirm the power cord is fully seated at both the wall and the driver box connection. Some Sunraise models have a rocker switch on the driver; make sure it is in the ON position. If all of that checks out and the light still does not turn on, plug it into a different outlet on a different circuit to rule out a tripped breaker or overloaded strip. If it still does not power on, the driver has likely failed. Contact the seller for a replacement.
Flickering or unstable output
Flickering almost always points to a loose connection or a failing driver. Some triac dimmer setups are incompatible with LED grow lights or their drivers, and that mismatch can lead to flicker or unstable brightness incompatible dimmers or drivers can cause flicker or unstable brightness.
Unplug the light, wait 30 seconds, and reconnect everything firmly. If the flicker continues, inspect the cord for any visible damage, kinks, or pinch points. A cord that has been pinched under furniture or run through a sharp-edged hole can develop internal breaks that cause intermittent contact. If the cord looks fine and it still flickers, the driver is on its way out.
Budget grow light drivers are often the first component to fail, and replacing just the driver (if the LED board is fine) is usually cheaper than buying a new unit.
Uneven coverage or dead spots
If part of the panel is noticeably dimmer or dark, you likely have a failed LED chip or strip. Raise the light height to see if the coverage evens out at a distance (sometimes perceived dead spots are just intensity falloff at the edges, which is normal). If one distinct section of the panel is completely dark regardless of height, individual LED chips or a section of the LED strip has burned out. This is repairable on some models by replacing the LED strip, but it requires soldering and working with low-voltage DC circuits. If you are not comfortable with that, contact the seller for a warranty replacement.
Overheating and hot spots
Sunraise panels use passive aluminum heat sinks for cooling. They will be warm to the touch during operation, but they should not be uncomfortably hot. If the back of the panel is extremely hot (unable to hold your hand on it for more than 2 seconds), check that there is at least 6 inches of clearance above the light for heat to dissipate.
In enclosed spaces like tents, make sure your exhaust fan is actually pulling hot air out at the top. Running a light in a sealed box with no airflow will cause it to overheat regardless of its own heat management. If you are running the light at full power in a small space, consider dialing back to 75% to reduce heat output.
Dimmer is not responding
If your Sunraise has a dimmer knob and it is not changing the output, first confirm the knob is actually turning (some stick). If the light jumps between full and off with no middle range, the potentiometer inside the dimmer has likely worn out or developed a dead spot. Try turning the knob slowly across the full range. If a specific position restores function, mark that spot and avoid moving it. For a permanent fix, the potentiometer can be replaced by someone comfortable with basic electronics, or you can request a driver replacement from the seller under warranty.
When to stop troubleshooting and contact support
Stop and contact the seller or Sunraise directly if: you smell burning at any point, you see scorch marks on the housing, the cord is physically damaged, or any fix you attempt does not resolve a power or flicker issue within 10 minutes. Do not continue operating a light that smells burned or shows physical damage. The troubleshooting logic used for Sunraise overlaps significantly with other budget panels. If you are comparing notes with someone running a different brand, the Likesuns LED grow light instructions cover a nearly identical troubleshooting sequence and are worth cross-referencing.
Keeping your light running: maintenance, cleaning, and parts
Cleaning the light
Dust and debris on the LED surface and heat sink reduce both light output and cooling efficiency. Every 4–6 weeks (or more often in dusty or high-humidity environments), unplug the light, let it cool for 15 minutes, and wipe the LED surface with a dry or slightly damp microfiber cloth. Do not use spray cleaners directly on the LEDs. For the heat sink fins on the back, use a soft brush or compressed air to clear out any packed dust. Even a thin layer of dust on heat sink fins can raise operating temperatures by several degrees, shortening the driver's lifespan.
Checking mounts and hardware
Every 2–3 months, inspect the rope ratchets and hanging hooks for wear. The plastic clips on budget rope ratchets can become brittle after repeated heat and humidity cycles. Squeeze the clip mechanism to confirm it locks securely. If the rope shows fraying or the clip slips when you pull on it, replace the ratchet before the light falls. A falling grow light can damage plants, break the panel, and create an electrical hazard if the cord gets pinched or pulled from the driver.
Driver lifespan and replacement
The LED chips in most budget panels are rated for 50,000+ hours, but the driver (the power supply box) is usually the component that fails first, often within 2–5 years of regular use. Drivers are typically replaceable without replacing the entire light. You need to match the output voltage and current rating on the original driver label. A common spec for Sunraise-style panels is a 36V DC driver. Replacement drivers are available from electronics suppliers, and swapping one out only requires disconnecting two or three wire connectors. This is the single most cost-effective repair you can do on a grow light.
LED strip replacement
If individual LEDs or entire strips fail, replacement LED boards for common panel sizes are available on Amazon and from electronics suppliers. The repair requires basic soldering and identifying the correct voltage/wattage spec from your panel's sticker. It is a reasonable DIY repair for anyone comfortable with basic electronics. If you are not, weigh the cost of repair against buying a new panel, since entry-level Sunraise panels are inexpensive enough that full replacement sometimes makes more sense than a repair involving multiple failed components.
How Sunraise compares to similar budget LED panels
Sunraise sits in the same category as several other budget and mid-range LED grow light brands, all of which use similar driver and LED board designs. Here is a quick comparison of what you can expect across this class of light.
| Brand/Model | Approx. Wattage Range | Dimmer Included | Coverage (Flowering) | Manual Availability |
|---|---|---|---|---|
| Sunraise panels | 45W–300W | Some models | 2x2 to 3x3 ft | No official manual PDF found |
| VIVOSUN VS1000 | ~100W (draw) | Yes | 3x3 ft | Available from VIVOSUN |
| VIVOSUN 4000 | ~400W (draw) | Yes | 4x4 ft | Available from VIVOSUN |
| Juhefa panels | 45W–200W | Some models | 2x2 to 3x3 ft | Limited; brand guide available |
| Likesuns panels | 50W–200W | Some models | 2x2 to 3x3 ft | Limited; brand guide available |
If you are shopping in this category and want a brand with better-documented instructions, VIVOSUN provides more detailed official guidance. The VIVOSUN VS1000 grow light instructions are a good benchmark for what a well-documented budget panel setup looks like, and the concepts translate directly to Sunraise operation. For larger setups, the VIVOSUN 4000 grow light instructions show how multi-bar quantum board panels are configured, which is relevant if you are considering an upgrade.
For shelf-style or vertical growing setups, it is also worth looking at how different form factors work. The Sunblaster grow light garden instructions cover a tube-style panel designed for shelving, which approaches distance and intensity quite differently from a single overhead panel like Sunraise. And if you find yourself comparing driver specs across brands, the VIVOSUN 600W LED grow light manual is a useful reference for understanding how driver specs and intensity ratings are documented on mid-range panels.
Your practical next steps from here
If you just pulled your Sunraise out of the box: find the spec sticker, confirm your wattage, set up the ratchet hangers at the top of the recommended distance range for your plant stage, plug into a surge-protected outlet, and set a timer before powering it on for the first time. Run at 25–50% intensity for the first week if you have a dimmer. If you do not, just use the extra distance as your buffer.
If you are troubleshooting an existing setup: work through the power and connection checks first, then evaluate heat management and coverage. Most problems with budget LED panels trace back to the driver or a loose connection, and both are fixable without buying a new unit.
If you are unsatisfied with your Sunraise's performance after following this guide, that is useful information. Not every budget panel delivers consistent quality, and there is no shame in acknowledging that a particular unit is underperforming. Document your observations, check your purchase window, and consider whether a replacement from the same seller or an upgrade to a brand with stronger documentation and quality control is the better call for your setup.
FAQ
Where exactly is the model number and what numbers should I write down for the Sunraise grow light manual setup?
Look for a sticker on the back of the panel or on the side of the box, then write down the actual wattage draw, the input voltage range, and the recommended coverage area. If there is a driver label, also note the driver output specs (DC voltage and current), because that determines what replacement driver is compatible if troubleshooting points to the power supply.
My Sunraise panel came with a rope ratchet kit, but my ceiling or tent roof is thin. Can I hang it from drywall anchors?
Avoid drywall-only mounting. Use hardware that attaches to a structural member (joist, rack frame, or a properly rated stud) or a tent-rated hanging method that distributes load across the tent frame. If your setup only has sheet material, switch to a rated grow rack or support beam, because rope ratchets and vibration can loosen light-duty anchors over time.
How do I confirm the light is truly on at the timer’s schedule, not just plugged in?
After programming the timer, do a manual test for one cycle (turn the timer to a forced ON position if it has that mode, then observe the driver switch and confirm the LEDs come up). Also verify the timer’s AM/PM and that the outlet provides power by plugging in a small lamp, because some timers power only during their ON window.
What light schedule should I use for photoperiod plants versus autoflowers with a Sunraise grow light?
Use photoperiod schedules like 12 hours on and 12 hours off to trigger flowering, and keep the off period uninterrupted. For autoflowers, many growers use a long-day approach (often around 18 hours on, 6 hours off). The key edge case is that if your Sunraise timer ever gets reset, photoperiod plants can re-vegetate or flower early, so consider using an outlet timer with a battery backup if your power flickers.
If my dimmer knob doesn’t work, how can I tell whether it’s the knob, the driver, or a wiring/connection issue?
First check that the knob moves through its full range and that you can hear or feel a change in the driver area when turning. If the output only toggles between full and off, suspect a dead spot in the dimmer potentiometer. If you get no change at all but the light works at one position, re-seat the plug at the driver and verify the driver rocker switch (if present) is ON, then test on a different outlet to rule out a loose power connection.
Do I need to measure canopy distance from the LEDs or from the panel housing?
Measure from the LED plane to the top of the plant (canopy), not from the top of the metal housing or the hanging hook. Because some panels have thicker frames or diffuser surfaces, measuring from the wrong point can put you several inches off target, which is why height adjustments should be done using the same reference every time.
Can I run the Sunraise grow light at 100% during the first week to save time?
It’s usually a mistake. Even if your plants tolerate light, seedlings and clones often show stress quickly, leaf curl, bleaching, or stalling. A safer decision aid is to start at 25 to 50% intensity (or at the top of the distance range if you have no dimmer) for the first 5 to 7 days, then adjust by 2 to 4 inches or 25% intensity only after you see recovery over about 48 hours.
What should I do if my plants stretch even after I raise the light or increase intensity?
Stretch can also be caused by low overall daily light duration, temperature, or airflow imbalance. Check the timer first to confirm the ON window matches what you intended, then verify you are using the correct intensity level for the plant stage. Finally, confirm heat and air movement, because plants often reach toward better conditions, not just more photons.
Is it safe to use an extension cord with a Sunraise grow light?
Prefer not to. If you must, use a heavy-duty outdoor-rated cord appropriate for the load and keep connections off the tent floor. Lightweight extension cords and coiled cords can overheat under continuous use, and grow tents increase splash risk, so the safest option is still a properly placed outlet and surge-protected power strip.
How often should I clean the Sunraise heat sink and LEDs, and what’s the right cleaning method?
Clean every 4 to 6 weeks, or sooner in dusty or high-humidity rooms. Unplug the light and let it cool, then wipe the LED surface with a dry or lightly damp microfiber cloth. For the fins, use a soft brush or gentle compressed air to remove packed dust, avoid spraying cleaners directly onto the LEDs, because residue can affect heat transfer and performance.
My panel has a dark section, but it changes when I adjust height. Does that mean only coverage is uneven?
Usually, height changes can reveal normal edge falloff, but a truly non-functioning section stays dark regardless of distance. If one distinct area is consistently dim or off at all heights, that points toward failed LED chips or a broken strip section, which may require replacing the LED strip or board rather than just adjusting hanging height.
How can I tell whether overheating is coming from poor ventilation versus running too much intensity?
First check clearance above the panel and confirm the exhaust fan actually removes hot air at the top of the tent. If the back of the panel becomes extremely hot quickly and airflow is confirmed, dial intensity down (example: from 100% to 75%) temporarily. If heat persists even at reduced intensity and adequate clearance, stop and troubleshoot airflow or consider returning/replacing if the cooling path appears blocked.
If the driver fails, can I replace it myself safely, and what compatibility details matter?
Replacement drivers are often the most cost-effective repair, but you must match the driver output voltage and current ratings to the original label. If you are comfortable with basic electronics and can disconnect and reconnect the labeled connectors without damaging insulation, it’s feasible. If you are unsure, it’s safer to request a warranty replacement rather than risking an incorrect driver that could damage the LEDs.
When should I stop troubleshooting and contact the seller for a replacement instead of continuing to test?
Stop when you see burning smells, scorch marks, physical cord damage, or when quick fixes (like reseating connections) do not resolve power or flicker within about 10 minutes. Also stop if the unit works intermittently and you can’t identify a clear loose connection, because repeated driver failure can worsen and may create electrical hazards.
Can I use the Sunraise in a mixed setup with other brands without changing anything?
You should still re-check height and intensity for each panel, because different brands can output different intensity distributions. If panels are in the same tent, verify your overall canopy response during the first week, then adjust each light independently based on plant stage, rather than assuming identical wattage ratings produce identical results.
Next Article
Vivosun VS1000 Grow Light Instructions: Setup to Troubleshoot
Step-by-step Vivosun VS1000 setup and troubleshooting: assembly, hanging height, coverage, controls, power issues, overh