Setting up a grow light timer is not complicated, but there are just enough moving parts to trip people up. If you want the exact step-by-step timer sequence, see the full Lordem grow light timer setup guide for how to set timer settings correctly. The lights run at the wrong time, the schedule doesn't stick, or the timer works fine for a day and then stops following the program.
Grow Light Timer Instructions: Setup, Program, Troubleshoot

Marcus Tillman
4 Apr 2026
Almost every one of those problems has a quick fix once you know what to look for. This guide walks you through the whole process: picking the right timer, checking compatibility before you plug anything in, programming the schedule step by step, and troubleshooting the common mistakes that send people back to Google at midnight.
Types of grow light timers (and what each one actually controls)
Before you touch a button, it helps to know what kind of timer you have, because the setup steps are a little different for each. There are three main types you'll run into as an indoor grower.
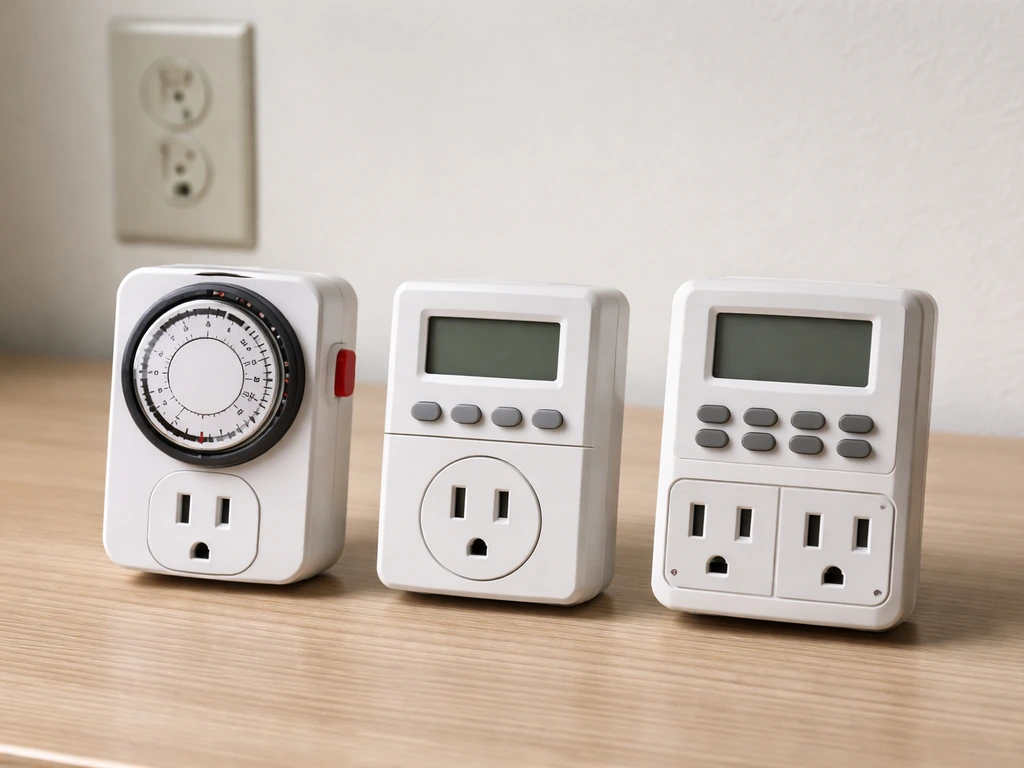
- Mechanical plug-in timers: The round dial type with little pins you push in or pull out. Simple, durable, and cheap. They cycle power on and off in 15- or 30-minute increments. They don't have a display, so there's nothing to program beyond pushing the pins.
- Digital plug-in timers: These have a small LCD screen, buttons for setting the current time and day, and the ability to store multiple on/off programs. Some models support up to 20 different on/off programs; others cap out at 8 cycles per day across 7 days. These are the most common choice for grow lights and the focus of most of the setup steps below.
- Smart plug timers: These plug into your outlet and connect to your home Wi-Fi or Bluetooth. You set schedules through a phone app, which lets you pick specific days, start times, and end times. Some support scheduling per individual socket. They typically include a physical on/off override button on the device itself.
- In-line timers: Built directly into the grow light's power cord. Less common for home setups. You program them the same way as digital plug-in timers, but you don't add a separate device between the outlet and the light.
One thing all of these have in common: they control power, not dimming. A timer switches your light on or off on a schedule. It does not gradually increase intensity or reduce it. If you want dimming, that feature needs to be built into the light fixture itself or its controller, not the timer.
Before you plug anything in: compatibility, ratings, and placement
This is the step most people skip, and it causes the most headaches. Take five minutes here and you'll avoid problems that are annoying to diagnose after the fact.
Check the timer's electrical rating against your light's draw
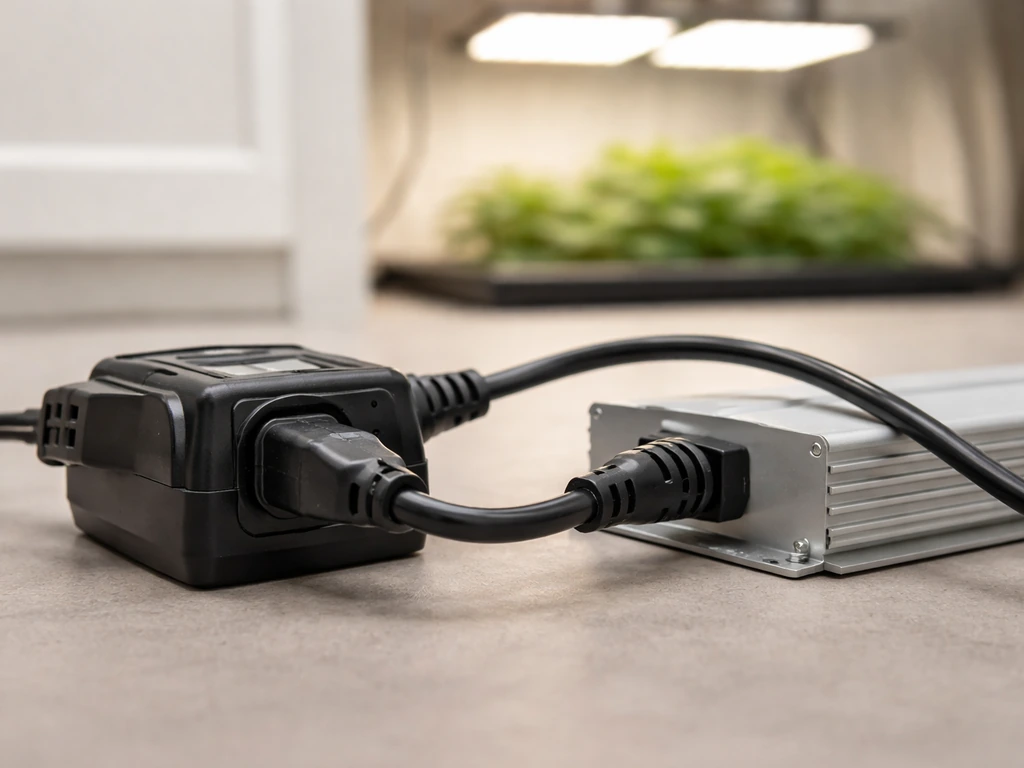
Every timer has a maximum rated load printed on the device or in the manual. A common rating for plug-in timers is 125V/15A/1875W. That 1875W is your ceiling. Add up the wattage of every device you plan to plug into that timer and make sure the total stays under that number. Most LED grow lights for home use pull 100 to 400 watts, so a single light is almost never a problem. But if you're daisy-chaining lights or adding a fan to the same timer outlet, do the math first. The rating is a hard safety limit, not a guideline.
Also confirm your timer is ETL Listed or UL Listed. These certifications mean the device has been independently tested for electrical safety. This matters especially for grow environments where humidity and heat can be factors.
LED driver compatibility
Most modern LED grow lights use a built-in driver that converts AC power to the DC voltage the LEDs need. Standard plug-in timers work fine with these because the timer is just switching the AC power. Where things can go sideways is with certain older ballast-driven HID lights or specialty trigger-cord lights, which require a timer specifically rated for ballast loads. If you're running a standard plug-in LED panel or strip light, a regular digital timer rated for LED use will handle it without any issues.
Extension cord and outlet safety
Plug your timer directly into a wall outlet whenever possible. Extension cords are considered temporary wiring, not a substitute for permanent branch circuit wiring, and using them as a long-term solution for a grow light setup creates a fire risk, especially if the cord isn't rated for the load. If you absolutely need to use an extension cord, make sure its wattage rating meets or exceeds the total draw of your light. High-amperage devices are generally best plugged directly into the wall. The timer itself goes between the wall outlet and the grow light, not in the middle of an extension cord chain.
Step-by-step: how to program a digital grow light timer
These steps cover the most common digital plug-in timer workflow. The button labels may differ slightly by brand, but the sequence is nearly universal. If you have a specific brand, check the dedicated guides for things like Elaine grow light timer instructions or Sansi grow light timer instructions, which walk through brand-specific button layouts.
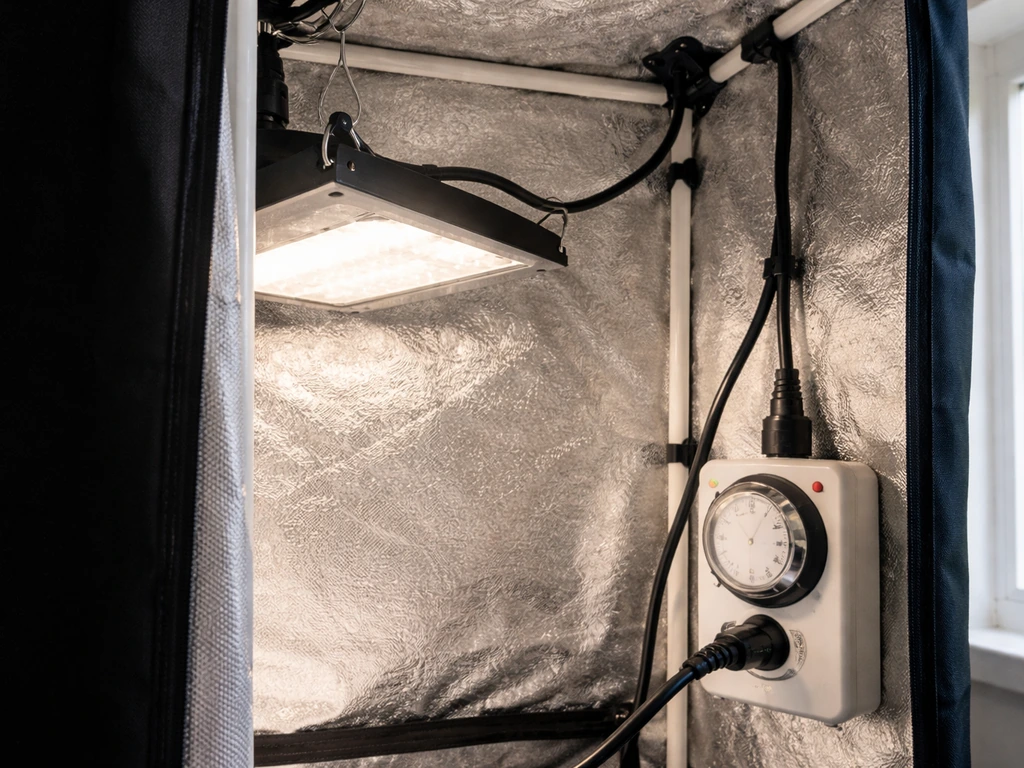
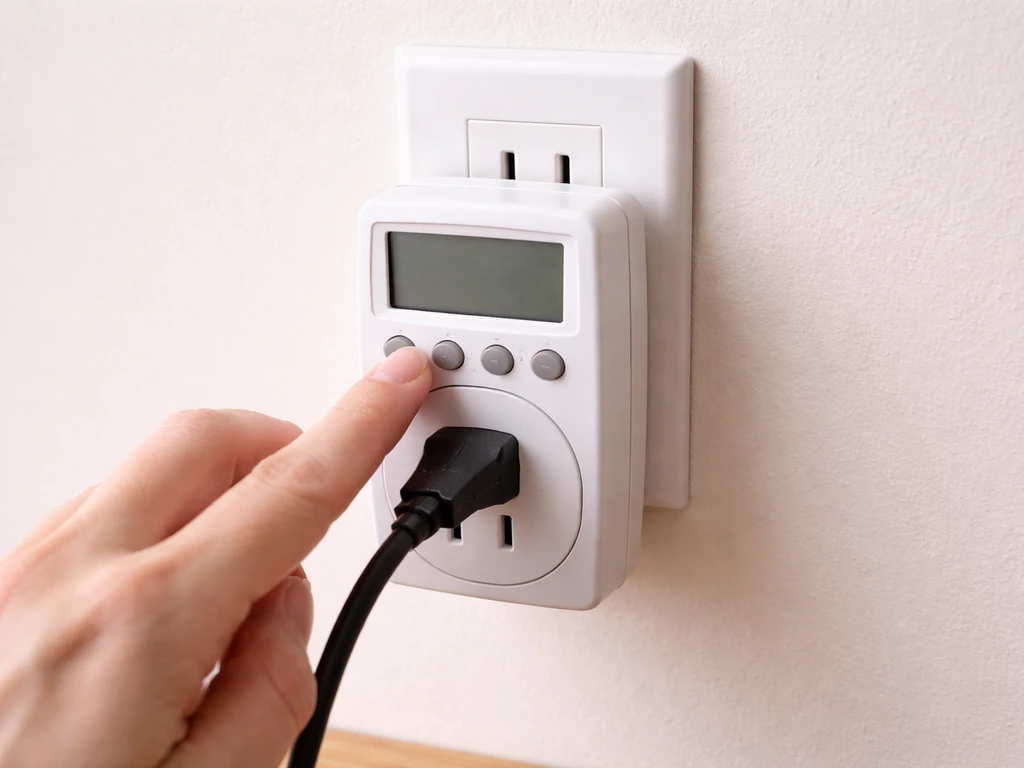
- Plug the timer into the wall outlet (not into an extension cord if you can avoid it). If the display doesn't light up, give it a minute connected to power to recharge the internal battery. Some models, like the Autopilot TM01715D, require this before you can set anything.
- Press RESET before you do anything else. On most digital timers this is a small button or a pinhole you press with a paperclip. This clears any previous programming and puts the timer in a clean state.
- Set the current time and day. Look for a button labeled DAY/TIME, CLOCK, or similar. Press it, then use the + and - buttons to set the correct day of the week first, then the hour and minute. Many timers display time in 24-hour (military) format, so 8:00 PM is entered as 20:00. The clock must be set correctly before your on/off programs will run at the right time.
- Enter programming mode. Press PROG or PROGRAM to start entering your first event. You'll typically set: (1) which days the event applies, (2) the ON time, and (3) the OFF time. Some timers require you to enter ON and OFF as separate events; others let you set them as a pair.
- Enter your ON time. Use + and - to set the hour and minute your light should turn on, then press ENTER or the next button to confirm.
- Enter your OFF time. Same process. Set the hour and minute your light should turn off.
- Set the repeat days. Most 7-day timers let you choose whether the program runs every day, weekdays only, weekends only, or specific days. For grow lights, you almost always want DAILY or EVERY DAY.
- Confirm and save. Press ENTER or PROG one more time to lock in the schedule. The display should return to showing the current time.
- Switch the timer to AUTO mode. Look for a button or switch labeled AUTO, ON/AUTO/OFF, or similar. Make sure it's set to AUTO. If it's set to ON, the light stays on all the time. If it's set to OFF, the light stays off. AUTO is what makes the program actually run.
- Test it manually. Use the manual override button to trigger an ON cycle, verify the light comes on, then switch back to AUTO. This confirms the light is responding before you walk away and assume it's working.
If you're working with a smart plug timer, the workflow is app-based but follows the same logic. You plug in the device, add it to the app (Meross, myTouchSmart, Mars Hydro, or whichever ecosystem your plug uses), then create a schedule by selecting your preferred days, setting a start time, and setting an end time. Make sure the physical override button on the smart plug is not locked in the ON or OFF position. For a full walkthrough of the general process, the guide on how to set a timer on a grow light covers additional timer types in detail.
Common programming mistakes and how to fix them
Light doesn't turn on at the scheduled time
Nine times out of ten, the timer is not in AUTO mode. Check the mode switch or button first. If it reads ON, the light will stay on continuously. If it reads OFF, it stays off. You need AUTO for the schedule to execute. If AUTO is selected and it's still not working, do a full RESET (paperclip in the pinhole on models like the Woods 50029WD, or the RESET button on digital models), re-enter the current time, and re-enter your program from scratch. Intermatic’s DT11 instructions also describe a RESET button to clear or reset settings and then you can re-enter the time and operating mode (Countdown, Off, Auto, On, or Rand) RESET button on digital models.
Timer is on but the display is blank or frozen
This usually means the internal battery is dead or the capacitor needs a charge. Plug the timer into the wall and leave it for 10 to 15 minutes before touching any buttons. Once the display comes back, do a RESET before programming anything.
Schedule is off by exactly one hour
Daylight saving time is the culprit. Digital timers don't automatically adjust for DST. You need to go back into the clock settings and manually advance the time by one hour in spring, or set it back one hour in fall. Smart plug timers are more complicated: the app needs to have your time zone set correctly. In the Mars Hydro app, for example, you verify this under Me → App Settings → Time Zone. After correcting the time zone, reset the timer scene in the app so the new time zone takes effect on the schedule.
Timer turns the light on or off at the wrong time (not a DST issue)
The current time on the timer clock is probably wrong. This happens when a power outage resets the timer's internal clock without you noticing. Go back to the clock-setting step, verify the current time displayed matches your actual local time, and correct it if needed. Then confirm your ON/OFF programs are still saved (a power outage can clear programs on some models).
Schedule doesn't repeat daily
Check whether your program was set to a specific day of the week instead of DAILY. Some timers default to programming for the current day only. Go back into the program and change the day setting to every day or DAILY. Also verify the timer is set to 24-hour repeat, not a countdown mode (countdown modes run once and stop).
Manual override is stuck on
If you pressed the ON/OFF button to test the light and forgot to switch back, the timer is overriding your schedule. Press the override button again to cycle it back to AUTO mode. On smart plugs, check the app to make sure the schedule is active and the physical button hasn't forced a permanent ON or OFF state.
How many hours of light do your plants actually need?
This is where a lot of people get vague advice like "give them plenty of light." Here are actual numbers you can plug into your timer schedule today.
| Plant Stage / Type | Recommended Daily Light Hours | Notes |
|---|---|---|
| Seedlings (starting from seed) | 14–16 hours on / 8–10 hours off | Strong, consistent light prevents stretching (legginess). Keep lights closer than you think — 2 to 4 inches for seedling trays under T5/LED bars. |
| Vegetative / foliage houseplants | 12–16 hours on / 8–12 hours off | Most tropical houseplants do well at 12–14 hours. Low-light species (pothos, ZZ, snake plant) can thrive at 10–12 hours. |
| Flowering plants (photoperiod) | 12 hours on / 12 hours off | The 12/12 split triggers flowering in photoperiod-sensitive plants. Consistent dark periods matter as much as the light period. |
| Vegetative growth (fast-growing plants) | 18 hours on / 6 hours off | 18/6 is a standard schedule for maximizing vegetative growth. Don't exceed 18 hours — plants benefit from a dark rest period. |
| Fruiting plants (tomatoes, peppers, etc.) | 14–16 hours on / 8–10 hours off | These are day-neutral for fruiting but need high light levels. Prioritize intensity and duration together. |
The underlying concept here is Daily Light Integral (DLI): the total amount of light a plant receives over a full day, combining intensity and duration. If your light isn't very bright, you can compensate somewhat by running it longer. If it's a high-intensity fixture close to the plant, you may need fewer hours to hit the same DLI. The practical takeaway is that you should keep your timer schedule stable and adjust duration in one-hour increments based on what you observe: stretched, pale growth means more light hours or a closer fixture; bleached or curled tips mean too much intensity or too many hours.
For a Lordem light specifically, the Lordem grow light timer setup guide includes brand-specific scheduling recommendations worth checking if your light has a built-in timer controller.
Multi-light setups and advanced considerations
Running multiple lights from one timer
A dual-outlet digital timer is the simplest solution for running two lights on the same schedule. Models like the Autopilot dual-outlet timer can support both outlets simultaneously with up to 8 on/off cycles per day, and you don't need a separate timer for each light if they're sharing the same schedule. Just make sure the combined wattage of both lights stays within the timer's 15A/1875W limit. For example, two 200W LED panels pull 400W total, well under the ceiling. Two 600W lights would push you into the danger zone.
Smart timers vs standard digital timers
Smart plug timers are genuinely more convenient once they're set up. You can adjust your schedule from your phone without touching the device, which is useful if you're away from home or want to tweak hours as seasons change. The downside is that they depend on your home Wi-Fi or Bluetooth staying connected, and if the app loses sync or your time zone setting is off, your schedule drifts silently. Standard digital timers have no connectivity to lose.
They just run the program you gave them until you change it or the power goes out. For most home growers with one or two lights, a digital timer is more reliable day to day. For larger setups or people who travel, a smart plug gives you more control.
Dimming vs on/off timers
Standard timers, digital or mechanical, only switch power on and off. They cannot dim your light. If you want gradual sunrise/sunset simulation or variable intensity throughout the day, you need a grow light with a built-in dimming controller or a dedicated grow light controller that handles dimming separately from the timer. Don't buy a timer expecting it to dim your light. For most home growers running seedlings or houseplants, on/off scheduling is all you need.
Load calculations for multi-outlet smart plugs
Multi-outlet smart plugs (like the 3-outlet outdoor models used for grow tents) let you schedule each socket independently through the app. This is useful if your lights run different schedules, like a propagation light running 16 hours and a flowering tent running 12 hours. Even with per-socket scheduling, the total load across all outlets still cannot exceed the device's rated amperage. Check the product specs and treat the total capacity as a shared pool across all sockets.
Quick verification checklist before you walk away
Once you've programmed your timer, run through this checklist before you consider it done. It takes two minutes and catches most problems before they become a dead plant.
- Timer is plugged directly into a wall outlet (not chained through an extension cord or power strip).
- Total wattage of connected lights is below the timer's rated maximum (typically 1875W / 15A for standard plug-in timers).
- Current time on the timer display matches your actual local time, including the correct day of the week.
- ON and OFF programs are saved and set to repeat DAILY (not just for today).
- Timer mode is set to AUTO, not ON or OFF.
- Time zone in your app is correct (smart timers only) and matches your actual location.
- You've done a manual override test: forced the light on, confirmed it works, then returned to AUTO mode.
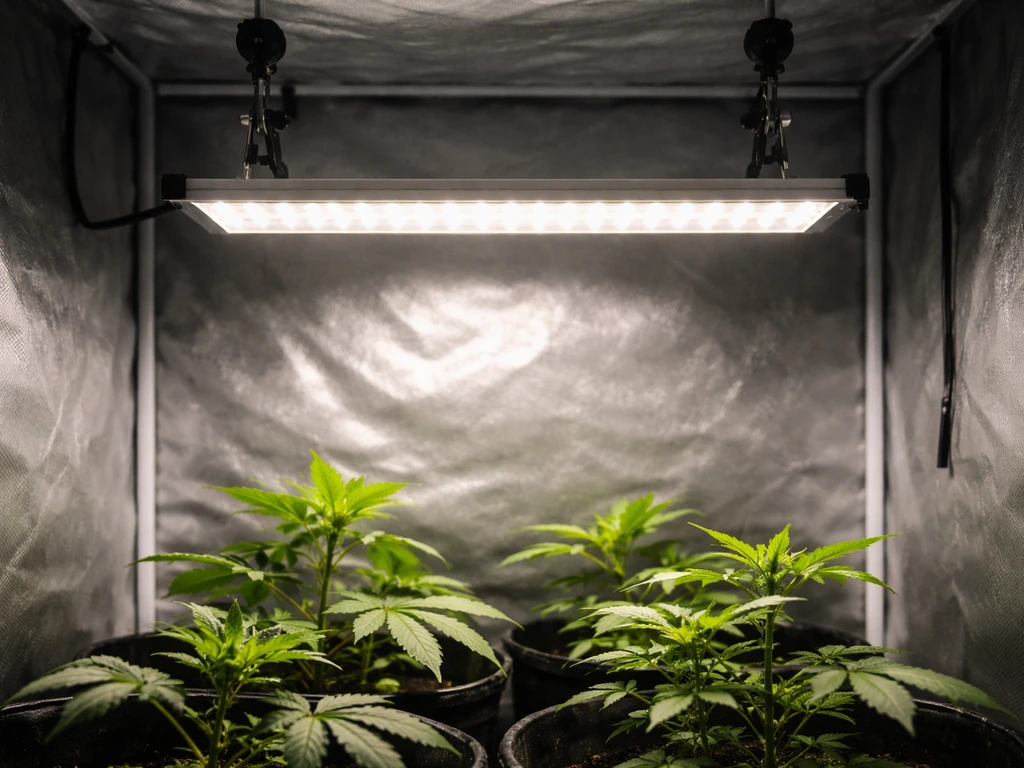
- Light is at the correct height above your plants (typically 18 to 24 inches for most LED panels at full intensity over established plants; closer for seedlings under lower-power bars).
- No extension cords in the circuit are rated below the total wattage of your connected devices.
After the first full day, come back and check that the light turned on and off at the times you programmed. It sounds obvious, but actually watching one full cycle happen (or checking the grow space at the scheduled OFF time to confirm it went dark) is the best way to catch a wrong time setting before it costs you a week of plant growth. Once you've confirmed two consecutive days run correctly, you can trust the schedule and stop checking daily.
From here, your main job is to watch the plants, not the timer. If seedlings start stretching toward the light or looking pale and leggy, add an hour to your ON period or lower the fixture. If leaf tips are bleaching or curling under, reduce the hours or raise the light. Keep your timer schedule stable as the baseline and make one change at a time so you know what caused the improvement.
FAQ
Can I set my grow light timer to follow sunrise and sunset automatically?
Most basic timers work from 24-hour clock settings and do not “know” your sunrise or sunset automatically. If you want seasonal changes, update the timer schedule manually (for digital timers) or use the smart plug app to edit times, then verify the physical plug is still in AUTO mode. Don’t rely on the timer to adjust by itself.
Will a grow light timer dim the lights for sunrise or sunset effects?
No. The timer only turns power on or off. If your light has a built-in dimming controller, follow its own manual for intensity changes, and let the timer handle only on/off windows. If your fixture is dimmable, the dimming often has its own schedule or knob, separate from the timer.
How do I know whether my timer is compatible with my specific grow light (LED vs HID)?
Confirm the timer’s output is rated for your light type and driver needs. For most modern LED fixtures, a standard LED-compatible plug-in digital timer is fine, but HID or specialty trigger-cord lighting can require a ballast-rated timer. If you are unsure, match the timer’s load rating wording in the manual to your light’s electrical type, not just its wattage.
What should I do if my total wattage is close to the timer’s maximum rating?
Treat the rated load as a ceiling, then add margin. If the timer says 15A at 125V (1875W), and you calculate 1200W total, running close to the ceiling leaves no buffer for heat and voltage swings. If you’re near the limit, split the lights across a second timer or use a higher-rated timer rated for your region’s voltage.
Can I use extension cords, and what are the common mistakes that make them unsafe?
Use a timer with a grounded (3-prong) outlet rating when your grow light has a grounded plug, and avoid using an adapter to force fit. Also check the timer and extension cord ratings are for the same voltage system and are not “light duty.” If you must use extension cords, keep them heavy-gauge and fully unwound to reduce heat buildup.
My timer seems to be off by exactly one hour or more. How do I identify the cause?
If you see the same light-time behavior but the schedule seems offset by hours, daylight saving or time zone is most common for digital and smart plug timers. Next check that the app is set to the correct time zone and that the timer clock was re-synced after a power outage. Finally, verify whether you programmed DAILY versus a specific day or a single-run mode.
After a power outage, should I reprogram or just reset the time?
Some timers keep the program but lose the current clock when power is interrupted, so the next run uses the wrong time. After any outage, do two steps: set the current clock to match local time, then re-check that your saved ON/OFF program entries still exist. If your model allows it, take a quick photo of settings so you can restore them fast.
Can I create multiple ON/OFF cycles per day, and does that affect reliability?
Yes, but be precise about what “cycle” means on your timer. Many dual-outlet and multi-channel timers cap the number of ON/OFF events per day, so fewer events with longer ON windows may be safer than many short pulses. If your timer supports only a limited number of switching events, reduce edits and stick to one stable schedule for the same photoperiod.
My smart plug timer works when I toggle it, but my schedule does not. What should I check first?
If the ON/OFF buttons override, the schedule will not run until the timer is returned to AUTO. On smart plugs, also confirm the app schedule is “active” and not paused, and that no manual command is latched in the physical state. After correcting, wait for the next scheduled switch to verify it truly returned to schedule control.
What should I do if my timer display is stuck or doesn’t come back after resetting?
If the timer display is blank or stuck after being left for a while, unplug it, then inspect for loose connections and ensure it has power from the wall outlet. For “dead battery” designs, some models need several minutes connected before the clock fully initializes. Once the screen returns, perform the model’s RESET procedure and then program again.
How do I adjust the timer schedule without overcorrecting?
Pick one baseline change at a time. Keep the timer schedule stable for at least a couple of full cycles, then adjust by one hour (or by repositioning the light) based on plant response. Frequent changes can mask whether growth improvements are from lighting, watering, or temperature.
What’s the best way to test my grow light timer after programming it?
Do a two-day verification that includes both the ON and the OFF moment, not just one switch. For example, confirm the light turns on at the programmed start time, and then physically check it goes dark at the OFF time. If it fails either event twice, re-check AUTO mode, clock accuracy, and whether the program saved to the correct day setting.
How can I tell if I accidentally saved conflicting schedules?
If your timer has multiple slots, ensure you aren’t accidentally creating a conflicting program entry (for example, a single-day program plus a daily program). Conflicts can cause intermittent behavior that looks like it “works for a day.” Clear existing slots, then re-enter only the schedule you want and confirm the day selection is set to DAILY.
Next Article
Innova Grow Light Instructions: Setup, Use, and Troubleshooting
Step-by-step Innova LED grow light instructions: setup, mounting, distance, schedules, intensity, and fast troubleshooti