Installing Barrina LED grow lights comes down to four things: knowing which model you have, mounting the bars securely at the right height, connecting power correctly (plug-in or daisy-chain), and <a data-article-id="236AC373-DD45-40C8-BF88-03D2579042A6">setting a timer so your plants get consistent light every day</a>. These tower garden led grow lights instructions help you choose the right mounting height and timer schedule for consistent results. If you also want a garland-style setup, these garland grow light garden instructions are a helpful related option for choosing placement and timing. Most people can go from unboxing to first test in under 30 minutes. Here is exactly how to do it.
How to Install Barrina LED Grow Lights Step by Step
Marcus Tillman
25 Apr 2026
Know your Barrina model and what's in the box
Barrina makes several distinct product lines, and the installation steps are different enough that you really do need to identify your model before you start. Check the model number printed on the bar itself or on the box. The most common ones you will encounter are:
- T8 series (including the QL42): 4FT bars, 42W each, full spectrum with reflectors, plug-in and linkable. Sold in multi-packs of 4 or 6 bars with power cords included.
- TX series (TX18, TX72, TX-L84): 1FT to 4FT bars, full spectrum, linkable via included daisy-chain cords. The TX72 supports up to 4 lights in series.
- TR40: 40W hanging light, 5000K full spectrum, with an integrated timer built into the unit.
- OG09 (Orbgrow puck): 9W magnetic puck light, 3000K+6500K+660nm spectrum, with a built-in 3-timer setting (4H/8H/12H) and 5 brightness levels. Mounts magnetically or with cable ties, not with hanging hardware.
- DC10: 10W panel, 3-spectrum, with an integrated 3/6/12-hour cycle timer that runs automatically once set.
- WF30 stand kit: 5 x 30W, 2FT bars bundled with a 6-tier plant stand, includes a timer and waterproof pads on each shelf layer.
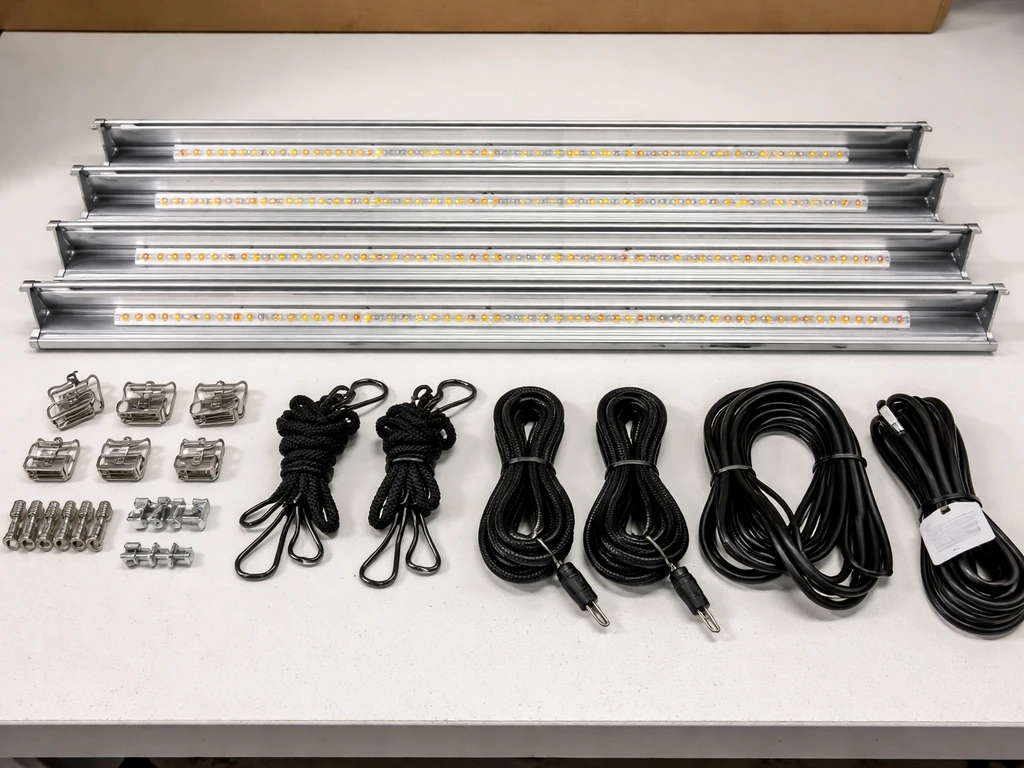
Once you know your model, lay out everything from the box and check it against the included parts list. A typical T8 or TX bar kit will include the light bars, a power cord (usually one per pack), linkable connecting cords, and hanging hardware such as ropes or clips. The OG09 puck kit instead includes a magnetic backing and linking cables. If anything is missing, do not try to substitute generic connectors or cables. Barrina's linking systems are model-specific, and using the wrong connectors is the number-one cause of installation problems.
Plan placement: mounting style and light height
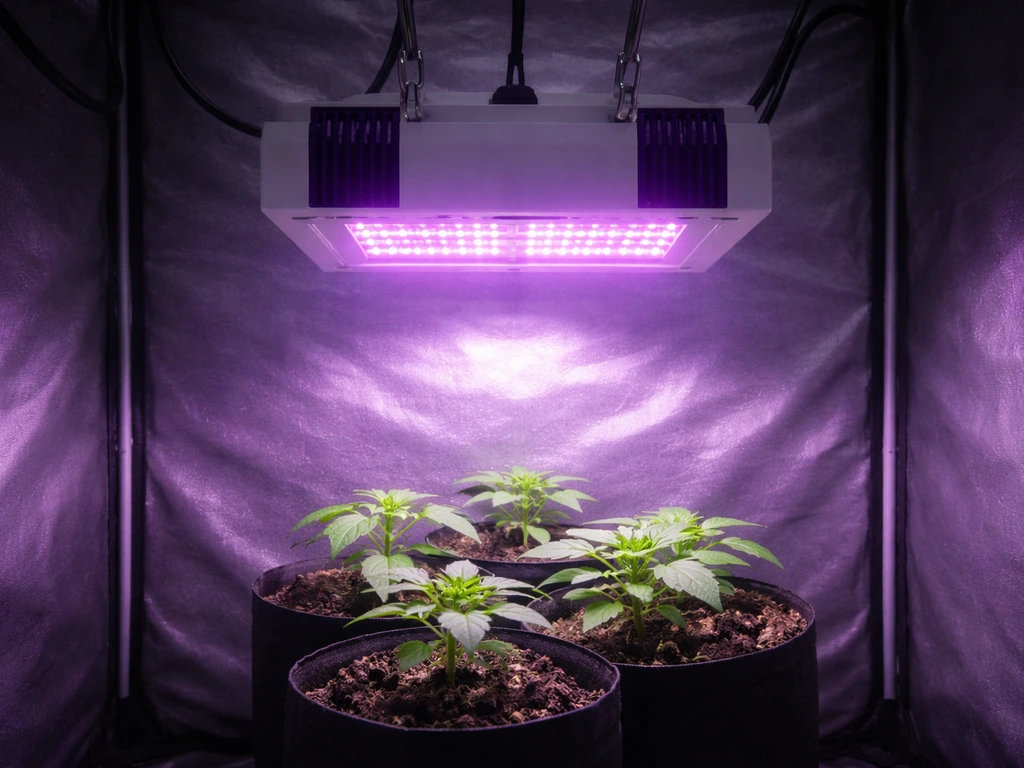
Before you drill or hang anything, decide how you want to mount the lights. Your three realistic options are hanging from a ceiling or grow tent bar, clamping or zip-tying under a shelf, or using the included stand (WF30 kit). The right height above your plants depends on the plant type and growth stage.
| Plant type / stage | Recommended light height | Notes |
|---|---|---|
| Seedlings / germination | 4 to 6 inches | Barrina bars are relatively low intensity at this range; watch for stretching and raise if stems lean toward light |
| Leafy greens and herbs | 6 to 12 inches | Most T8 and TX bars work well here; check for even coverage across the canopy |
| Fruiting plants (vegetative) | 12 to 18 inches | More distance needed as canopy fills in |
| Fruiting plants (flowering/fruiting) | 18 to 24 inches | Light intensity drops with distance; do not go higher than needed |
| Houseplants / low-light tropicals | 18 to 30 inches | OG09 puck or DC10 panel may be sufficient at this range |
| Succulents and cacti | 6 to 12 inches | These want high intensity; keep bars closer than you would for tropicals |
For bar-style lights like the T8 QL42 or TX72, space multiple bars evenly across the grow area rather than clustering them in the center. A general rule: if you have a 2-foot-wide shelf, one 4FT bar centered overhead works for herbs and greens. For a 4-foot-wide bench, two bars spaced about 10 to 12 inches apart give much more even coverage than one bar in the middle. Uneven spacing is the most common cause of patchy plant growth after installation.
Mounting and attaching the bars safely
How you mount depends on your model. Here are the step-by-step workflows for the most common setups.
Hanging from a ceiling or grow tent bar (T8, TX, TR40)
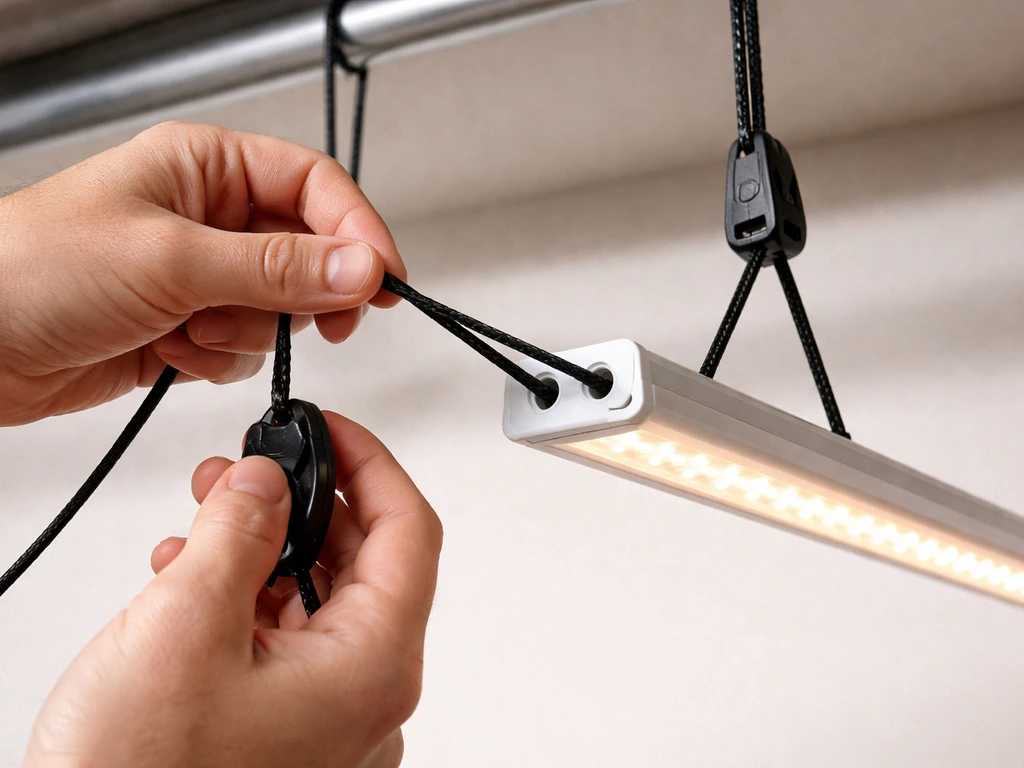
- Thread the included rope ratchets or hanging clips through the mounting holes or hooks at each end of the light bar. Most Barrina bars have a hole or bracket at both ends.
- Attach the other end of the rope ratchets to your ceiling hook, tent bar, or overhead rail. Make sure the anchor point can handle at least twice the weight of the bar (most Barrina bars weigh under 2 lbs each, but chain-linked sets are heavier).
- Set the height using the ratchet adjustment before you connect power. It is much easier to dial in height now than after wiring.
- For the TR40 hanging light, use the included hanging hardware and make sure the unit hangs level so the built-in timer controls on the body are accessible.
- Do not hang bars at an angle. A tilted bar throws light unevenly and creates hot spots directly below one end.
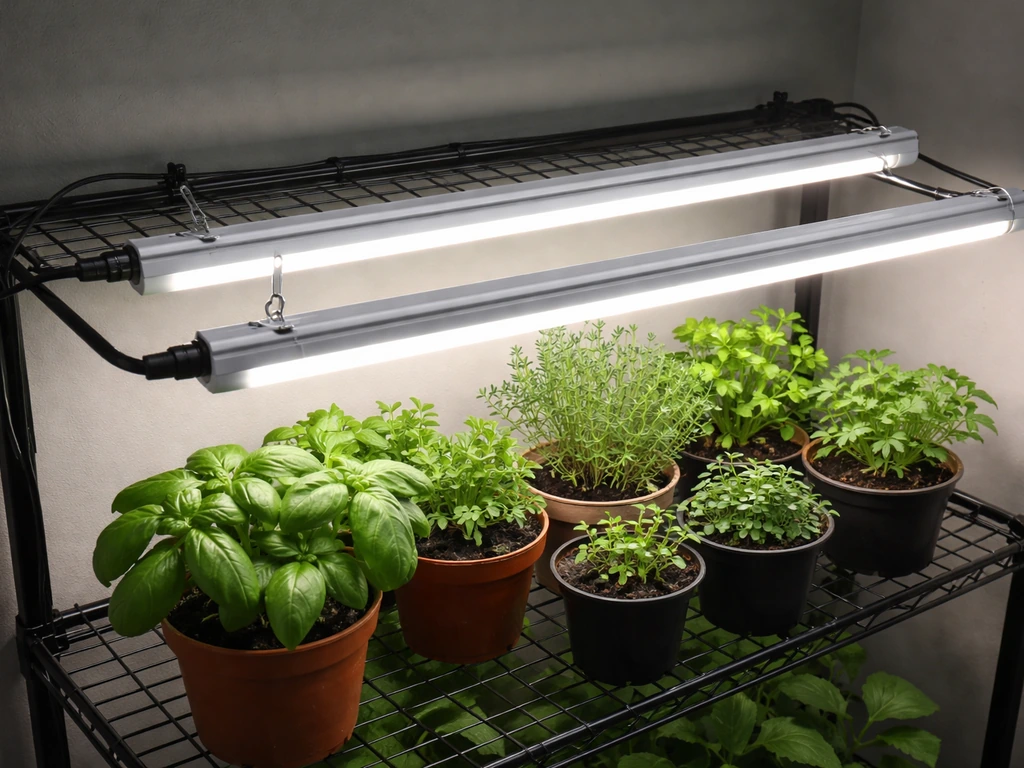
Under-shelf or cabinet mounting (T8, TX, OG09)
- For T8 and TX bars under a shelf: use the included mounting clips or brackets to screw the bar directly to the underside of the shelf. Mark both mounting points with a pencil before drilling so the bar sits straight.
- If your shelf material is too thin for screws, use heavy-duty cable ties through the mounting holes to secure the bar tightly against the shelf surface.
- For the OG09 puck: place the magnetic base against any steel surface (steel shelf, metal cabinet door, refrigerator side panel) and it will hold without fasteners. Alternatively, use cable ties through the puck's mounting holes for non-magnetic surfaces.
- Leave at least 1 inch of clearance around the bar on all sides for airflow. Do not box the light in tight against walls or shelf sides.
WF30 plant stand kit assembly
The WF30 stand ships with the frame and grow light bars as a bundled kit. Assemble the metal frame tiers first following the stand instructions, then clip or mount each 2FT bar to the underside of each tier as described above. The kit includes PP waterproof pads on each layer to protect the lights from water drips when you water plants above. Make sure those pads are in place before you run power.
Wiring and power setup
Barrina lights are plug-in, meaning no separate driver or hardwiring is needed. Every kit comes with at least one power cord that plugs straight into a standard 120V household outlet. The key wiring task for most people is linking multiple bars together using the included connectors.
Plug-in single bar setup
If you are only using one bar, connect the power cord to the end of the bar (there will be a male or female port at one or both ends, depending on the model) and plug it into the wall. That is it. The T8 manual describes this as plug-and-play, and it really is that simple for a single bar.
Daisy-chaining multiple bars
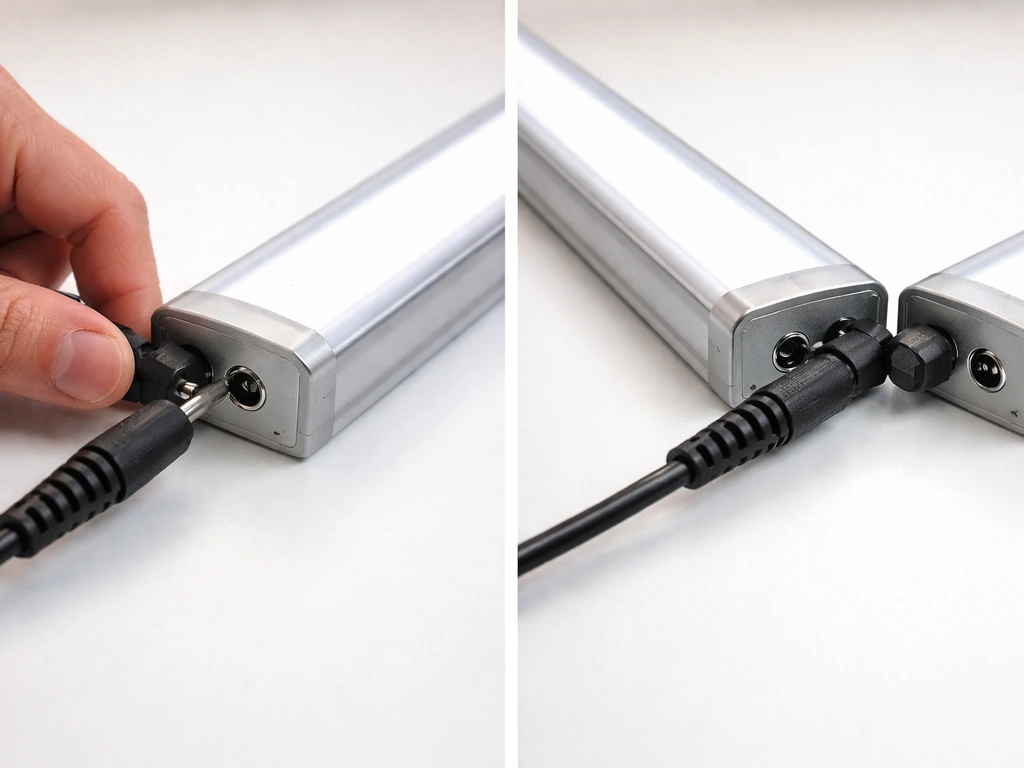
When you have a multi-pack, you link the bars in series using the provided linkable cords rather than plugging each bar into a separate outlet. The T8 uses a male-to-female connector system: the male end of one bar's cord plugs into the female port on the next bar. The TX72 works the same way, using its own provided linkable cords.
- Connect the power cord to the first bar in the chain.
- Run a linkable cord from the output port on bar 1 to the input port on bar 2.
- Repeat for bar 3 and bar 4 if needed. The TX18 and TX72 both support up to 4 bars in series maximum. Do not exceed this limit.
- The last bar in the chain has no outgoing connection. Leave that end port empty.
- Plug the single power cord from bar 1 into your outlet or timer.
Only use the linkable cords that came in the box. Third-party cables can have the wrong connector type or wrong voltage rating for your specific Barrina series, and mixing them is how you end up with flickering, no power, or a tripped breaker.
Cable management
Loose cables are a watering hazard and a tripping hazard. Use cable clips or zip ties to route cords along the shelf edge or tent frame. Keep connectors off the floor and away from standing water. Make sure the power cord has some slack at the plug end so the connection is not under tension, but do not let it dangle freely over your plants or growing medium. For the WF30 stand, route the connecting cords up the frame post on one side to keep them out of the way of the plant shelves.
First test: confirm the light is working
Before you put any plants under the lights, do a quick operational check. Plug in and turn on the light, then verify the following:
- All bars in the daisy chain light up, not just the first one. If one bar in the middle stays dark, that connecting cord is not fully seated. Unplug, push the connector in firmly until it clicks or seats flush, then re-test.
- The light output looks even from end to end on each bar. A dim section in the middle of one bar is a defect, not a setup issue.
- Hold your hand about 12 inches below the bar after 5 minutes of operation. You should feel mild warmth, not intense heat. Barrina bars run warm but should not be too hot to hold your hand near.
- For the OG09 and DC10 with built-in timers, run through the timer button to confirm the 4H/8H/12H settings cycle correctly before relying on them.
- Check coverage by moving your hand across the entire canopy area at plant height. There should be light reaching all corners, not just directly below the bars. If you see dark corners, you may need to adjust bar spacing or add another bar.
Set your light schedule and timer
Consistent light every day matters more than getting the schedule perfect on day one. The T8 manual specifically calls this out, and it is true across all Barrina models. Here is how to set up timing based on what you are growing.
| Plant type | Daily light hours | Timer method |
|---|---|---|
| Seedlings (most species) | 14 to 16 hours on | External mechanical or digital timer; or use OG09/DC10 built-in 12H cycle as a starting point |
| Leafy greens and herbs | 12 to 16 hours on | External timer set to 14H on / 10H off works well as a default |
| Fruiting vegetables (veg stage) | 16 to 18 hours on | External timer required for T8/TX bars |
| Fruiting vegetables (flowering) | 12 hours on / 12 hours off | Strict 12/12 cycle; use a reliable digital timer, not a mechanical one |
| Houseplants and tropicals | 10 to 14 hours on | OG09 built-in 12H cycle is convenient here |
| Succulents and cacti | 12 to 14 hours on | External timer; these plants do not need a dark period as strictly as fruiting plants |
For T8 and TX bar lights that do not have a built-in timer, <a data-article-id="413658E4-AA97-4012-97F2-3EFCC66A2292">plug the power cord into an external timer</a> (a basic 24-hour mechanical outlet timer costs around $8 to $12 and works fine). Set the on-time to start when your plants would naturally get morning light, and let it run for the recommended hours. The DC10 and OG09 have built-in timers that run a repeating on/off cycle automatically once activated, so no external timer is needed for those. The TR40 also has an integrated timer on the unit. For those models, just press the timer button to set your preferred duration and the light will repeat that cycle every 24 hours without any unplugging.
Troubleshooting common Barrina installation problems
Most issues people run into with Barrina bars after installation are fixable in under 5 minutes once you know what to look for.
Light does not turn on at all
- Check that the outlet has power (plug in a phone charger to confirm). A tripped breaker or dead outlet is the most common culprit.
- Check that the power cord is fully seated into the bar's port. Push it in firmly and try again.
- If using a timer, confirm the timer is set correctly and the current time on the timer dial or display matches your intended on-window.
- If none of the above works, try a different outlet on a different circuit. Barrina bars draw enough current in a daisy-chain that a weak or overloaded outlet can cause issues.
Flickering or intermittent light
- A loose linkable connector between two bars is almost always the cause. Unplug, remove and reseat each connection in the daisy chain one at a time, then retest.
- If you are chaining more than the supported number of bars (more than 4 for TX18 and TX72), remove the extra bars from the chain. Overloading a daisy chain causes voltage drops that show up as flickering.
- Do not use extension cords that are too thin (under 16 AWG for runs longer than 6 feet). A thin extension cord can cause a small voltage drop that makes LED bars flicker.
One bar in the chain is dark
- Reseat the connectors on both sides of the dark bar. This is almost always a connection issue, not a dead bar.
- Swap the connecting cord for a different one if you have a spare. Linkable cords can fail at the connector crimp.
- Test the dark bar by connecting it directly to the power cord as the only bar in the chain. If it lights up on its own, the problem is the connector or the cord, not the bar.
Uneven light coverage or dark patches under the grow area
- Bars spaced too far apart create gaps. Move them closer together or add a bar if your kit allows.
- A bar mounted too high (over 24 inches for most Barrina models) will have significant light falloff at the edges. Lower the bars.
- Check that bars are hanging level. A tilted bar concentrates light on one side.
Bars running too hot
- Barrina bars should feel warm but not painfully hot after 30 minutes of operation. If they are uncomfortably hot to touch, check that there is at least 1 inch of clearance around the bar for airflow.
- Do not mount bars flush against an enclosed surface with no air gap. Heat buildup shortens LED lifespan and can cause dimming.
- In a grow tent, make sure you have at least one fan moving air past the bars.
Plants stretching or burning despite correct height
- Stretching (etiolation) means the light is too far away or on too few hours. Lower the bars by 2 to 3 inches and extend the timer by 2 hours, then reassess after 5 days.
- Bleaching or brown leaf tips directly under the bar means it is too close. Raise by 3 to 4 inches and check again after a few days.
- If you have an OG09 or another model with dimmable output, try reducing brightness to 80% before raising height, since that preserves more even coverage.
Fine-tuning after the first few days
The initial setup gets you in the right ballpark, but expect to make small adjustments in the first week. Here is what to watch for and how to respond.
Check your plants after 3 to 4 days at the initial height setting. If seedlings are short and stocky with deep color, your height and timing are working. If they are tall and pale and leaning toward the light, bring the bars down 2 inches. If leaf edges are bleaching or curling upward, raise the bars 3 to 4 inches. For models with brightness control (OG09 has 5 levels; DC10 is dimmable), adjust intensity before changing height when possible. Intensity changes affect the whole canopy evenly, while height changes affect coverage area.
If you are running a multi-bar setup and some plants are thriving while others in the same area are struggling, the issue is almost always uneven bar spacing rather than total light output. Adjust the spacing so bars are distributed evenly across the canopy width rather than clustered toward one side. For a 4-bar T8 QL42 kit over a 4-foot-wide bench, space bars roughly 12 inches apart centered over the growing area.
After dialing in height and spacing, revisit your timer setting. Once your height and spacing look right, confirm your koscheal grow light instructions and fine-tune the schedule to match your plants’ daily light needs timer setting. Most growers start at 14 hours and adjust up or down by 2-hour increments based on plant response over 7 to 10 days. Do not change both height and timer duration at the same time, or you will not know which change actually helped. One variable at a time is the fastest way to get your setup dialed in.
If you are using bar-style lights from another brand alongside your Barrina setup, the same height and timing principles apply, though each brand's daisy-chain system is brand-specific. Barrina's linkable connectors are only compatible within their own product series, so do not mix connector cords between Barrina models or with other brands.
FAQ
Can I connect multiple Barrina LED grow light bars using extension cords or a power strip instead of the included linking cables?
Yes, but only if you use the exact Barrina linkable connectors that match your model line. Avoid using power strips or extension cords as a substitute for the included linking cords, because the connector type and internal wiring assumptions can be different by series. If you need more reach, route the included cable system to the nearest outlet position instead of mixing connectors.
What should I check first if my Barrina grow lights flicker or lose power after installation?
If your bars flicker or won’t turn on reliably, unplug everything and inspect the end ports and linked connectors for a fully seated connection. Also verify you are not mixing connector types between series, for example T8 linking cords with a TX or OG kit. A loose or incorrect connector is one of the most common causes of intermittent power.
Should I use a wall outlet timer with Barrina models that already have a built-in timer?
For non-timer Barrina bar models, use an external 24-hour outlet timer that switches the power, then set the on-time to align with when you want “morning” light, and keep the duration within the recommended range for your plants. If your kit has a built-in timer (DC10, OG09, TR40), do not use an external timer on top of it, since you can end up double-cycling the light schedule.
How do I protect the plugs and connectors from water when plants are being watered above the lights?
Keep connectors above the floor level of the grow area, and route cables so they are not exposed to direct water spray. For wet locations like stands or seedling stages, make sure any included waterproof pads are installed before running power. Never submerge connectors or leave them in puddles.
One side of my grow area looks worse than the other. Is that a height problem or a spacing problem?
If your setup uses a shelf or tent and some plants are dim while others are fine, the fix is usually bar layout, not overall intensity. Re-check that bars are evenly distributed across the full canopy width, and adjust spacing before you change height. Height affects coverage, but spacing affects uniformity across the whole bench.
How should I adjust height if my seedlings are either stretching or showing signs of light stress?
If you can see plants leaning toward the light, bring the bars down in small steps, about 2 inches at a time, then re-check after a few days. If you see bleaching or leaf edges curling upward, raise the bars about 3 to 4 inches. Try to change only one variable (height or timer duration) at a time so you can identify what improved or worsened results.
What’s the best way to fine-tune results without confusing what helped, height or timer changes?
Avoid changing both height and timer duration in the same round of adjustments. A practical approach is, set height first to get the canopy looking consistent, then tweak the daily hours in 2-hour increments over 7 to 10 days. That way, you can tell whether the response came from intensity changes due to height or from total daily light due to the timer.
How much cable slack should I leave, and where should I route cords to prevent damage?
Some Barrina models are plug-and-play for power, but you still need slack management. Route connecting cords along the frame or shelf edge, use cable clips or zip ties, and ensure the plug end is not under tension. Don’t leave connectors dangling over your growing medium because repeated movement can loosen connections.
When should I adjust brightness levels (if available) versus adjusting height?
If your model doesn’t have a built-in brightness control, you should treat intensity as fixed and adjust only height and schedule. For models that are dimmable (DC10) or have multiple brightness levels (OG09), adjust intensity first when you need a gentler change, since it affects the entire canopy evenly compared with height changes.
Can I daisy-chain Barrina lights with bars from another brand in the same setup?
No, Barrina linking connectors are intended for specific series. If you want to combine brands, the wiring approach may not match the compatibility requirements, and the daisy-chain may not be safe or stable. Use the Barrina lights as their own chain, then run the other brand’s lights on its own compatible system.
Next Article
Purple Reign Grow Light Instructions: Setup Guide
Step-by-step Purple Reign grow light setup: model check, mounting, wiring, height, dimming schedule, and troubleshooting