You can build a functional grow light reflector today using a piece of white-painted hardboard, aluminum flashing, or reflective Mylar film stretched over a simple frame, and it will genuinely push more usable light onto your plants. If you want to go beyond reflecting more of your current light, you can also follow guides on how to make a grow light for plants from scratch or upgrade an existing setup. The core job of a reflector is to grab photons that would otherwise scatter sideways or upward and redirect them down to the canopy. That means more PPFD (the actual light plants use) without buying a bigger or more powerful fixture.
How to Make a Grow Light Reflector Step by Step

Marcus Tillman
13 May 2026
What a grow light reflector does (and when you actually need one)
Every grow light emits light in all directions, not just downward. Without a reflector, a meaningful percentage of that output hits your walls, ceiling, or the sides of the fixture housing and gets absorbed as heat rather than reaching leaves. A reflector captures that stray light and redirects it toward the canopy, improving what growers call 'usable PPFD', the photosynthetically active photon flux density that your plants can actually convert into growth. Think of it as squeezing more yield from the same wattage you're already paying for.
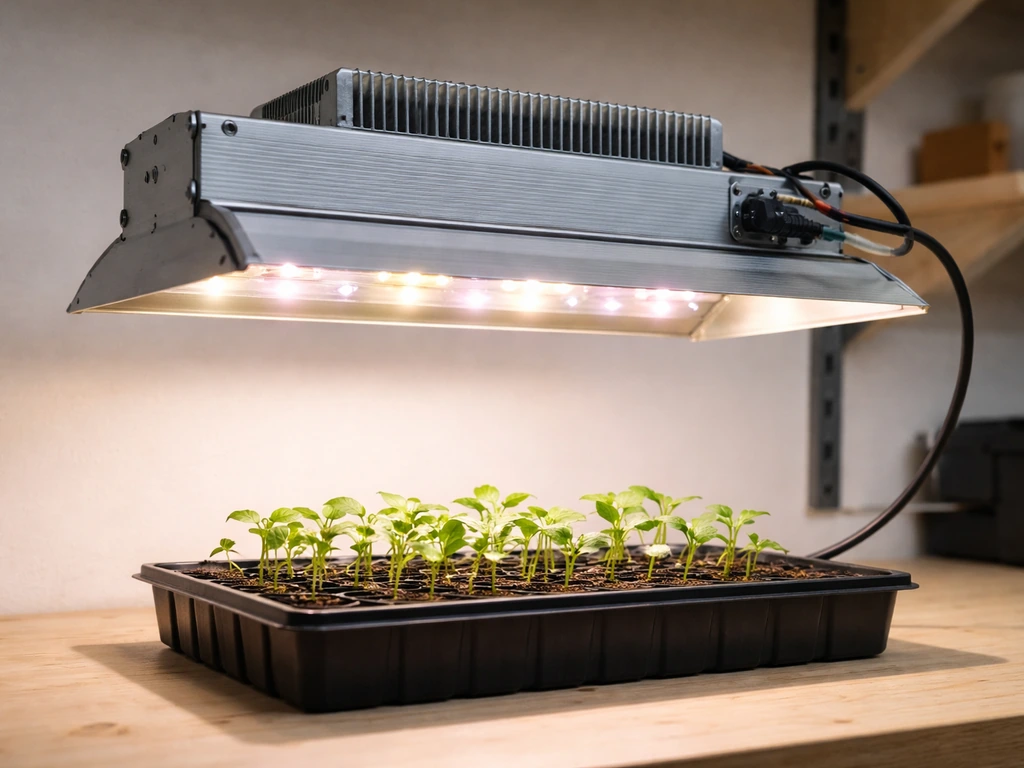
You need a reflector most when you're growing in an open space (a shelf, a closet without reflective lining, or a room corner) rather than inside a grow tent. A properly designed white or silver tent already bounces light back effectively, and testing consistently shows that reflective tent walls can meaningfully boost average canopy PPFD compared to bare walls. If you're in a tent, your highest-impact move is keeping the tent walls clean and taut. If you're not in a tent, running a bare LED bar or panel over a seedling tray, a propagation shelf, or a DIY grow cabinet, a reflector can add real, measurable intensity without touching your power bill. If you want even more containment and efficiency, you can also build a light trap for a grow box that prevents stray light from escaping and boosts usable output inside the enclosure.
A reflector also matters when your light source is a single-point or bar-style fixture with a wide, inefficient spread. If you notice the center of your canopy getting bright while the edges stay dim, a shaped reflector that narrows and redirects the beam can flatten that gradient considerably. Uniform PPFD across the canopy matters because plants at the edges of an uneven field grow slower than plants in the hot center, leaving you with uneven harvests.
Choosing the right reflector material and design
Material choice is the single biggest variable in DIY reflector performance. Here's how the common options stack up:
| Material | Reflectivity | Heat tolerance | Cost | Best for |
|---|---|---|---|---|
| Mylar film (dedicated grow Mylar) | 90–95% | Up to 302°F (150°C) | Very low | Frames, tent walls, cabinet liners |
| Orca Grow Film | ~94% (full visible spectrum) | Good for normal grow-room temps | Moderate | Premium DIY builds, tents, larger setups |
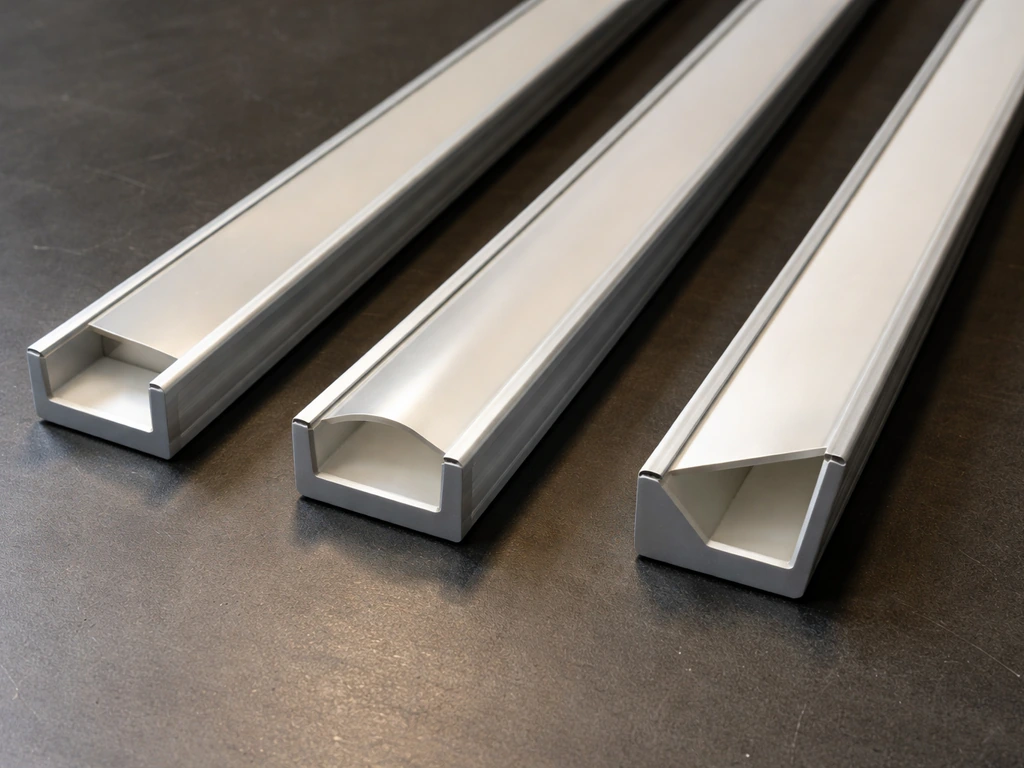
| Aluminum flashing (bare) | ~70–80% typical | Very high | Low | Shaped reflector hoods, curved forms |
| Protected aluminum sheet/mirror | ~85% avg (400–700 nm) | High | Moderate–high | Precision beam control, COB fixtures |
| Flat white paint on hardboard/foam | ~80–85% | Medium | Very low | Side walls, diffuse supplemental fill |
| Household aluminum foil | Variable, often 60–70% usable | Medium | Near-zero | Temporary only — not recommended long-term |
Mylar and Orca-style films are the practical sweet spot for most DIY builds. They're flexible, easy to cut and attach, and perform as well as or better than bare aluminum when it comes to visible-spectrum reflectivity. Bare aluminum foil is tempting because it's free, but the crinkled surface scatters light unpredictably and actual usable reflectance drops significantly compared to smooth, purpose-made films. Skip the foil for anything permanent.
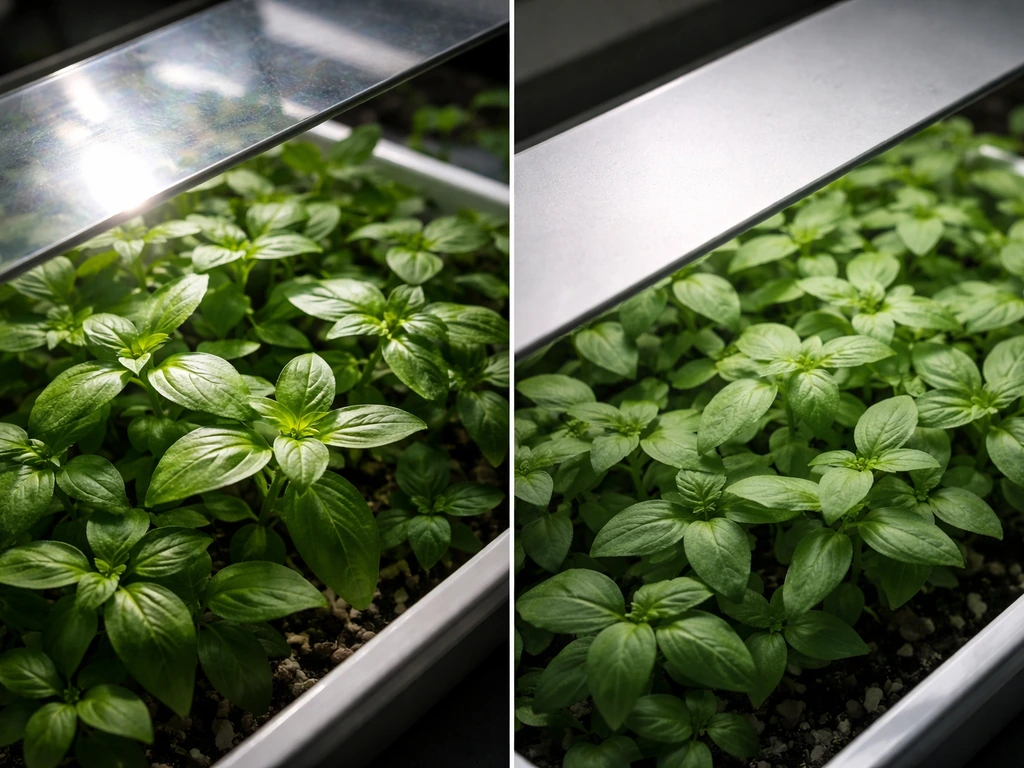
Surface finish matters as much as reflectivity percentage. Glossy or mirror-like surfaces concentrate light into hot spots, bright patches that can bleach leaves directly below them. Matte or slightly textured reflective surfaces (like Mylar or flat white) diffuse light more evenly, which is almost always what you want for plants. Reserve mirror-smooth surfaces only if you're specifically trying to focus a narrow beam from a COB LED or HID point source onto a small, defined area.
Matching reflector design to your light type
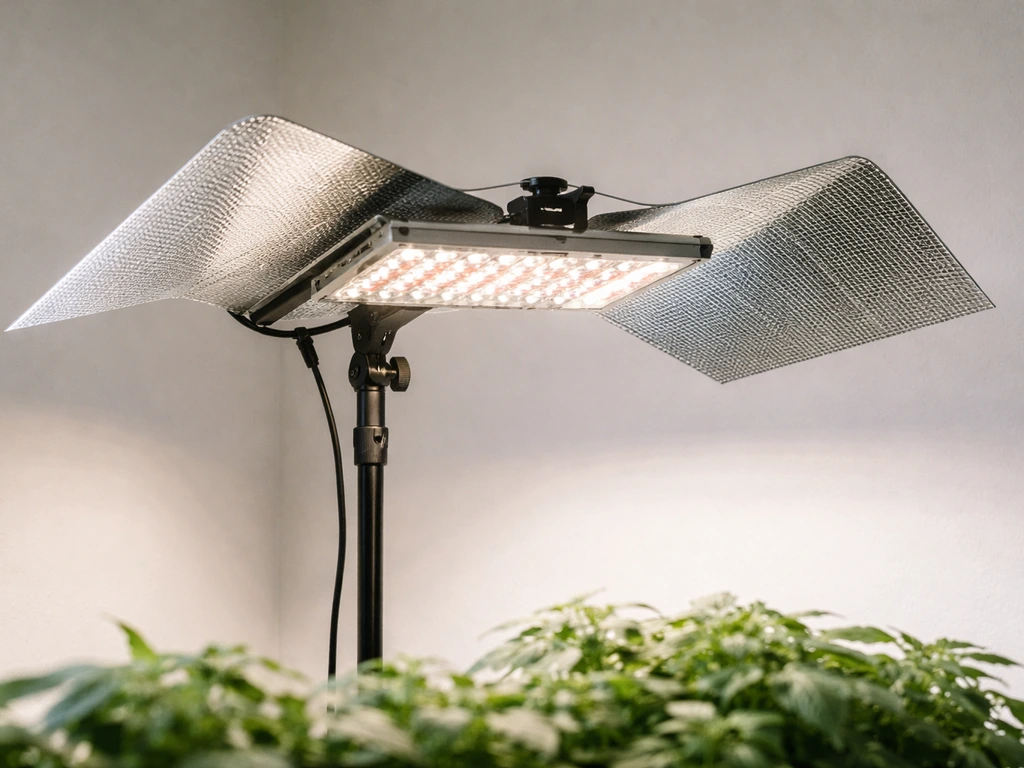
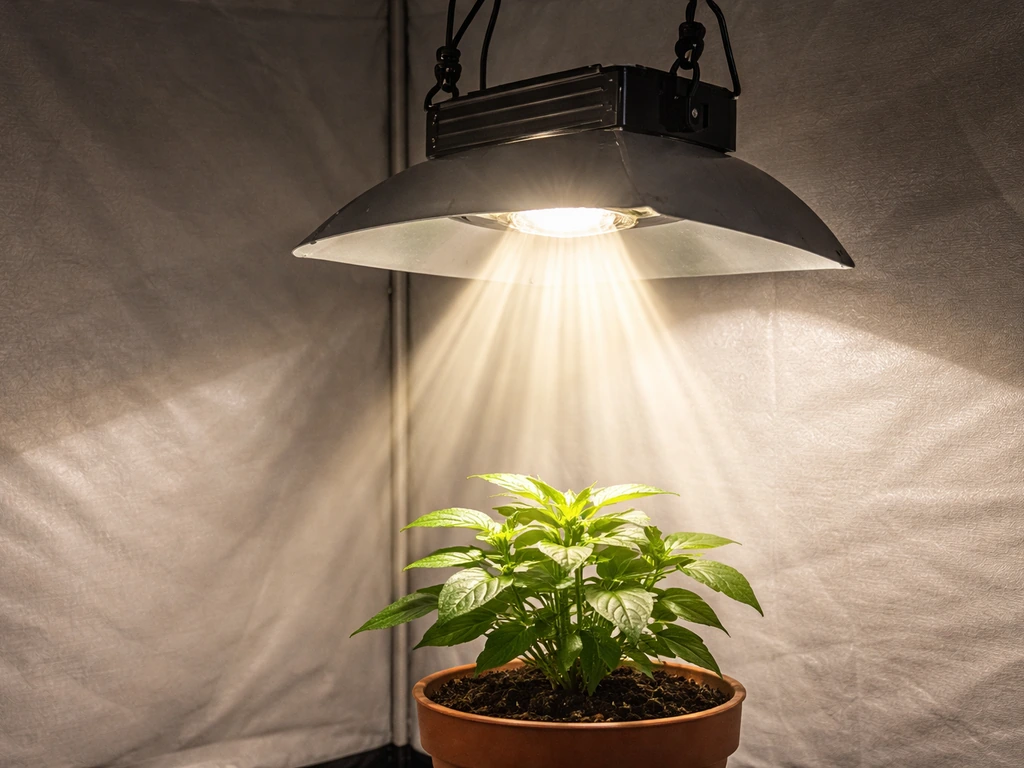
LED bars and strip lights benefit from a simple flat or gently curved reflector running along their length, think of a shallow trough shape that catches side-emitted light and directs it downward. A flat wing on each side of the bar, angled at about 45 degrees outward and down, works well and is easy to build. LED panels with built-in reflector cups around each diode need less help from an external reflector; focus instead on side walls to keep light from escaping the growing area. Single COB or point-source LEDs benefit most from a blank" rel="noopener noreferrer">parabolic or deep-dish reflector that controls beam spread precisely, similar to how a parabolic aluminized reflector (PAR) works in lighting optics. If you want to go beyond a reflector and build the whole COB-based grow light too, use these reflector and beam-control steps as part of a complete COB build how to build a cob led grow light. If you're building a T5 or fluorescent-based grow light from scratch, a flat-white painted backing immediately behind the tubes is the most effective and simplest approach.
Tools and parts you'll need
You don't need much. Here's a practical checklist that covers a standard DIY wing-style or trough-style reflector for an LED bar or small panel fixture:
- Reflective Mylar film roll or sheet (4 mil thickness is durable; buy at least 10–20% more than your planned dimensions to allow for trimming)
- Aluminum flashing roll (6–8 inches wide, from any hardware store) for shaped/curved sections if desired
- Rigid backing board: foam-core board, thin plywood (1/4 inch), or coroplast (corrugated plastic sheet) — white-painted if using as a diffuse surface
- High-temp RTV silicone adhesive (rated to at least 260°C / 500°F — look for UL-rated flame-retardant versions)
- Double-sided foam tape (high-temp rated if attaching Mylar near heat sources)
- Metal-to-metal pop rivets or sheet metal screws if joining aluminum pieces
- Aluminum HVAC tape (foil tape) for seams and edges — not standard duct tape, which degrades with heat
- Scissors and a utility knife with fresh blades
- Metal ruler and a Sharpie for marking cuts
- Drill with small bit for mounting holes
- Wire or chain with S-hooks for hanging (rated to at least 5 lbs more than your reflector weight)
- Zip ties for cable management if routing wiring near the reflector
- Quantum PAR meter (or borrow one) for before/after PPFD measurements — a lux meter will not give you accurate plant-relevant readings
Step-by-step: building your reflector
This build is for a wing-style reflector designed to mount above or alongside an LED bar or small panel fixture. It's the most versatile and easiest shape to construct, and it works well in cabinets, shelves, closets, and open-frame setups. Once your reflector is mounted, you can add the grow lights to a plant stand frame and build a compact setup for seedlings. The same principles apply if you scale it up or adapt the geometry for a different light type. A DIY table top grow light can use the same reflector ideas to improve usable light on seedlings without changing the fixture.
- Measure your fixture length and width. Your reflector wings should extend at least as long as the fixture (match length exactly or go 1–2 inches longer on each end). Each wing should be 4–8 inches wide for a bar-style light. For a square panel, make four equal-width side flanges.
- Cut your backing material (foam-core, plywood, or coroplast) to the wing dimensions. Two panels per bar, one for each side. For a 24-inch LED bar, cut two panels roughly 24 inches x 6 inches.
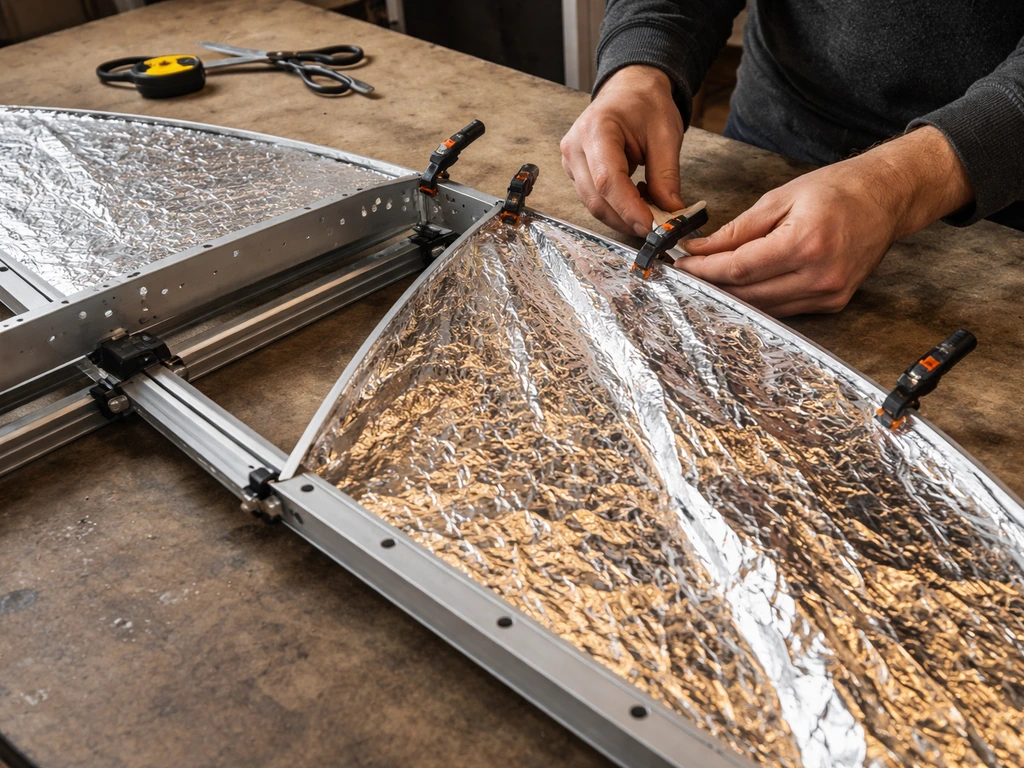
- If using Mylar film as the reflective surface, cut it slightly larger than each backing panel — about half an inch of overhang on all sides. Apply the high-temp RTV silicone or double-sided foam tape to the backing surface in stripes, then press the Mylar on smoothly, working from one end to avoid wrinkles. Fold and secure the overlap edges around the back with foil tape. Wrinkles scatter light and reduce effective reflectance, so take your time here.
- If using aluminum flashing directly (no Mylar), cut the flashing to the same dimensions with tin snips. Wear gloves — the edges are sharp. Smooth any burrs with a fine file or sandpaper.
- Score and bend each wing panel to your desired angle. A 45-degree outward angle from vertical gives a good balance between directing light downward and capturing wide side-scatter. You can adjust this to 30 degrees for a tighter, more focused beam or 60 degrees for broader spread. Score the bend line lightly on the non-reflective side before bending to get a clean fold.
- Attach the two wings to a central spine. The spine can be a strip of the same backing material, an aluminum bar, or even a piece of 1-inch PVC. The fixture itself will often serve as the spine if you mount the wings directly to the fixture housing — just ensure any attachment doesn't block cooling vents or electrical components.
- Create mounting points: drill two holes at each end of the reflector assembly (through a non-reflective reinforcing strip, not through the reflective surface itself if avoidable). Thread wire, chain, or zip ties through these points. The reflector should hang level and stable at the same height as the fixture or just above it.
- For a canopy target of 2 feet x 2 feet at 18–24 inches hanging height, a 24-inch bar with 5-inch wings at 45 degrees will cover the area reasonably well. Scale up proportionally: a 48-inch bar with 6-inch wings covers roughly a 3-foot x 4-foot canopy at similar hanging height. A simple rule of thumb from fixture manufacturers: 3 feet of hanging height roughly corresponds to a 3-foot x 3-foot spread for a bare bar fixture, and a reflector can increase that spread or improve its uniformity without raising the light.
- Do a dry-hang test before finalizing everything. Hang the assembly, turn on the light, and check for obvious glare angles, shadow gaps at the canopy edges, and whether the reflector wings are stable and not vibrating from any fans. Adjust wing angles as needed before making anything permanent.
Installation and placement: distance, angle, and avoiding hot spots
Getting the reflector position right matters as much as building it correctly. Start with the fixture at the manufacturer's recommended hanging distance from the canopy, which for most LED bars and panels is 12–24 inches for vegetative growth and 18–30 inches for seedlings. Then refine from there using actual PPFD readings, not guesswork. If you don't have a PAR meter, measure canopy distance carefully and look for visual signs of stress within 3–5 days of any change.
To check coverage, use a quantum PAR meter at canopy level and take readings across a minimum 3x3 grid of points (ideally 5x5) spread evenly across your growing area. Average those readings and look at the difference between the highest and lowest points. A well-designed reflector setup should reduce that gap significantly, a good target for vegetative growth is a canopy PPFD range where your maximum reading doesn't exceed your minimum by more than 30–40%. Hot spots show up as dramatically elevated single-point readings. If your center reads 900 µmol/m²/s and your corners read 200 µmol/m²/s, something is off with your geometry or material.
For wing angle adjustments: tilting the wings more steeply (toward 60 degrees from vertical) widens the spread and helps corners but reduces center intensity. Tilting them flatter (toward 30 degrees) concentrates light more centrally. Start at 45 degrees, map your PPFD, and adjust from there. Small changes (5–10 degrees) make a measurable difference. If you're getting glare on young seedlings or the light seems uncomfortably direct, the reflector surface is likely too mirror-smooth, switch to a matte-finish Mylar or apply a light diffusing film.
Airflow is a critical installation factor that's easy to overlook. The reflector wings should not block intake or exhaust vents in your grow space, and they should not trap heat against the fixture body. Leave at least 2–3 inches of clearance between the top of the reflector assembly and any ceiling or mounted fans. If your fixture has a built-in fan or cooling fins, make absolutely sure the wings do not obstruct airflow to those components. A reflector that improves light but raises canopy temperature by trapping heat is a net negative.
Finishing and safety checks
Before you leave the reflector running unattended, go through this checklist. It only takes a few minutes and it's worth doing every time you modify or reinstall the setup.
- Heat check: Run the light for 30 minutes, then carefully (use the back of your hand, not your fingers) check the temperature of the reflector surface nearest the fixture. It should be warm but not hot — if it's too hot to hold your hand near for 5 seconds, you have a heat concentration problem. Reposition the reflector to add more clearance from the bulb/driver or add ventilation.
- Fire-safe material check: Confirm your Mylar or reflective film is not in direct contact with any part of the fixture that gets significantly hot. Mylar handles up to 302°F (150°C), so as long as your LED fixture doesn't have exposed components exceeding that — which most modern LEDs don't — you're fine. Keep all reflective film away from driver boards and wiring terminals.
- Wiring and electrical clearance: The reflector must not compress, pinch, or contact any wiring. Route all cables through designated cable management (zip ties to the spine or hanging hardware), never draped over the reflective surface. If you drilled into any metal components to mount the reflector, make sure no sharp edges are near wire insulation.
- Grounding: If any part of your reflector is metal (aluminum flashing, aluminum bar spine), and it's within reach of live wiring in an accidental scenario, attach a grounding wire from that metal component to your grow light's chassis ground or to a known earth ground. Don't skip this on metal builds.
- Mounting stability: Give the hanging assembly a firm tug in all directions. It should not shift more than a half inch in any direction. Chains with S-hooks are more secure than single strings. Use locking S-hooks or crimp the hooks closed with pliers if your setup is above seedlings or valuable plants.
- Reflective surface cleanliness: Dust and water spots reduce reflectance noticeably. Wipe the reflective surface with a clean, dry microfiber cloth before first use. Going forward, wipe it down monthly — even a thin layer of dust degrades performance. For stubborn spots on Mylar, use a lightly damp cloth and let it dry before running the light.
Troubleshooting performance: weak spread, glare, hot spots, and uneven growth
If things aren't working the way you expected after installation, here's how to diagnose and fix the most common problems:
Weak overall light spread or low edge PPFD
If your canopy edges are significantly dimmer than the center, your wings are either too narrow, angled too steeply (too close to vertical), or your reflective material has low efficiency. Try widening the wings by adding an extension strip, or open the angle outward by 10–15 degrees. Also check whether the Mylar surface is wrinkled or dirty, even moderate wrinkling can scatter light ineffectively. If you're already using good Mylar and the spread is still poor, the issue may be the fixture itself: a bare LED panel with tight individual reflector cups isn't going to benefit as much from side wings as a bare-emitter bar or strip.
Hot spots and leaf bleaching
Hot spots almost always come from a glossy or mirror-like reflective surface creating focused reflection. Switch to matte-finish Mylar or add a thin diffusing layer. You can also try raising the fixture 2–4 inches, increasing distance softens intensity quickly. If you see bleaching or light burn symptoms (yellowing or pale patches at the tops of plants directly under the brightest point), treat it as an excessive PPFD problem: back off the fixture height or reduce output, and the symptoms should ease within a few days. A well-mapped 5x5 PPFD grid will show you exactly where the hot spot is concentrated so you can address it precisely.
Uneven growth across the canopy
If plants on one side of the tray grow faster or stretch more than the other side, your reflector is asymmetric or angled unevenly. Hang a small level on the fixture and check that the reflector wings are at equal angles on both sides. Also rotate your plant trays 180 degrees every few days as a quick fix while you fine-tune the build. Asymmetric PPFD gradients are surprisingly common in DIY builds and a rotation schedule is a practical hedge.
Glare causing you to work uncomfortably near the setup
If the reflector is bouncing light into your eyes when you work in the grow space, angle the wings very slightly inward (toward the center line of the fixture) rather than straight out. Adding a small downward lip (about an inch, bent at 90 degrees) to the outer edge of each wing acts as a glare shield without meaningfully reducing canopy PPFD.
When to upgrade rather than iterate
There's a point where tweaking a DIY reflector hits diminishing returns. If you've optimized material, angle, and height but your PPFD map still shows a uniformity ratio worse than 1.5:1 (highest point to lowest point), the limiting factor is probably the fixture itself rather than the reflector. A single-point LED or a low-quality LED bar with a poor beam pattern will not produce uniform coverage regardless of how good your reflector is. At that stage, the smarter investment is a better fixture. If you're thinking about building your own light entirely rather than just improving an existing one, that's a separate but related project worth exploring.
Also worth noting: if you're running a COB LED and want precise beam control, a flat wing reflector isn't the right tool. A shaped parabolic reflector matched to the COB's emission profile will outperform a flat wing significantly in that scenario, and that's a more advanced build with more material precision required. For most growers running off-the-shelf LED bars, panels, or T5-style fixtures over seedlings and vegetative plants, the simple wing or trough design described here is genuinely all you need.
FAQ
Will a reflector increase growth if I already have reflective walls or a grow tent?
No, not always. A reflector changes the direction of light, but if your fixture already has a good beam spread (for example, panel-style designs with cups around each diode) you might see a smaller gain. The fast way to decide is to do a PPFD grid test before and after, and compare the uniformity (highest vs lowest). If uniformity barely improves, the reflector is doing less for your specific fixture.
Which reflector surface finish gives the most even light, and why does mirror-smooth reflectivity cause problems?
Start with matte or slightly textured films (Mylar, Orca-style) and avoid mirror-smooth surfaces unless you are intentionally focusing a narrow beam. Also, keep the reflective layer clean and unwrinkled, because creases and dust create random scattering that can both reduce usable PPFD and create glare or localized hot spots.
How can I tell if my reflector is working without a PAR meter?
If you do not have a quantum PAR meter, you can still do a practical check. Watch for stress after a small change (3 to 5 days), look for edge dimness vs center bleaching, and keep adjustments incremental. If the center suddenly causes bleaching, raise the fixture or reduce output immediately, since that is usually an intensity problem rather than a coverage problem.
What wing angle changes should I make to fix dim corners versus a bright center?
You can use the “angle as a tool” approach. If corners are dim, increase the wing angle so it throws more light outward (steeper toward about 60 degrees from vertical). If the center is too bright and corners are only mildly low, tilt flatter toward about 30 degrees from vertical. Plan to adjust in 5 to 10 degree increments and then re-check coverage.
Can I use diffusion to reduce hot spots, and will it lower overall PPFD too much?
Yes, for many DIY setups a simple diffusing layer helps reduce hot spots. For example, place a thin matte-diffuse film in front of the reflective surface or use a matte-finish reflector material instead of glossy/mirror surfaces. This typically improves uniformity, but it can reduce peak PPFD slightly, so re-map after changes if you are targeting a specific canopy range.
What’s the safest way to mount a reflector without creating a heat buildup problem?
It depends on your fixture temperature management. A reflector can raise canopy-to-fixture temperatures if it blocks airflow or traps heat against the housing. Keep 2 to 3 inches of clearance from the ceiling or mounted fans, and confirm that any built-in fans or cooling fins still move air freely. If canopy temperatures rise and plants wilt during lights-on, heat is likely offsetting the light gain.
What should I do if I’ve optimized the reflector but PPFD uniformity is still poor?
Uniformity targets are easier if you separate “coverage” from “intensity.” If your PPFD map shows a large max-to-min gap even after optimizing height and angles, the limiting factor is often the fixture beam pattern. As a rule of thumb from the article’s diagnostic approach, if you cannot get max to min within about 1.5:1, upgrading the fixture optics often beats further reflector tinkering.
My plants grow unevenly left vs right, how do I diagnose whether it’s the reflector or something else?
If one side of the canopy grows faster, treat it like a geometry problem first. Verify the reflector wings are symmetric, confirm the fixture is level, and check that the reflector assembly is not skewed during mounting. As a quick practical hedge, rotate trays 180 degrees every few days while you fine-tune, because it helps average out directional gradients.
How can I reduce glare from a grow light reflector without losing too much canopy light?
If it’s an eyes-and-glare issue, you can add a small glare shield without fully abandoning the reflector benefit. Angle wings slightly inward (toward the center line of the fixture) and consider adding a small downward lip on the outer edge of each wing (about an inch, bent 90 degrees). Then re-check canopy uniformity to ensure you did not create a new edge dimming pattern.
Should I use the same wing-style reflector for a COB or point-source LED?
Wings and trough reflectors are usually for LED bar or panel shapes. If you are using a true point source like a single COB, a flat wing tends to be inefficient because it cannot control the beam precisely. In that case, a parabolic or deep-dish reflector matched to the COB’s emission profile is a better match than a simple flat reflector design.
Next Article
How to Make a Grow Light for Plants Step by Step
Step-by-step guide to DIY a grow light: parts, wiring safety, sizing for seedlings to flowering, placement, testing and