Building a COB LED grow light from scratch is one of the most rewarding DIY projects you can do as an indoor grower. If you also want a complete, practical walkthrough of how to make a grow light for plants, use the same parts and planning approach before you start wiring. Done right, you end up with a high-efficiency, full-spectrum light that outperforms most budget fixtures, lasts for years, and costs a fraction of a commercial unit.
How to Build a COB LED Grow Light Step by Step

Marcus Tillman
18 Apr 2026
The short version: pick your COBs for the right spectrum, match them to a constant-current driver, mount them on a properly sized heatsink with thermal paste, wire everything safely, and hang the finished light at the right distance for your plants. If you want a true T5-style setup, the same core wiring, driver matching, heatsinking, and spacing principles apply, just adapted to T5 bulbs how to build a t5 grow light.
The rest of this guide walks through every step in detail.
Choosing the right COB LEDs for plant growth
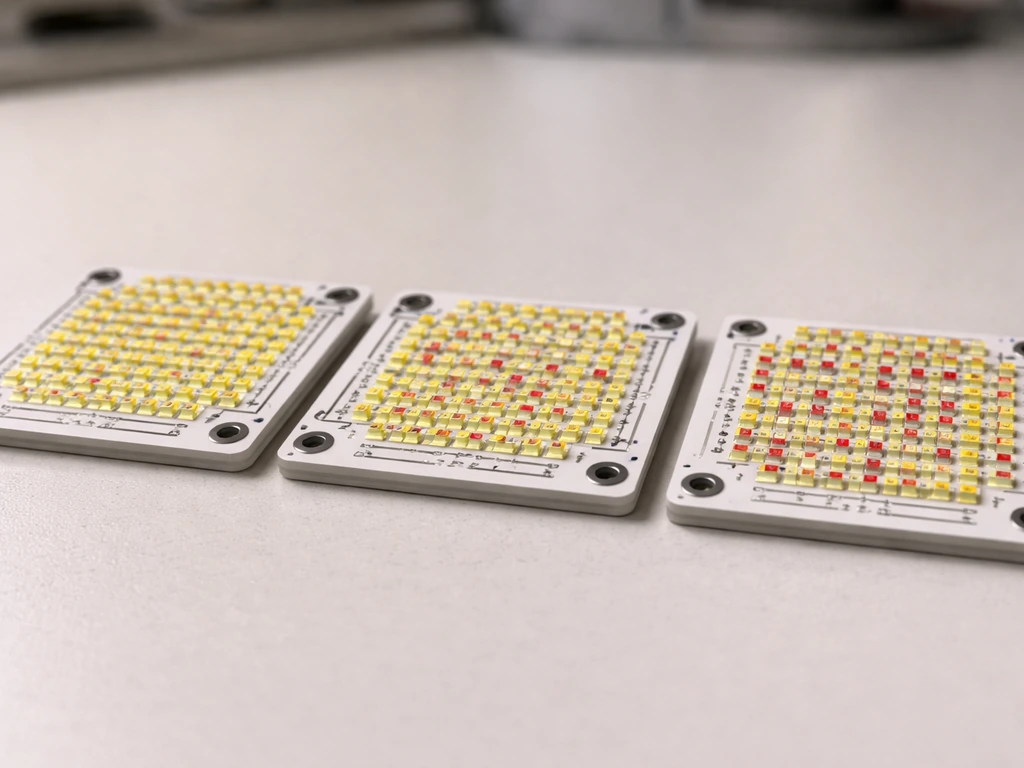
COB (chip-on-board) LEDs pack dozens or hundreds of individual diodes onto a single ceramic substrate. For plants, this matters because you get a dense, even light source rather than a cluster of separate diodes pointing in slightly different directions. The two things you need to care about most when choosing COBs are spectrum and efficacy.
For spectrum, plants respond most strongly to blue light around 450-460 nm (drives compact, vegetative growth) and red light around 660 nm (drives photosynthesis and flowering). Far-red at 730-735 nm triggers the Emerson enhancement effect, extending the effective photosynthetic response and influencing flowering timing. Research measuring photosynthetic photon efficacy (µmol of photons produced per joule of electricity) found 660 nm red LEDs to be the most efficient at 3. 84 µmol/J, followed by 730 nm far-red at 3.
39 µmol/J, with 450 nm blue at 2. 38 µmol/J and broadband 5700 K white at 2. 31 µmol/J. This is why most serious COB builds use a white COB as the backbone (covering the full visible spectrum in one emitter) and add supplemental red or far-red if you want to push flowering.
For a beginner build, a high-quality white COB in the 3000-4000 K range is the simplest and most versatile choice. It covers blue, green, and red in one chip, works well across vegetative and flowering stages, and is cheap to source. If you want to go further, a 3500 K or 4000 K white COB paired with dedicated 660 nm red COBs gives you a meaningful boost during flower without overcomplicating the build. Adding 730-735 nm far-red chips is optional but worthwhile if you're growing anything that benefits from precise photoperiod control, like cannabis or tomatoes.
On binning and flux: COB manufacturers sort (bin) their chips by light output and color. Higher bin = more light per watt, which directly affects how well your build performs. Brands like Cree, Luminus, Samsung, and Citizen are the ones most growers trust. The Citizen CLU048 series, Cree CXB3590, and Luminus CXM-32 are popular choices that are well-documented in the DIY growing community. Avoid unbranded no-name COBs from unknown suppliers: the bin data is unreliable, and you won't know what spectrum you're actually getting.
Parts list and specs
Here's everything you need for a functional single-COB or multi-COB build. I'll give you specific numbers so you're not guessing.
| Component | What to look for | Budget estimate (per unit, 2026) |
|---|---|---|
| COB LED (e.g., Citizen CLU048-1212) | 3000-4000 K white, 80+ CRI, rated 50-100W, check Vf and If specs | $8-$25 |
| Constant-current LED driver | Match Vf range of COB; adjustable output preferred; HLG, Meanwell, or Inventronics brands | $20-$55 |
| Aluminum heatsink | 1.5-2.5°C/W thermal resistance or lower; fin-style recommended; sized to COB wattage | $10-$30 |
| Thermal interface material (TIM) | Thermal paste (e.g., Arctic MX-4) or graphite pad; avoid cheap white paste | $5-$10 |
| Mounting hardware | M3 or M4 stainless screws, star washers, COB holder/bracket specific to your COB model | $3-$8 |
| Optics (optional) | Narrow (60°) or wide (90-120°) lens reflector to shape beam; match to COB footprint | $2-$8 each |
| Wiring and connectors | 18-20 AWG stranded silicone wire; Wago 221 or lever connectors; ferrules if using stranded to terminal | $5-$15 |
| Enclosure or frame | Aluminum channel, angle bracket, or project box for driver housing; wire loom for cable management | $5-$20 |
| Power cord and plug | Grounded 3-prong; rated for driver input wattage with margin | $3-$8 |
Driver selection is the part most beginners get wrong. Your driver must be a constant-current type, not constant-voltage. Look at your COB's datasheet for the forward voltage (Vf) at your target current (If). For example, a Citizen CLU048-1212 run at 1050 mA has a Vf of roughly 36V. You need a driver whose output voltage range includes 36V and whose output current matches 1050 mA. Meanwell HLG series drivers are the most popular choice: the HLG-60H-36A, for instance, is adjustable and compatible with a wide range of COBs in that voltage range. Always buy a driver rated for at least 20% more wattage than your planned COB load so it runs cool and lasts longer.
Heat management and mounting design
Heat is the number one killer of COB LEDs. A chip running too hot drops in efficiency and fails early. The goal is to keep your COB junction temperature below 85°C, ideally closer to 60-70°C under normal running conditions. You control this through heatsink size and airflow.
Heatsink sizing follows a simple rule: match the heatsink's thermal resistance (°C/W) to your power level. For a 50W COB with a 1°C/W heatsink in a 25°C room, you'd expect roughly a 50°C rise at the base, putting junction temp around 60-65°C after accounting for the thermal interface. For passive cooling (no fan), you generally need a heatsink rated 1.5°C/W or lower for COBs above 30W. For active cooling (adding a 12V PC fan), you can use a smaller heatsink since the airflow drops thermal resistance significantly.
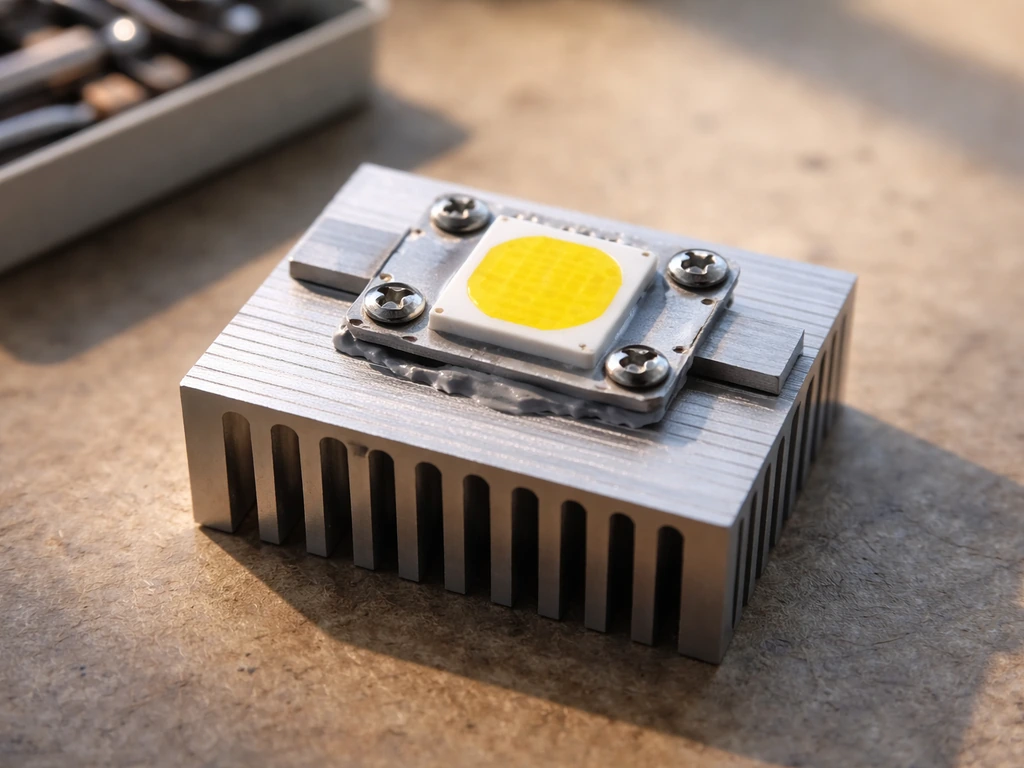
Mounting the COB correctly matters as much as heatsink size. Clean both surfaces (COB back and heatsink contact area) with isopropyl alcohol before applying thermal paste. Use a pea-sized amount of paste in the center of the COB and press it down evenly. Intel recommends applying roughly a pea-sized amount of thermal paste and securing the cooler in an even pattern to ensure consistent pressure. Tighten mounting screws in a star pattern, the same way you'd torque a cylinder head, to get even pressure and a thin, consistent paste layer. Uneven mounting is a common beginner mistake that leaves air gaps and tanks thermal performance.
For multi-COB builds (2, 4, or more chips), spacing matters. Give each COB its own heatsink section or use a large shared aluminum plate. A common approach is to space COBs 6-10 inches apart on a 1/8-inch aluminum channel or sheet, which distributes heat and creates more even canopy coverage below. If you add a 120mm PC fan blowing across the heatsinks, you can run COBs harder and use less heatsink material overall.
Wiring, assembly, and safety checks
This section assumes you're comfortable handling low-voltage DC wiring. The driver's DC output side (going to your COBs) is low voltage (typically 30-60V DC) and relatively safe to handle when the driver is unplugged. The AC input side (120V or 240V from your wall outlet) is where you need to be careful. Always wire the AC side first, verify connections are tight and insulated, and don't touch live terminals.
- Mount your COB(s) to the heatsink with thermal paste and screws before doing any wiring. Get the physical build done first.
- Mount the driver separately, either in an enclosure or secured to a non-conductive surface away from direct heat. Drivers have their own heat output and need airflow.
- Wire the AC input: connect Line (black/brown), Neutral (white/blue), and Ground (green/yellow) to the driver's L, N, and PE terminals. Use ferrules on stranded wire ends before inserting into terminals.
- Wire the DC output: connect the driver's positive (+) output terminal to your COB's positive lead (anode), and negative (-) to the COB's negative (cathode). For multiple COBs, wire them in series if their combined Vf falls within the driver's output range, or parallel if you're using separate driver channels.
- Use 18-20 AWG silicone wire for the DC runs. Silicone insulation handles heat better than PVC if wires run near heatsinks.
- Secure all connections with Wago lever connectors or properly crimped ring terminals. No bare wire ends taped with electrical tape.
- Before first power-on, double-check: no AC wires touching DC wires, all ground connections solid, no exposed conductor near any metal surface, and driver output voltage range matches your COB Vf.
- Power on with the COB pointed away from you and check for any smell of burning, flickering, or visible arcing. If anything seems off, cut power immediately.
A dimmer or potentiometer on the driver is a worthwhile addition if your driver supports it (most HLG series do via the CTRL or DIM pin). This lets you reduce output during seedling stages without changing distance, which gives you much finer control over your light intensity throughout the grow.
Calibrating brightness: distance, coverage, and intensity
Once your light is built and working, you need to figure out how high to hang it and how much output to run. There's no single correct answer because it depends on your COB's wattage, your plant type, and your grow space. But there are solid starting points.
Light intensity follows the inverse square law: double the distance, quarter the intensity. A 50W COB at 18 inches might deliver 400-500 µmol/m²/s at canopy level, which is solid for vegetative growth. Raise it to 30 inches and you're down to roughly 100-150 µmol/m²/s, which works for seedlings or low-light houseplants. This is why having a dimmable driver is so useful: you can keep distance consistent and just reduce output for sensitive stages.
| Growth stage | Target PPFD (µmol/m²/s) | Starting distance (50W COB) | Driver output |
|---|---|---|---|
| Seedlings / germination | 100-200 | 24-30 inches | 30-50% |
| Vegetative growth | 300-600 | 16-22 inches | 60-80% |
| Flowering / fruiting | 600-900+ | 12-18 inches | 80-100% |
| Low-light houseplants | 50-150 | 24-36 inches | 20-40% |
If you want to get precise, a PAR meter (quantum sensor) is the right tool. A decent apogee or LightScout quantum meter reads PAR in µmol/m²/s and takes the guesswork out of placement. Without a meter, use the distance guidelines above as starting points and watch your plants: upward leaf curl, bleaching, or tips turning brown usually means too much intensity or too close; stretching, pale color, or leaning toward the light means not enough.
For coverage area, a single 50W COB with a 90-degree lens covers roughly 2x2 feet effectively. A 100W COB or two 50W COBs can cover a 3x3 foot area. For 4x4 and larger tents, plan for four COBs minimum. Optics (lenses or reflectors) shape the beam: narrow 60-degree lenses concentrate light for taller canopies, while wider 90-120 degree lenses spread light more evenly for short, bushy plants. A grow light reflector can help shape and direct the beam for more efficient coverage.
Installation and placement for common indoor plants
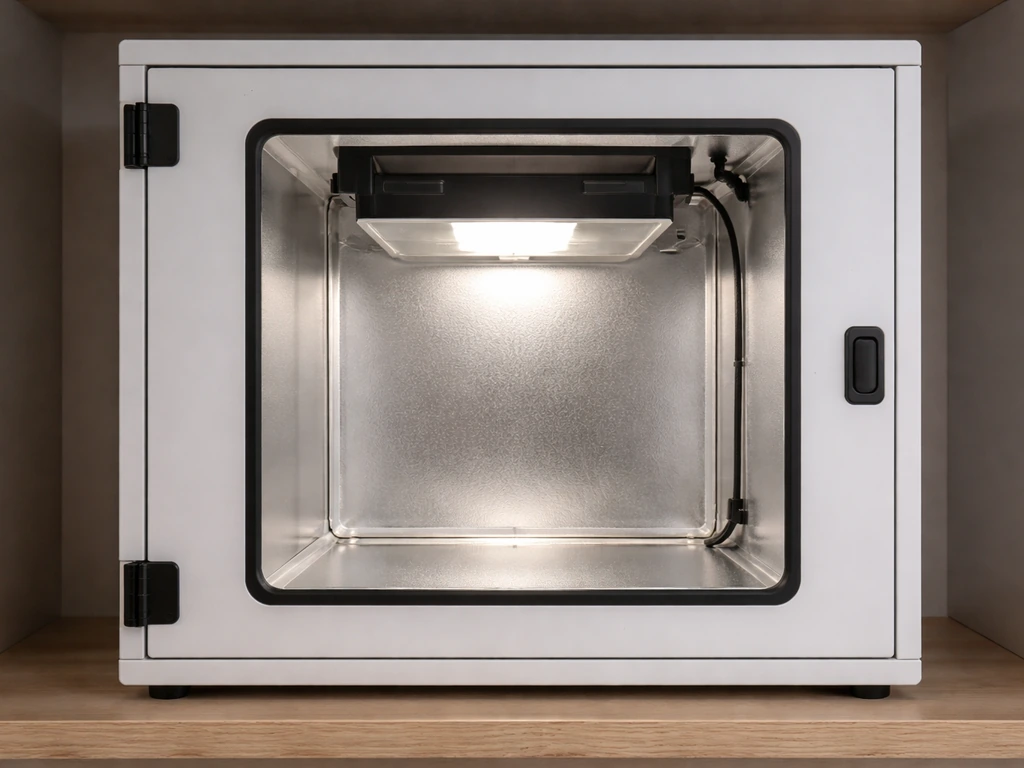
Where you mount the finished light matters as much as how you built it. If you are specifically looking for a diy table top grow light, these same COB, driver, and mounting principles apply, just on a smaller scale. The goal is even coverage across your canopy without hot spots directly under the COB and dim edges.
- Herbs and leafy greens (basil, lettuce, spinach): hang at 16-20 inches, run at 60-70% output, 14-16 hours per day. These are high-light plants that handle intensity well and grow faster than most people expect under a well-built COB.
- Seedlings and cuttings: start at 24-30 inches at 30-40% output. Introduce more light gradually over 7-10 days as roots establish. Too much light too early stresses young plants before they can cope.
- Tomatoes and peppers: these need significant intensity during fruiting. Hang at 14-18 inches at 80-100% once flowering begins. Good candidates for supplemental 660 nm red COBs.
- Houseplants (pothos, monsteras, peace lilies): most tolerate lower intensity. 24-36 inches at 20-40% output for 10-12 hours per day is usually sufficient. A single smaller COB build works well for a shelf of houseplants.
- Cannabis and other flowering plants: vegetative phase at 18-22 inches, 60-80%; flip to 12-18 inches at 80-100% for flower. Far-red (730-735 nm) supplementation during the last 15-30 minutes of the light cycle can support the Emerson enhancement effect.
Mount your light on an adjustable rope ratchet or pulley system so you can raise and lower it easily as plants grow. If you are figuring out how to make a light trap for a grow box, the same mounting and height control ideas help you keep the beam where you want it how to make a light trap for grow box. Fixing it at a set height and leaving it there is the most common beginner mistake: your plants change height weekly and your light needs to move with them. A simple pair of 1/8-inch rope ratchets costs about $8 and makes adjustment trivial.
If you're building a more involved setup, like mounting COBs onto a plant stand or integrating them into a shelf system, the physical structure needs to handle the heatsink weight safely. If you are building a plant stand for your grow lights, plan the frame to support the heatsinks safely and keep the wiring protected from moisture mounting COBs onto a plant stand. A completed 4-COB build with heatsinks can weigh 5-10 pounds. Make sure whatever you hang it from is rated for at least twice that load.
Running schedules and growth-stage timing
Plants need a consistent light schedule to grow and flower on cue. An outlet timer (mechanical or digital) is the cheapest and most reliable way to control this. Digital timers that program to the minute are worth the extra few dollars over mechanical wheel timers.
| Plant type / stage | Light hours per day | Dark hours | Notes |
|---|---|---|---|
| Seedlings (all types) | 16-18 hours | 6-8 hours | Consistent schedule from day one; avoid 24-hour light |
| Vegetative herbs and greens | 14-16 hours | 8-10 hours | Most herbs thrive at 16 hours; lettuce can handle 18 |
| Houseplants | 10-14 hours | 10-14 hours | Match to natural light levels for the species |
| Cannabis / photoperiod flowering | 18 hours (veg), 12 hours (flower) | 6 hours (veg), 12 hours (flower) | Strict 12/12 schedule for flower; light leaks disrupt flowering |
| Tomatoes and peppers (fruiting) | 14-16 hours | 8-10 hours | Day-neutral; more light generally means more yield |
The most important rule with schedules is consistency. Varying your light timing by even an hour or two regularly can stress photoperiod-sensitive plants and cause hermaphroditism in cannabis. Set your timer once, verify it runs correctly for a couple of days, and leave it alone. If you want to adjust schedules gradually (for example, transitioning from seedling to veg timing), move the schedule in 30-minute increments every few days rather than jumping all at once.
For seedlings specifically, don't go straight to 18-hour schedules right out of germination. Start at 16 hours for the first week, then move to 18 if you want maximum vegetative growth. This gives very young plants a chance to establish without light stress compounding other early stressors like moisture and temperature fluctuation.
Troubleshooting: overheating, dim output, flicker, and uneven coverage
Even a well-built light can have issues. Here's how to diagnose the most common ones.
Overheating
If your heatsink is too hot to touch comfortably (above ~60°C at the surface) after 30 minutes of operation, you have a thermal problem. First, check your thermal paste application: remove the COB, clean both surfaces, and reapply properly. Second, check that your driver output matches your intended operating current and you haven't accidentally over-driven the COB. Third, add a fan if you're running passive cooling. A 120mm PC fan running at 5-12V directed across the heatsink fins can drop temperatures by 15-25°C in a passively borderline setup.
Dim output
If the light seems dimmer than expected, check your driver's output current with a multimeter. If the current is lower than your target, the driver may be in a reduced mode due to a low-set dimmer potentiometer, a protection fault, or a mismatch between the driver's minimum output current and your COB's Vf. Also check connections: a high-resistance connection in the DC circuit (loose terminal, corroded connector) will drop voltage and reduce current to the COB.
Flicker
Visible flicker almost always points to a loose connection or a driver running outside its stable operating range. Check every connection in the DC circuit. If a connection is solid and flicker persists, verify that your COB's Vf at your operating current is within the driver's output voltage window. A COB with a Vf of 34V run from a driver whose output range is 36-54V will be unstable or won't run at all. Flicker can also indicate a failing driver, especially if the unit has been running very hot.
Uneven coverage
If plants directly under the COB are doing well but plants at the edges look pale or stretched, you either need more COBs, wider optics, or more distance. Try swapping from 60-degree to 90-degree lenses first. If that's not enough, raising the light 4-6 inches will spread coverage at the cost of some intensity at center. For a 3x3 foot or larger space, a single COB almost always gives uneven coverage: this is genuinely a case where a 2- or 4-COB build makes a meaningful difference over a single emitter.
One last thing: always let your completed build run for 30 minutes before leaving it unattended for the first time. Stay nearby, check surface temperatures, check for any electrical smell, and verify that the driver stays in its expected temperature range (most quality drivers run warm but not hot to the touch). A little patience during the first test run saves a lot of regret later. Once you've verified everything is running well, you've got a light that'll outperform most commercial options at its price point and give you full control over your indoor grow.
FAQ
What’s the safest way to test my cob led grow light wiring before I connect plants?
Unplug the driver, then do a continuity check on the DC leads to confirm there are no shorts between positive and negative. Power it for 5 to 10 minutes while you keep your hands away from the AC side, and verify the COB surface warms up evenly. If one section stays cool while others heat up, stop and re-check the DC connections.
Can I run multiple COBs in series with one constant-current driver?
Only if the driver’s output voltage range comfortably covers the total forward voltages at your target current. COBs do not have identical Vf, so series wiring can cause instability if the driver cannot supply enough voltage across the dimmest and most-wired-forward cases.
Do I need to use thermal paste, or is thermal pad enough for a cob build?
Thermal paste usually performs better because it fills micro-gaps when you tighten the mounting screws properly. If you use a thermal pad, choose one rated for LED heatsink contact, keep thickness consistent, and expect slightly higher junction temperatures than with good paste, especially under higher wattage.
How do I choose lenses or optics if my plants are in a short tent versus a taller grow area?
Use wider lenses (90 to 120 degrees) for short, bushy canopies where you need even coverage at the edges. Use narrower lenses (around 60 degrees) for taller canopies to concentrate light deeper, but you may need more spacing and careful height control to avoid hot spots directly under each COB.
If my build has a dimmer option, what’s a common mistake that causes unstable output?
Turning the dimmer down too far can move the driver into a reduced or protection behavior, where output current becomes inconsistent. Start by verifying current with a multimeter at the dimmer setting you plan to use, and avoid extreme low settings if you see flicker or heat changes.
How can I confirm my driver is actually outputting the current I think it is?
Measure current in the DC circuit with the correct current-measurement method for your multimeter (many setups require an inline current shunt or clamp method on DC, depending on the tool). If you only measure voltage at the COB, you can miss a wrong current because LED forward behavior depends on temperature and Vf.
What happens if I accidentally use a constant-voltage driver instead of a constant-current driver?
A constant-voltage driver can overcurrent the COB as it warms, because the LED’s current draw is not limited. That can lead to rapid efficiency loss and premature failure, even if the light initially seems bright and stable.
How do I prevent condensation or moisture damage on wiring in grow tents?
Route the driver and all AC connections outside the most humid zone when possible, use strain relief so terminals are not pulling under vibration, and keep DC splices in an enclosure rated for humidity. Also leave a drip loop on cords so water cannot follow the cable into the driver.
Is it okay if my heatsink is warm to the touch during operation?
Warm is expected, but overheated is not. If the heatsink surface becomes uncomfortable to touch after about 30 minutes, treat it as a thermal failure risk, then check paste coverage, ensure the driver is not overdriving the COB current, and consider adding airflow.
How do I know whether I need more COBs or just better height and optics?
If the center looks strong but the edges are pale, raising the light can improve spread slightly, and switching from narrower to wider optics often helps first. If the canopy still shows persistent edge weakness, adding more COBs or increasing COB count for the same coverage area is usually the most reliable fix.
Can I use white COBs for both veg and flower without adding red or far-red chips?
Yes, many growers run only a suitable white COB through the full cycle. Adding dedicated 660 nm red and optional 730 to 735 nm far-red can improve flowering behavior and photoperiod responsiveness for plants that benefit from spectrum tuning, but it increases complexity and requires correct current matching and driver choices.
What’s the best practice for setting the initial hanging height after the first test run?
After your 30 minute safety check, start with a conservative distance based on your total COB wattage and lens angle, then adjust by observing plant response. If you have a PAR meter, aim for a moderate canopy PAR at first, because dialing in height is faster and safer than guessing from appearance alone.
How often should I change or reapply thermal paste on a DIY cob build?
Usually you do not need to replace it frequently. Repaste only if you remove the COB for troubleshooting, or if you observe overheating after confirming driver settings and airflow, because thermal paste degradation typically becomes relevant after rework or long periods at excessive temperatures.
What’s the most common reason a cob build flickers?
Flicker is often caused by an intermittent connection on the DC side or a driver operating outside the stable voltage window for your COB’s Vf. Tighten and inspect every DC terminal, then verify the driver’s output voltage range matches the COB Vf at your target current.
Next Article
How to Make a Light Trap for a Grow Box
Build a reflective, sealed light trap for your grow box: materials, wiring safety, step-by-step install, tuning and fixe