To get your Innova LED grow light running correctly, you need to do four things in order: confirm your exact model, mount it at the right height for your plant type, set the intensity or spectrum mode for your current growth stage, and program a consistent daily schedule using a timer. The specific settings vary a little between Innova units, but the core process is the same across their LED lineup, and this guide walks you through every step from unboxing to a fully dialed-in setup.
Innova Grow Light Instructions: Setup, Use, and Troubleshooting

Marcus Tillman
16 May 2026
Which Innova grow light model do you actually have?
This is worth spending two minutes on before anything else. 'Innova' appears on a wide range of products from multiple different manufacturers, so a generic search for 'Innova grow light manual' can easily pull up instructions for an air purifier, a smartwatch, or an HVAC controller. Innova.it hosts Airleaf user manuals, but you should confirm the exact Airleaf brand name and model before following any instructions from that page 'Innova grow light manual' can easily pull up instructions for an air purifier, a smartwatch, or an HVAC controller.. None of those will help you. The only reliable way to get the right manual is to find the exact model name or SKU printed on your unit.
Flip the light over or look along the edge of the housing. You are looking for a label that says something like 'Model: INV-GL45W' or similar. Write that down. Then go directly to the retailer where you bought it (Amazon listing, the brand's website, or the packaging insert) and search for that exact model string. If you bought it from Amazon, the listing page usually has a manual PDF linked under 'Product guides and documents.' If nothing turns up, search '[your model number] grow light manual PDF' and look for a Manuals+ or ManualsLib result, both of which host third-party scans of grow light manuals.
Once you have confirmed the model, check how many watts it draws (not the 'equivalent' wattage claim, the actual draw listed on the label), whether it has a single spectrum, dual spectrum switch, or full-spectrum LED array, and whether it uses a dial, a button cycle, or an app to control intensity. These three details determine everything downstream in this guide.
Before you plug it in: parts, connections, and safety
Most Innova LED grow lights ship with the light panel itself, a hanging kit (steel cable or adjustable ratchet hangers), a power cord, and sometimes a timer controller or a daisy-chain cable if it is a multi-bar system. Lay everything out and cross-check against the parts list in your manual. Missing a ratchet hanger clip is annoying to discover after you have already drilled holes.
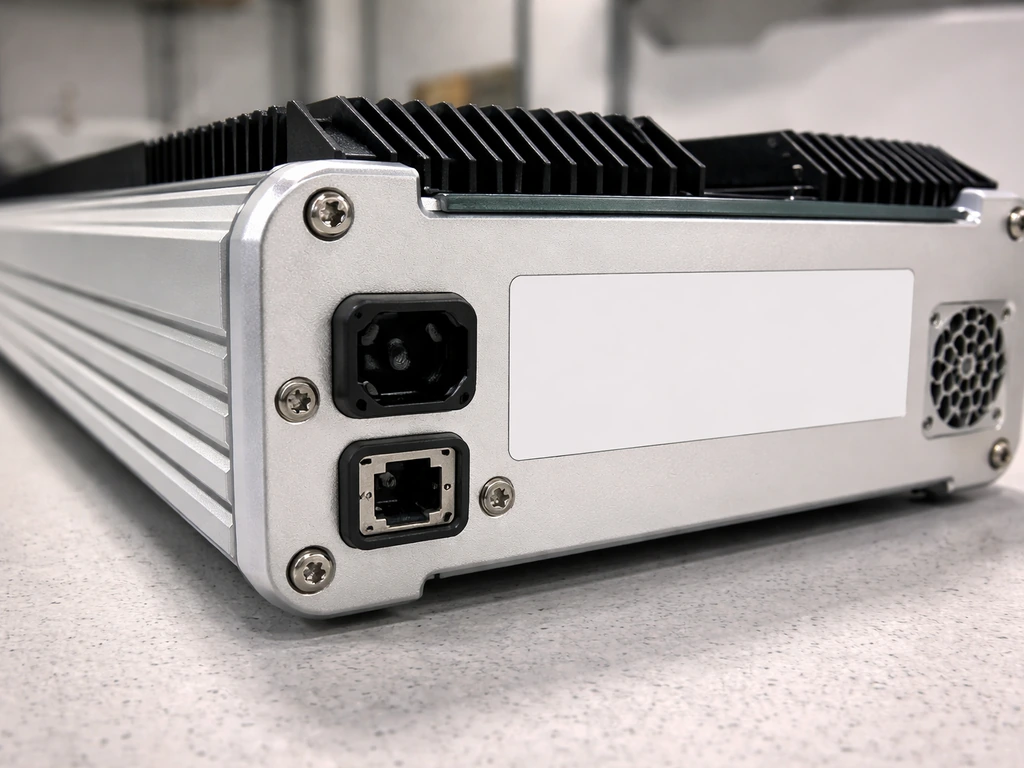
On the panel itself, identify the power input port, any secondary ports for daisy-chaining additional lights, and any control buttons or a dimmer dial. Some Innova models have a small RJ12 or 3.5mm socket specifically for an external timer or remote controller. Do not confuse this with the power input. Plugging the power cord into the controller port will not fry the unit instantly, but it is worth a second look before you connect anything.
Safety basics to handle before you power on the first time:
- Inspect the power cord along its full length for any nicks, exposed wire, or crushed sections from shipping.
- Make sure the hanging point you plan to use (tent bar, ceiling hook, or shelf bracket) can support at least three times the weight of the light. Most Innova LED panels weigh between 2 and 6 lbs, but a solid anchor point matters for long-term safety.
- Keep the light away from water spray. LED drivers are not waterproof. If you mist your plants, do it when the light is off and let surfaces dry before switching back on.
- Never cover the ventilation fins or fan vents on the driver housing. The driver needs airflow to stay within safe operating temperatures.
- Use a grounded (three-prong) outlet. Do not use an ungrounded adapter with any grow light.
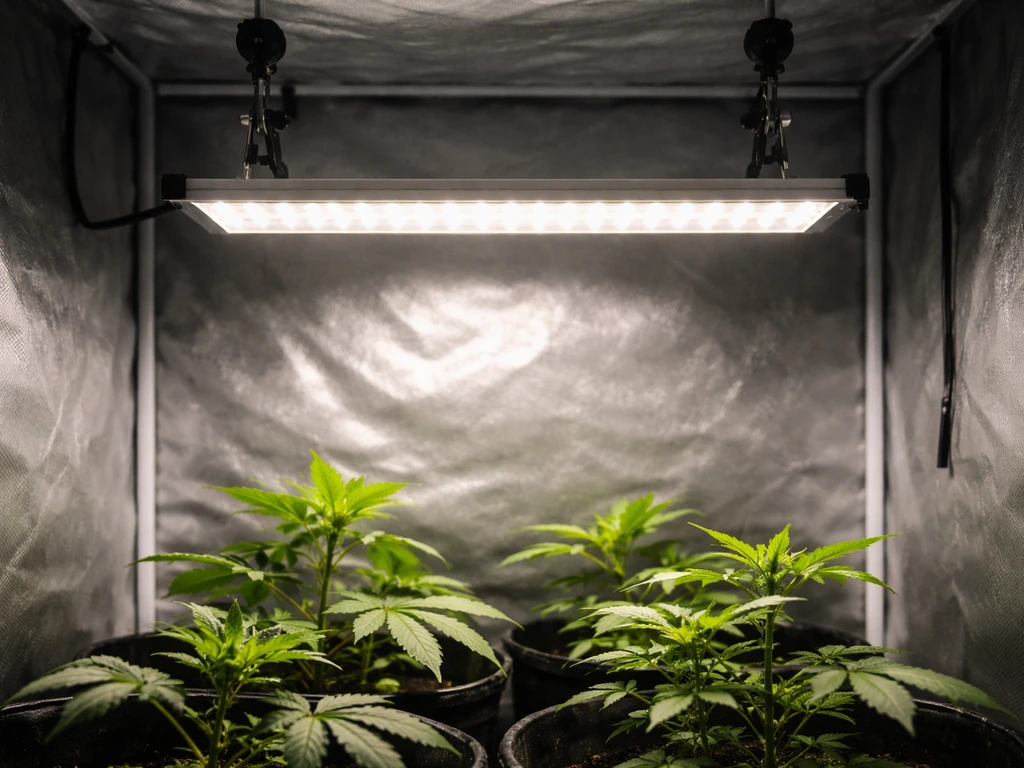
Mounting and positioning: height, coverage, and avoiding hotspots
Height is the single setting that new growers get wrong most often, and it affects both plant health and coverage area. Too close, and you get light burn and uneven hotspots in the center of your canopy. Too far, and plants stretch toward the light and never get enough intensity. The right height depends on your light's actual wattage draw and your plant type.
| Light wattage (actual draw) | Seedlings / clones | Vegetative stage | Flowering / fruiting |
|---|---|---|---|
| 20–40W | 18–24 inches | 14–18 inches | 10–14 inches |
| 45–100W | 24–30 inches | 18–24 inches | 14–18 inches |
| 100–200W | 30–36 inches | 24–30 inches | 18–24 inches |
| 200W+ | 36–48 inches | 30–36 inches | 24–30 inches |
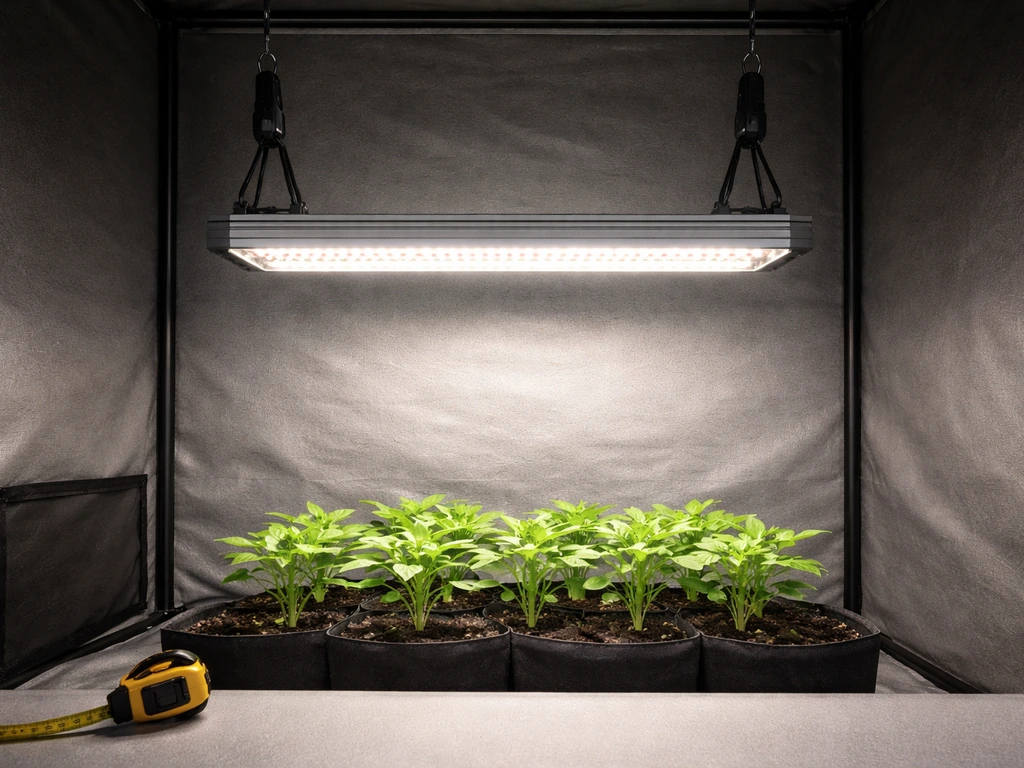
Use the ratchet hangers that came with your light. They let you raise or lower the panel in seconds without tools, which is exactly what you want as plants grow taller through their cycle. Hook the ratchet hangers over a solid beam, grow tent crossbar, or a purpose-built light rail. Run the cables straight up, not at an angle, so the panel hangs level. A tilted panel creates a brighter zone on one side and a dim zone on the other, which is basically a self-made hotspot.
To check for hotspots before your plants are underneath, hold a piece of white paper at canopy height and look at the light pattern. A good LED panel should produce a relatively even rectangle or circle of light across the paper. If you see a very bright central point fading quickly to dim edges, the light is too close or the optics are focused too tightly. Raise it until the bright center softens to a more even wash. Reflective walls (white paint or Mylar) in a tent or closet setup significantly improve edge coverage and reduce the effective hotspot problem.
Coverage area is also something to be realistic about. A 45W Innova LED will effectively cover roughly 2 x 2 feet for flowering plants and maybe 3 x 3 feet for leafy greens and seedlings. Do not expect it to light a 4 x 4 tent uniformly. If your footprint is bigger than the light's rated coverage, either add a second unit or concentrate your plants in the center under the panel.
Dialing in intensity and spectrum by plant type and growth stage
Innova LED grow lights come in a few different configurations. Some are single full-spectrum panels with no user controls beyond on/off. Others have a dimmer dial that adjusts output from roughly 10% to 100%. Some have a two-button or toggle system for switching between a 'veg' mode (blue-dominant) and a 'bloom' mode (red-dominant). Refer back to your specific model to know which controls you have, but here is how to use each option.
If your light has a dimmer dial
Start seedlings and young cuttings at 30 to 40% intensity. Full power this early stresses tender plants and can bleach new leaves. Move to 60 to 75% once plants have established a root system and show steady new growth, typically after two to three weeks. For flowering or fruiting plants that need maximum energy, run at 85 to 100% and make sure your height is adjusted accordingly to avoid heat stress at the canopy.
If your light has veg and bloom mode switches
Use veg mode (blue-heavy spectrum) during the vegetative stage. Blue light drives compact, bushy growth and strong stems. Switch to bloom mode (red-heavy) when plants enter the flowering or fruiting phase. Some growers run both modes simultaneously during late veg to give plants a broader spectrum. If your model allows both modes on at once, that is a perfectly valid approach. For houseplants and herbs that never go through a strict flowering cycle, running veg mode for the full duration works well.
By plant type
| Plant type | Recommended mode/intensity | Notes |
|---|---|---|
| Seedlings and clones | Low (30–40%) or veg mode | Keep height generous, watch for stretch |
| Leafy greens and herbs | Medium (50–70%) or veg mode | Full spectrum works well for the full cycle |
| Vegetative houseplants | Medium (50–60%) or veg mode | Most tolerate lower intensity than fruiting crops |
| Tomatoes, peppers, fruiting crops | High (80–100%) bloom mode at flower set | Need maximum PPFD; watch for heat stress |
| Succulents and cacti | Low to medium (30–50%) | High light plants but burn easily under direct LED heat |
Light schedules: how many hours and how to adjust
Plants do not need or want 24 hours of light. They need a dark period for metabolic processes, and running your light around the clock is one of the fastest ways to stress or stunt your plants while also burning through electricity. Here are the standard photoperiod targets based on plant type and stage. If you also need specific wake and grow light instructions for your Innova model, check the settings described in your manual for the exact timer schedule and control options Light schedules: how many hours and how to adjust.
| Plant / stage | Light hours per day | Dark hours per day |
|---|---|---|
| Seedlings (any type) | 16–18 hours | 6–8 hours |
| Vegetative herbs and greens | 14–16 hours | 8–10 hours |
| Vegetative houseplants | 12–14 hours | 10–12 hours |
| Flowering crops (photoperiod) | 12 hours | 12 hours |
| Autoflowering crops | 18–20 hours | 4–6 hours |
| Succulents and cacti | 12–14 hours | 10–12 hours |
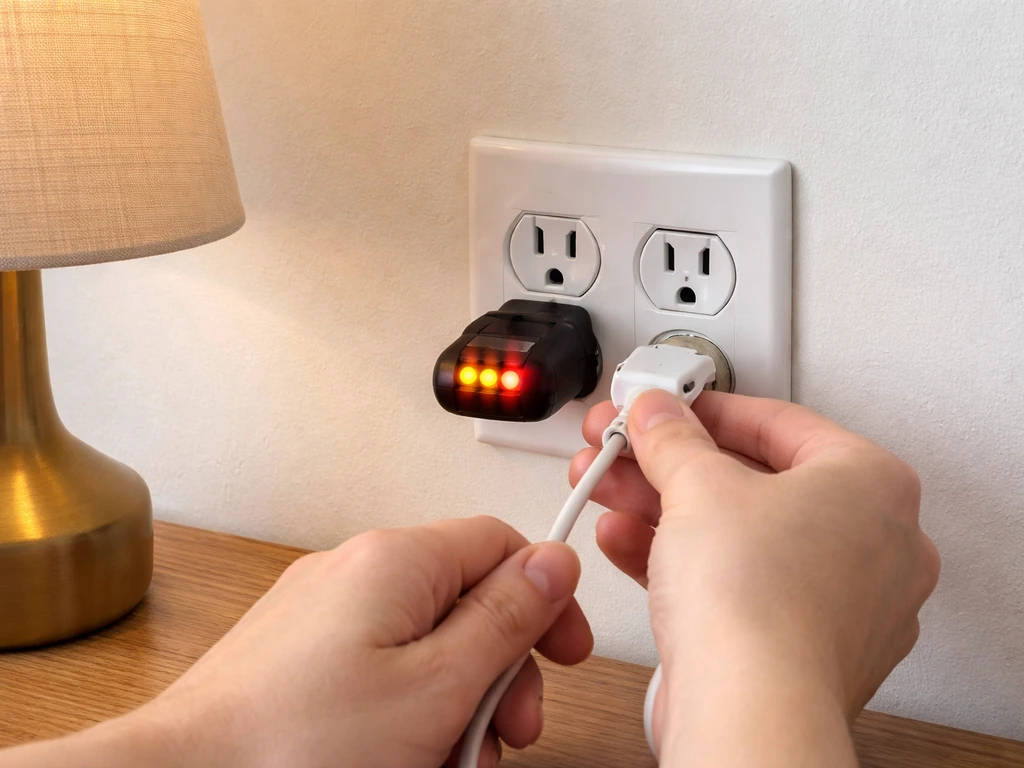
The most reliable way to stick to a schedule is a mechanical or digital outlet timer. Plug the timer into the wall, plug the grow light into the timer, set your on and off times, and you are done. If you need help setting up a Yadoker grow light schedule, follow the same timer-based approach described in this section. A basic mechanical outlet timer costs around $8 and handles this perfectly. If your Innova model has an RJ12 or similar controller port, it may be compatible with a purpose-made grow light timer controller that lets you set schedules directly on the unit. Some grow lights that use an blank" rel="noopener noreferrer">RJ-12 controller also ship with downloadable manuals and are designed to work with timer-based scheduling. Check your manual for that detail, but a simple outlet timer always works as a fallback. For step-by-step details, use the aokrean grow light instructions that match your exact model and controls Check your manual for that detail, but a simple outlet timer always works as a fallback..
Set your light to turn on at a consistent time each day. Plants respond well to routine. I usually set mine to come on around 7 AM and go off based on the target hours. Avoid keeping the light on late into the night if you have light-sensitive flowering plants in the same room, since even ambient spill can interrupt their dark period.
Watch your plants and adjust. If seedlings are stretching tall and thin toward the light (etiolation), they need either more hours, more intensity, or the light moved closer. If leaf tips are curling upward or showing bleached patches, the light is too intense or too close. Adjust one variable at a time so you know what changed the outcome.
Troubleshooting common problems
Light won't turn on
- Check the outlet by plugging in something else. If that works, the outlet is fine and the issue is with the light or its timer.
- If you are using a timer, bypass it temporarily by plugging the light directly into the wall. If it powers on, the timer is faulty or incorrectly programmed.
- Check all cable connections between the driver and the panel. On multi-bar systems, a loose connector on one bar can prevent the whole unit from powering on.
- Look for a small reset button on the driver housing, sometimes recessed and requiring a pin to press.
- If none of the above works and the unit is under warranty, contact the seller. Innova LED drivers do occasionally fail out of the box.
Flickering
Flickering almost always comes from one of three causes: a loose power connection, an overloaded circuit, or a failing driver. Start by checking that the power cord is fully seated at both the wall and the driver. Then check whether you have other high-draw devices on the same circuit (space heaters, fans, dehumidifiers). If the flicker happens when one of those kicks on, you have a voltage fluctuation issue and need to move the grow light to a dedicated circuit or plug it into a surge-protected power strip. Persistent flickering with nothing else on the circuit usually means the driver is failing and needs replacement.
Overheating and heat stress on plants
LEDs run cooler than HPS or fluorescent lights, but the driver housing can still get quite warm, and the light intensity itself causes heat buildup at the canopy when mounted too low. If leaves directly under the light are cupping upward, showing brown crispy tips, or bleaching to a yellow-white color, raise the light by 4 to 6 inches and check again after 24 hours. If the driver housing itself is uncomfortably hot to touch (above about 140°F), make sure there is airflow around it. A small clip fan moving air above the canopy fixes this in most tent setups.
Uneven coverage and dim edges
If plants at the edges of your space are growing slower or stretching more than those in the center, your light is not covering the full footprint evenly. Solutions: raise the light slightly to widen the spread, add reflective walls to bounce light back toward the edges, or add a second light for larger spaces. Moving plants on a rotation (outer plants swapped to center every few days) is a low-tech fix that works well for small collections.
Timer problems
If your timer is not triggering correctly, first confirm the current time is set accurately on the timer itself. Mechanical timers have a 24-hour dial and small push-in pins or tabs for each 15-minute interval. Make sure you have set both an on tab and an off tab. Digital timers need the current time entered correctly, or the on/off programming will be offset from reality. If the timer seems to be ignoring your settings entirely, do a factory reset (usually holding the reset or clock button for five seconds) and reprogram from scratch.
Quick-start checklist and ongoing maintenance
Use this as a final check before your first full grow cycle, and revisit it monthly as part of routine maintenance.
Setup checklist
- Confirmed exact model number from the unit label and located the correct manual.
- Inspected power cord and all connectors for damage.
- Mounted light on a solid anchor point using ratchet hangers, hanging level.
- Set initial height based on wattage and plant stage using the height table above.
- Verified coverage area matches your plant footprint.
- Set intensity or spectrum mode appropriate for current growth stage.
- Plugged timer into the wall, light into the timer, and programmed on/off times.
- Confirmed current time on timer is accurate.
- Checked for airflow around the driver housing.
Monthly maintenance
- Wipe down the LED panel surface with a dry or slightly damp microfiber cloth to remove dust. Dust buildup reduces output more than most growers expect, especially over a full growing season.
- Check all cable connections and hanging hardware for loosening. Ratchet straps can slip over time, especially with vibration from fans.
- Inspect the driver housing and fan vents for dust blockage. A can of compressed air clears vents quickly.
- Verify timer accuracy against a clock. Mechanical timers can drift by 10 to 15 minutes per month.
- Look over your cable routing. Cables should not be pinched, coiled tightly near heat sources, or lying in water trays.
- Adjust hanging height as plants grow taller. Do not assume the height you set at week one is still correct by week six.
If you are comparing the Innova setup process to other budget LED brands you might have considered, the general approach is very similar across the category. Brands like Yadoker, Sondiko, Wakyme, and Aokrean all follow the same core workflow: confirm model, mount safely, set height by wattage, program a timer, and adjust based on plant response. The main differences are in available controls (some have dimmers, some do not) and coverage claims. The fundamentals covered here apply broadly, so if you are running more than one brand of light in the same space, you can use the same schedule and height logic for all of them.
FAQ
How do I tell which control port is for daisy-chaining lights versus an external timer on my Innova grow light?
Check the label printed near each port on the panel housing (it usually names the function). Daisy-chain ports are typically grouped together and are meant for connecting additional LEDs, while timer/remote ports are usually labeled as “timer,” “remote,” or show a distinct connector type (for example RJ12 or 3.5 mm). If the manual is missing, do not guess, unplug the unit, and contact the seller with your exact model string.
My Innova light has both a veg and bloom mode, can I use them together all the time?
You can use both if your specific unit is designed to run the modes simultaneously, but for most crops it is safer to still follow a stage-based plan (veg for establishment, bloom for fruiting). If you keep both modes on during early growth, watch for slower node spacing or leaves that look heavier than normal, and adjust intensity down rather than changing height first.
What should I do if my plants look stressed even after I set the correct height and intensity?
Treat it like a diagnosis problem. First confirm the daily schedule includes a real dark period (not just “lower brightness” overnight). Then check temperature and airflow at canopy level, if the driver is hot or air is stagnant, LEDs can still create canopy heat stress. Finally, look at watering and nutrients, because LED setup issues often get misattributed when root conditions are off.
Can I run the Innova grow light at 100% for seedlings to speed growth?
Generally no. New seedlings and cuttings usually do better at 30 to 40% and gradually step up, because higher intensity can cause leaf bleaching and stress even if the height is correct. If you must run stronger, raise the light further first, then increase intensity in small increments over several days and reassess leaf color daily.
How far should I measure the light height from, the top of the plant or the center of the LED panel?
Measure from the underside of the LED panel to the canopy surface (the leaves your plants are growing toward). If you only measure from a fixed shelf height, you may accidentally change distance as plants grow. Recheck the distance whenever you adjust hangers, especially mid-cycle when growth changes quickly.
Do reflective tent walls replace the need for checking hotspots on white paper?
Reflective walls help reduce edge dimming, but they do not eliminate uneven optics or incorrect height. Use the white-paper hotspot check when you first set up the light or after any change to mounting height, dimmer level, or spectrum mode. If the center stays sharply brighter than the edges even with reflections, you likely need height adjustment or an additional unit.
How do I choose between a mechanical outlet timer and a digital timer for my Innova light?
Mechanical timers are simple and reliable, but they are less precise if you need minute-level control. Digital timers can be more accurate and often handle multiple schedules, but they can drift if the timer loses power or is programmed with the wrong current time. If your light has a controller port (RJ12 or similar), still start with a basic outlet timer as a fallback until you confirm compatibility with your exact model.
My timer is set correctly, but the light still turns on at the wrong time, why?
Common causes are incorrect local time entry on digital timers, missing both an on and off pin on mechanical timers, or an unintentional 24-hour wraparound. If it seems random, verify the timer is not in “override” mode, then factory reset and reprogram from scratch. Also confirm the light is plugged into the timer output, not into any controller-only port.
Is it safe to use a power strip or extension cord with my Innova LED grow light?
Use the manufacturer guidance if your manual specifies a particular rating. As a practical rule, avoid long or overloaded cords and prefer a surge-protected outlet for stability. If you notice flicker or brightness pulsing after plugging into a strip, move the light directly to a wall outlet or a dedicated circuit and recheck the driver connection.
What flicker pattern indicates a driver problem versus a wiring or circuit problem?
If flickering follows the behavior of other high-draw appliances on the same circuit, it points to voltage fluctuation (wiring or overloaded circuit). If it persists consistently even when the rest of the circuit is idle, especially with no loose connections, that is more consistent with a failing driver. In either case, first reseat plugs at both wall and driver before replacing anything.
What temperature should the driver housing reach, and what’s the best fix if it feels too hot?
If the driver housing is uncomfortably hot to touch, treat it as “too hot for your setup.” Improve airflow around the driver housing, keep the panel area ventilated, and ensure the light is not enclosed in a way that blocks heat escape. A small clip fan aimed to move air above the canopy often helps both driver and canopy temperatures.
My plants at the edges grow slower than those in the center, can I rotate them instead of adding a second light?
Yes, rotating is a useful stopgap for small spaces. Swap edge plants toward the center every few days so they receive the stronger central intensity intermittently. For a more uniform outcome, add reflective walls and consider raising the light slightly to broaden spread, but for larger tents rotation will not fully solve coverage limitations.
How often should I revisit the Innova light setup after the initial dial-in?
Recheck height and intensity whenever plants change size significantly, typically once per week during active growth, and also after any spectrum or dimmer setting changes. Beyond that, the article’s monthly maintenance check is a good baseline, especially for inspecting hangers, re-seating connections, and confirming the timer programming still matches your schedule.
Next Article
Sondiko Grow Light Instructions: Setup, Positioning, Timing
Step-by-step Sondiko grow light setup: assembly, safe power, distance for seedlings to plants, timing, troubleshooting
