Setting up your Wakyme grow light is straightforward once you know what you're working with. The most common version you'll find is the Wakyme 1200W LED (model FSZD-10), and this guide walks you through everything from pulling it out of the box to dialing in a daily schedule that actually grows healthy plants. If your unit looks slightly different or has a different label, the core principles still apply, but double-check your box or the label on the back of the light for your specific model number before you start.
Wakyme Grow Light Instructions: Setup, Schedule, Fixes

Marcus Tillman
19 Apr 2026
Check your model and specs first
Before you plug anything in, flip the box over or look at the sticker on the back of the light itself. The most widely sold Wakyme panel is the FSZD-10, which uses 120 SMD LEDs and draws about 213 watts from the wall (despite being marketed as a 1200W equivalent, that's the actual power consumption). It's designed to replace a 900W HPS or MH fixture and runs on a standard 120V US outlet. The unit weighs roughly 5.77 pounds and has a rated lifespan of 100,000 hours. Knowing the actual wattage (213W) matters for sizing your circuit if you plan to run multiple lights.
The FSZD-10 has a Veg/Bloom double-switch layout, two built-in cooling fans, and an aluminum heat-sink substrate. It does not have a built-in timer, so you'll need an external one (more on that below). If your Wakyme light has a dial, remote, or app control instead of two rocker switches, you may have a newer bar-style model, and some of those details will differ. The rest of this guide focuses on the FSZD-10 panel, which is the most common unit people are setting up.
Unboxing and figuring out what everything is
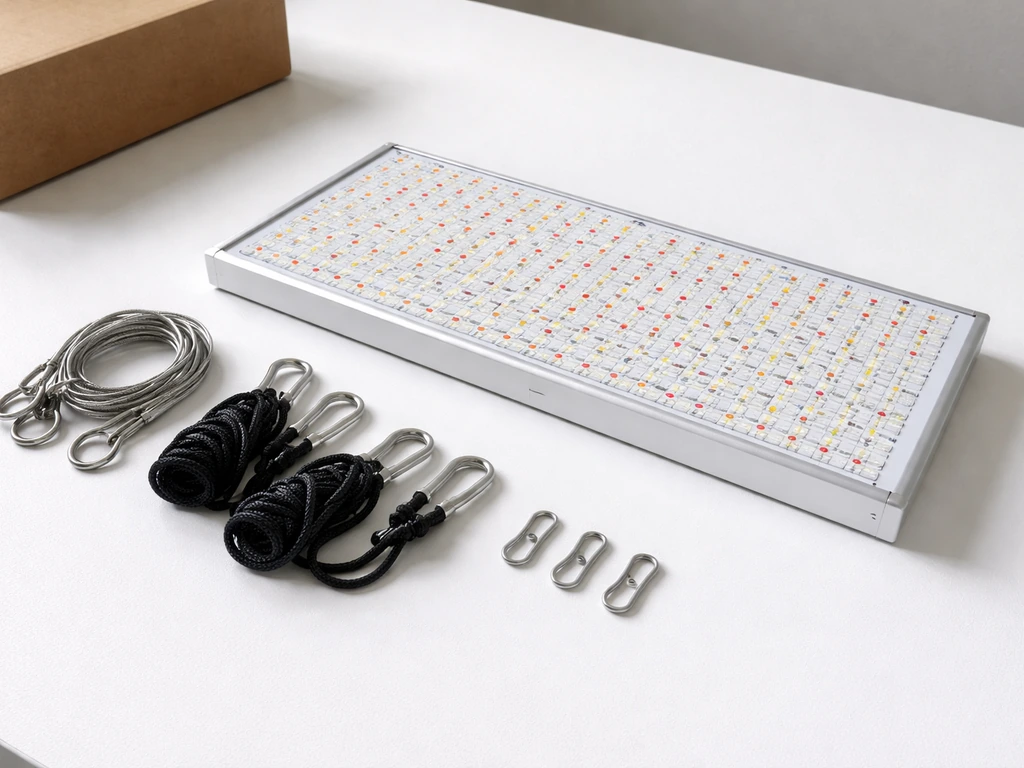
Open the box on a clean surface. You should find five things: the grow light panel itself, a set of steel hanging cables, adjustable rope hangers, hooks for your support structure, and the power cord. Some kits also include a small temperature and humidity meter as a bonus accessory. Lay everything out and make sure nothing is missing before you start mounting anything.
- Wakyme 1200W LED grow light panel (FSZD-10)
- Steel hanging cables (attach to the four corner points on top of the light)
- Adjustable rope hangers (click-to-adjust, connect the cables to your overhead anchor)
- S-hooks or carabiner hooks (go between the rope hangers and your tent rod, ceiling hook, or frame)
- Power cord (one end plugs into the back of the light, the other into your outlet)
- Temperature/humidity meter (if included, optional but useful)
One thing that confuses people: there's a second outlet port on top of the unit. That's a daisy-chain port that lets you plug another device or a second light into it. It's a standard 3-prong outlet. Just don't exceed your circuit's current rating if you use it. For most home setups running a single light, ignore it for now.
Hanging and mounting the light safely
Start by attaching the four steel cables to the hanging points at each corner on the top of the light. These are small eyelets or loops, and the cables clip or thread through them. Once all four cables are attached, connect the adjustable rope hangers to the top of those cables. The rope hangers have a small locking mechanism that lets you squeeze and slide the cord to raise or lower the light without unclipping anything. Run the hooks through the top loops of the rope hangers and hang them from a tent crossbar, ceiling hook, or whatever sturdy structure you're using. The whole unit is under 6 pounds, but make sure whatever you're hanging it from can comfortably hold more than that, especially if you're in a grow tent with thin metal poles.
Before you finalize the height, disconnect power and do everything mechanical first. The manual is clear on this: no power during installation or any adjustment. Once it's hanging at roughly the right height, route the power cord down and away from water sources. Plug the cord into the back of the light unit, then into a 120V outlet or power strip. Keep the cord off the floor of your tent or grow space if possible to avoid moisture contact.
How high to hang it
Height is probably the single most important setting on this light, and it's the one people get wrong most often. The Wakyme manual gives you two specific ranges based on growth stage: hang it 24 to 30 inches above the plant canopy during vegetative growth, and bring it down to 18 to 24 inches during flowering. At 24 inches, this light delivers a PAR of 527 µmol/m²/s and covers roughly a 3x3 ft area effectively, with a maximum spread of about 4x4.5 ft at that same height. If your plants are in a space smaller than 3x3 ft, you have room to raise it a little. If you're trying to cover more than 4x4.5 ft with one light, you'll end up with weak coverage at the edges.
Ventilation matters here too. Don't press the light against the top of a tent or enclose it without airflow around the unit. The two built-in fans need room to pull air across the aluminum heatsink. A few inches of clearance above and around the sides is enough in most cases.
Using the Veg and Bloom switches correctly
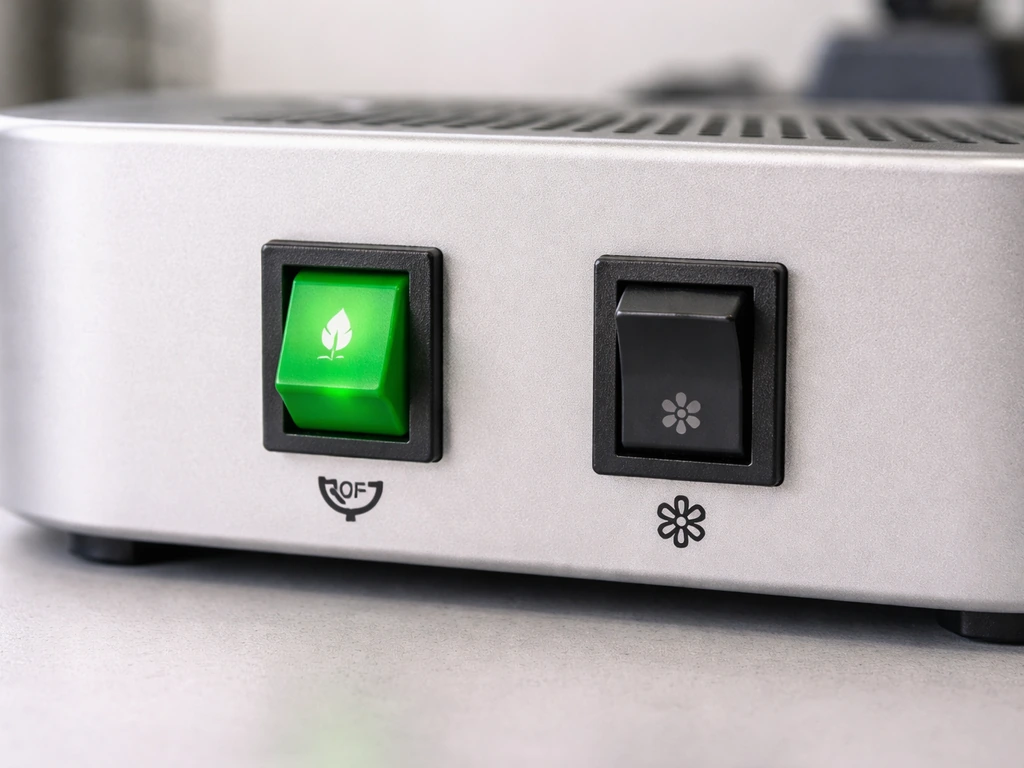
The FSZD-10 has two rocker switches on the back: one labeled Veg and one labeled Bloom. This is the entire control interface for this model. There's no dimming dial, no remote, and no app. Here's what each setting actually does and when to use it:
| Switch setting | Spectrum emphasis | Best used for |
|---|---|---|
| Veg only (ON) | Blue-dominant spectrum | Seedlings, clones, and vegetative growth |
| Bloom only (ON) | Red-dominant spectrum | Early flowering stage |
| Veg + Bloom (both ON) | Full combined spectrum | Flowering, fruiting, and maximum output |
For most of the growing cycle you'll have both switches on. The Veg-only setting is useful when you want a gentler start for seedlings or when you're trying to reduce heat slightly. The Bloom-only setting is rarely the right choice by itself. Running both gives you the full 213W output and the widest spectrum, which is what the light was designed to deliver during peak growth and flowering. If your light seems dim, the most common reason is that only one switch is on.
Because there's no built-in timer on this model, you'll need to plug it into an external outlet timer. A common best practice for timing grow lights is to blank" rel="noopener noreferrer">use an external outlet timer so the lights turn on and off on schedule consistently. If you are using an Aokrean grow light instead, follow Aokrean grow light instructions for the correct timer and daily schedule for your model. A basic mechanical or digital timer from a hardware store works perfectly. Set it to control the whole light rather than trying to manually switch it on and off every day. Consistency matters a lot more than precision here.
Daily schedules for each growth stage
Plants measure time by how long darkness lasts, not how long the light is on. That said, the Wakyme manual gives you clear photoperiod targets by stage, and these line up with what most indoor growers use: For Sondiko grow light instructions, the same basic ideas apply: check your model, set the correct height, and use a consistent photoperiod with the right switch settings.
| Growth stage | Light on | Light off | Switch setting | Height above canopy |
|---|---|---|---|---|
| Seedling / germination | 16–18 hours | 6–8 hours | Veg only | 28–30 inches |
| Vegetative | 16–18 hours | 6–8 hours | Veg (or Veg+Bloom) | 24–30 inches |
| Flowering / fruiting | 12 hours | 12 hours | Veg + Bloom | 18–24 inches |
For seedlings especially, start at the higher end of the height range (28 to 30 inches) and run Veg only for the first couple of weeks. Seedlings are easy to bleach or stress with too much intensity before they've developed proper root systems. Once they have their first few sets of true leaves, you can drop the light a few inches and switch to both modes for vegetative growth. When you flip to flowering, adjust the timer to 12/12 and drop the height to the 18 to 24 inch range.
Try to keep the ON period during the same hours each day. Plants stressed by inconsistent light cycles are more susceptible to problems. Program your external timer once and leave it alone unless you're deliberately transitioning to a new growth stage.
Troubleshooting what actually goes wrong
Light won't turn on
Check three things in order: Is the power cord fully seated into the back of the light unit? Is the outlet live (test it with something else)? Are both rocker switches actually in the ON position? It sounds obvious but the switches on the back are easy to bump to OFF during installation. If all three check out and the light still won't power on, try a different outlet and check the timer settings if you have one in the chain.
Light seems too dim
The most likely cause is that only the Veg or only the Bloom switch is on, cutting your output roughly in half. Turn both switches on. The other common cause is dust on the LED surface, which builds up over time and diffuses the light. Unplug the unit, let it cool, and gently wipe the lens surface with a soft, dry cloth. Don't use wet wipes or spray anything directly on the LEDs.
Plants stretching (stems getting long and leggy)
Stretching means the plant is reaching for more light. The light is either too far away, not bright enough for the stage, or running on Veg-only when it should be on both switches. Lower the light toward the recommended range for your stage and make sure both switches are on. If you're in veg at 30 inches, try 26 or 24 and watch the plant's response over a few days.
Leaf bleaching or burn
Bleached or bleached-looking leaves near the top of the canopy mean the light is too close or too intense for that stage. Raise the light by 3 to 6 inches and give the plant a few days to recover. If you're in the seedling stage, switch from both modes to Veg only until the plant toughens up. Burn-looking marks (brown crispy edges) can also come from heat, so check whether the fans are running.
Uneven growth across the canopy
If plants directly under the center of the light look great but those near the edges are smaller or paler, you're either trying to cover too large an area or the light isn't centered over the grow space. This light covers a 3x3 ft area well at 24 inches. If your grow space is wider, raise the light to spread coverage (at the cost of some intensity) or accept that edge plants will need more attention. Rotating pots every few days also helps even things out.
Flickering or partial illumination
Flickering usually points to a loose power connection or a failing power outlet. Re-seat the power cord at both ends and test the outlet directly. If half the LEDs are out (one side of the panel dark), and you've confirmed the connections are solid, that's likely a driver or board issue. Contact Wakyme support with your model number, as this is a warranty issue rather than a user fix.
Overheating or fans sounding wrong
The FSZD-10 has two built-in fans and an aluminum heatsink. If the unit feels unusually hot to the touch or the fans sound labored or grinding, the most common fix is cleaning. Unplug the light, let it cool completely, and use a can of compressed air to blow dust out of the fan vents. Dust accumulation is the number one cause of thermal issues on panel lights. If the fans are clearly not spinning after cleaning, contact customer support. Running the light with non-functional fans will shorten LED lifespan and may cause plant damage from radiant heat.
Where to put the light based on what you're growing
The right height and schedule depend a lot on your specific plants. Here's how to approach the most common setups:
Seedlings and young starts
Start at 28 to 30 inches above the trays and run the Veg switch only for 16 to 18 hours a day. Seedlings are fragile and will bleach fast if they're hit with full intensity at close range. After 10 to 14 days, when the first true leaves have developed, gradually lower to 26 inches and consider switching on the Bloom channel too. Watch the leaves daily at this stage.
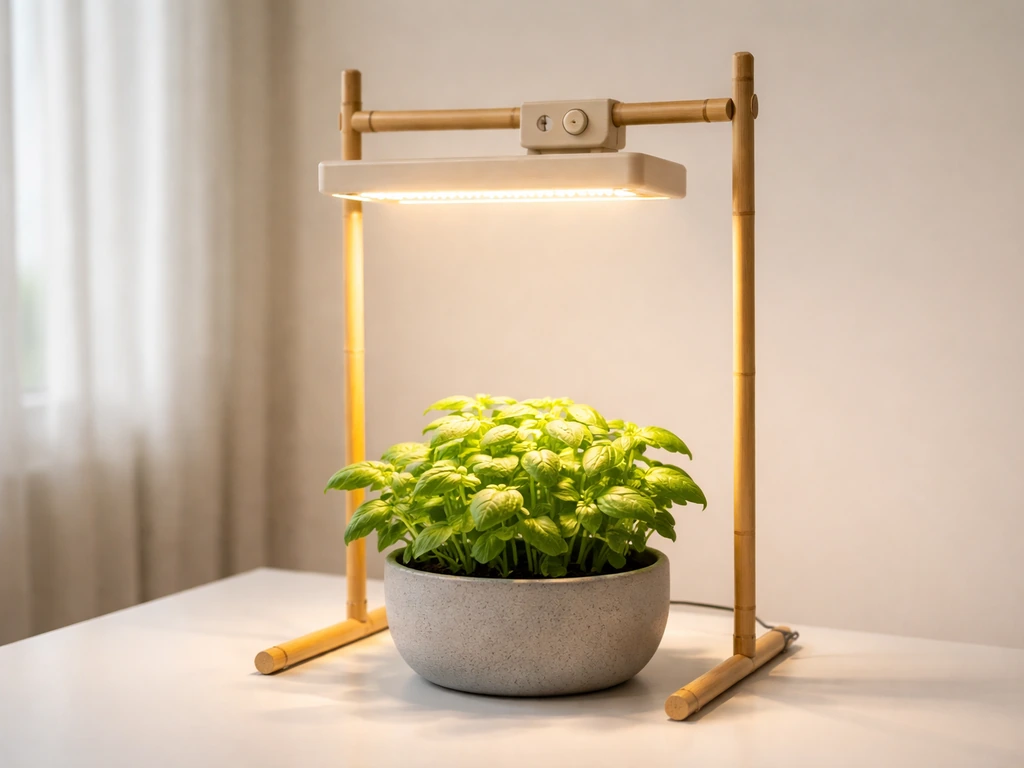
Herbs (basil, mint, cilantro, etc.)
Most kitchen herbs are fast-growing and light-hungry. Position the light 20 to 24 inches above the herb canopy with both switches on and run it for 14 to 16 hours a day. Herbs don't need a flowering trigger, so you can keep the 16-hour schedule indefinitely. If basil or mint starts bolting (sending up flower stalks), that's usually a temperature or stress response, not a light issue.
Houseplants
For non-flowering houseplants like pothos, philodendrons, or ferns, keep the light at 24 to 30 inches and run 12 to 14 hours a day with Veg only or both switches. These plants don't need high intensity and are more forgiving than edibles. If leaves are yellowing on the side closest to the light, raise it a few inches. If lower leaves are yellowing and growth is slow, that's usually insufficient light reaching the lower canopy, not a positioning issue with this light.
Succulents and cacti
Succulents want bright light but are very sensitive to heat buildup when light sources are close. Keep this light 24 to 30 inches above succulent arrangements and run 12 to 14 hours a day. Etiolation (stretching toward the light, losing their compact shape) means the light is too far away or the photoperiod is too short. Pale, washed-out color means the opposite. The Veg-only setting works well for most succulents since they rarely need red-spectrum flowering triggers indoors.
A few things worth knowing about similar lights
If you're also looking at or comparing other budget panel lights, many brands in this category use similar switch layouts and hanging hardware. Lights like those from Yadoker, Innova, Sondiko, and Aokrean follow a lot of the same principles around height, photoperiod schedules, and dual-switch operation. The specific PAR values, coverage areas, and switch behaviors will differ, so always cross-check the manual for the exact model you're running. But if you've gotten comfortable with the Wakyme FSZD-10's setup process, moving to or comparing another brand in this tier won't feel like starting from scratch.
Your next steps right now
- Confirm your model number on the label (look for FSZD-10 or similar on the back of the unit or the box).
- Hang the light at 28 to 30 inches above your canopy to start, using all four hanging points and the adjustable rope hangers.
- Plug into a 120V outlet via an external outlet timer, set for 16 hours on / 8 hours off for seedlings or veg, or 12/12 for flowering.
- For the first few days, run Veg only to let plants acclimate, then switch both Veg and Bloom on once plants look stable.
- Check the light height every week as plants grow and lower it gradually toward the recommended range for your stage.
- Every few weeks, unplug the light and clear dust from the fan vents with compressed air to keep it running cool.
FAQ
Can I use an extension cord and a timer with wakyme grow light instructions (FSZD-10) setup?
Yes, but only if your timer switches the power to the light reliably and is rated for the light’s real draw (about 213W for the FSZD-10). If your timer is a basic mechanical one, avoid models that plug into a power strip with loose connections, since heat buildup at a poor contact can cause flickering or intermittent shutdowns.
What should I check first if my Wakyme light seems dim even though it powers on?
If the light turns on but plants look underpowered, check for the most common cause first: verify both Veg and Bloom rocker switches are in the ON position. If only one side is active, output drops roughly in half, which can mimic an incorrect height or a failing LED.
How much clearance do I need around the light, and can I mount it against the tent roof?
Do not use it in a fully enclosed space without airflow. The fans need clearance above the heatsink and around the sides so dust and heat can move out. As a rule of thumb, keep a few inches of free space and ensure the grow tent exhaust is running when the light is on.
How do I adjust height when I see bleaching or stretching, using wakyme grow light instructions?
Use the recommended stage ranges as your starting point, then fine-tune using plant response. If you see bleaching at the canopy top, raise the light by 3 to 6 inches and hold it there for a few days, then adjust back down gradually. Sudden big height changes make it harder to identify what the plants are reacting to.
Is it better to run a complex schedule or keep it simple with Veg and Bloom rocker switches?
For the FSZD-10, you generally do not need to dim or use complicated schedules, because it has no built-in dimming hardware. Stick to consistent photoperiods (plants react to darkness length), and only change Veg to both modes, or switch to flowering photoperiod, when you intentionally transition stages.
Why do my plants grow well in the center but struggle at the edges with this Wakyme panel?
If you want even growth, center matters as much as height. For a single FSZD-10, aim for the main canopy to sit within the effective coverage (about 3x3 ft at the typical 24 inch reference point). Rotating pots helps with minor edge differences, but it will not fully correct having the canopy beyond the light’s designed spread.
Can I clean the LED surface with alcohol or wet wipes, and how often should I clean it?
Wipe only the LED surface gently with a soft, dry cloth after unplugging and letting the unit cool. Avoid wet wipes and do not spray anything directly on the LEDs or inside vents, since residue and moisture can reduce light output or lead to hot spots.
What does it mean if only half of the LEDs light up?
If only part of the panel goes dark after you confirm the cord is seated and both switches are on, that usually points to a driver or board problem rather than user setup. Stop using the light, note your model number, and contact customer support for warranty handling.
My seedlings bleach fast, how do I change the schedule or height to prevent it?
If seedlings bleach quickly, don’t immediately assume the timer is wrong. The most likely cause is intensity being too high for undeveloped roots, which you can fix by using Veg-only plus the higher end of the height range, then lowering gradually after true leaves appear.
Can I manually override the timer occasionally if I forget to start it on time?
For mixed schedules, pick one timer for the light and avoid manually turning it off mid-cycle. Consistency matters more than exact minute precision, but you should not frequently interrupt the photoperiod because that increases stress and can contribute to irregular growth.
What’s the right fix if the built-in fans sound grinding or stop working?
If the fans become noticeably noisy or labored, first do a dry compressed-air cleaning with the light unplugged and fully cooled. If fans still do not spin after cleaning, stop operation, since running without functional fans can shorten LED lifespan and may overheat the heatsink.
How do I update the timer if I switch from Veg to flowering using wakyme grow light instructions?
Yes, but confirm your plants’ schedule can still meet the correct photoperiod targets when you move from seedlings to veg and then to flowering. In practice, you should change the timer settings at stage transitions, not day-to-day, and recheck height after each transition.
Next Article
Yadoker Grow Light Instructions: Setup, Height, and Troubleshooting
Step-by-step Yadoker grow light setup, height, coverage, dimming and timer use plus fixes for common issues.