Set up your Jump Start grow light system by assembling the stand, installing the fluorescent tubes before plugging anything in, hanging the fixture 2 to 4 inches above your seedlings, then plugging into a standard 120V outlet. If your kit includes the built-in timer, press the 12 or 18 button at the exact time you want the light to turn on, and the cycle starts from that moment. That covers 90% of what you need to get growing today.
Jump Start Grow Light System Instructions: Setup and First Test

Marcus Tillman
4 May 2026
First, figure out exactly which Jump Start kit you have
Jump Start is a Hydrofarm exclusive brand, and the product line covers more than just grow lights. There are heat mat controllers (like the MTPRTC), seed-starting propagation kits, and multiple grow light configurations. Before you follow any setup steps, confirm which kit is actually in your box.
Look at the model number on the box, the instruction sheet, or the label on the fixture itself. The most common grow light models you'll encounter are the standalone stand kits (JSV2 for the 2 ft version) and the modular T5 light strip with timer (JSFS18T, JSFS2T, and JSFS4T). The older stand-based kits use model references like GTV2 or GTV4 in their assembly instructions. Knowing your model matters because the timer setup and mounting method differ slightly between them.
- JSV2: 2 ft stand kit, fixture with bulb included, grounded cord with on/off switch, no built-in programmable timer
- GTV2 / GTV4: Stand-based fluorescent kits with upright legs, crossbar, and AgroBrite full spectrum tubes
- JSFS18T / JSFS2T / JSFS4T: Modular T5 strip with built-in timer, 12hr or 18hr cycle buttons
If your box has a manual with a May 2019 revision date, you almost certainly have one of the JSFS modular T5 models. If you see a simpler assembly diagram with leg posts and a crossbar, you have the stand-based GTV2 or GTV4 kit. When in doubt, search your model number on the Hydrofarm website or check the ManualsLib listing for JSFS18T/JSFS2T/JSFS4T to download the correct PDF.
Unboxing and identifying your kit parts
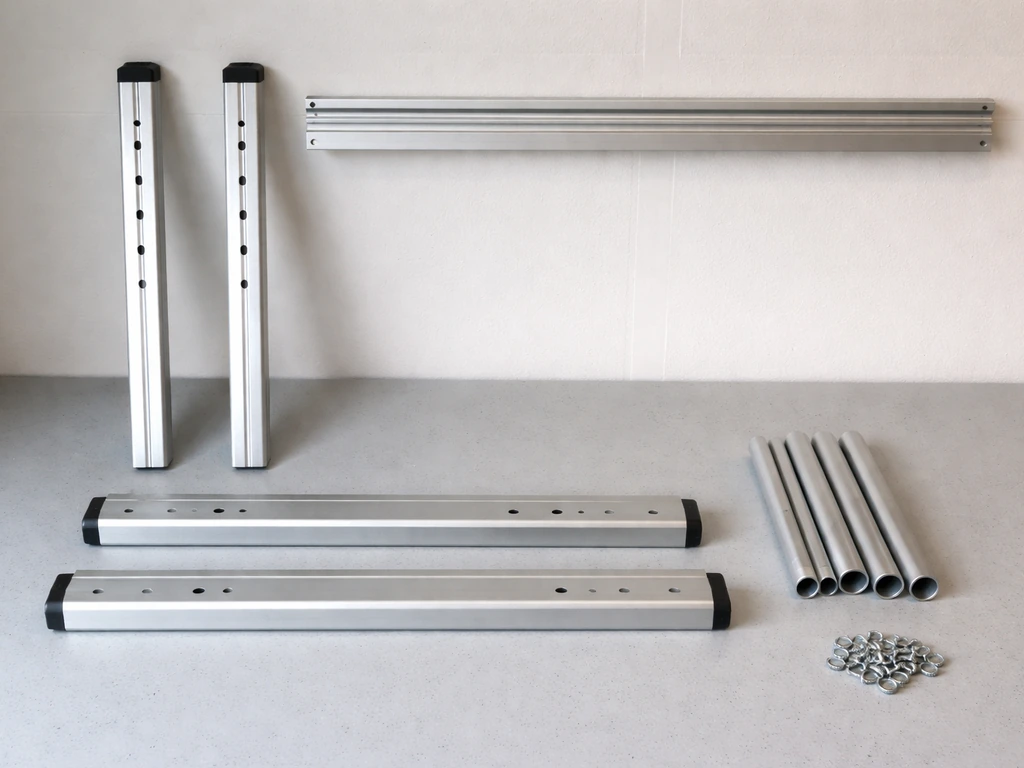
Lay everything out before you start assembling anything. Missing a small part at step 3 after you've already built the stand is genuinely annoying. Here's what you should see in a standard stand-based kit.
- 2 upright stand legs
- 2 x 18-inch foot pieces
- 1 channel crossbar
- #10 Phillips screws and flat washers
- 1 fluorescent fixture (1 to 4 ft or 2 ft depending on model)
- 2 AgroBrite full spectrum fluorescent tubes (25W, 34W, or 40W rated for EPACT compliance)
- S-hooks and hanger cables for hanging the fixture
- Grounded power cord with on/off switch
For modular T5 kits (JSFS18T, JSFS2T, JSFS4T), you'll also have a docking strip and a timer unit built into the cord assembly rather than a separate stand. The parts count is different, so cross-reference against the specific manual for your model.
Before touching the tubes, remove the cardboard packaging from each tube and inspect both socket ends on the fixture. The instruction manual is explicit about this: check that the sockets are open and ready to receive the pins. If a socket looks bent, clogged, or misaligned, do not force the tube in. Contact Hydrofarm support or the retailer before proceeding, because forcing a tube into a damaged socket can crack the tube or damage the ballast.
Quick start setup: mounting, wiring, and first power-on
Step-by-step assembly for stand-based kits
- Attach the 2 upright legs to the 2 foot pieces using the #10 Phillips screws and flat washers. Snug them down but don't overtighten.
- Slide the channel crossbar into position between the uprights and secure it at your desired height.
- Install the fluorescent tubes now, before plugging in. Insert each tube by aligning the pins vertically into the socket, then rotate the tube until it seats and locks. You should feel a slight click or resistance when it's properly seated.
- Hang the fixture from the channel crossbar using the S-hooks and hanger cables. The cables allow you to raise and lower the fixture height.
- Level the fixture. If one side hangs lower, gently pull the lower side cord until the fixture is level, then lock it in place.
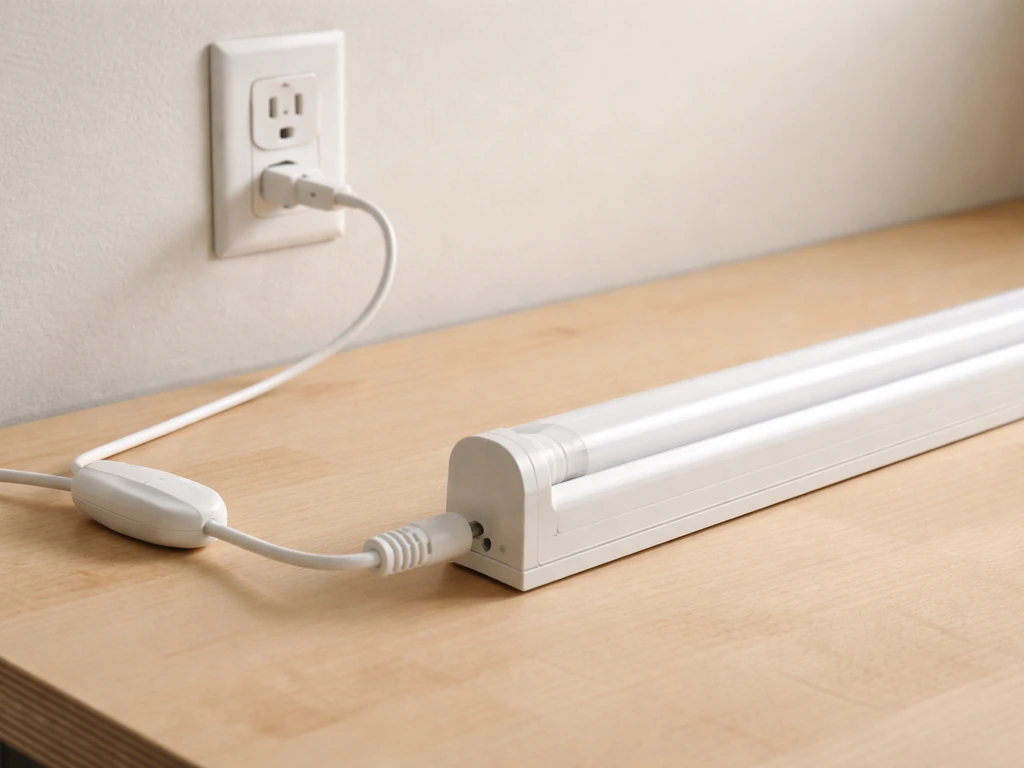
- Plug the grounded power cord into a standard 120V outlet. Turn on the switch and confirm the tubes light up.
That order matters. Install the tubes, hang the fixture, set the height, then plug in. Never install or remove tubes while the fixture is powered. It's a simple safety habit that protects you and the ballast.
One critical safety rule
Do not plug this fixture into a dimmer switch. The manual states this explicitly, and it's not just a preference. Fluorescent ballasts are not compatible with dimmers and can overheat, flicker badly, or fail outright. Use a standard outlet or a grounded timer outlet only.
First test
Once plugged in, both tubes should illuminate within a second or two. T5 fluorescents occasionally flicker briefly on first start in a cold room, which is normal. If one tube stays dark after 10 seconds, turn off the switch, unplug, and reseat that tube by rotating it back out and re-inserting it. A tube that is slightly off-angle won't make proper contact with the socket pins.
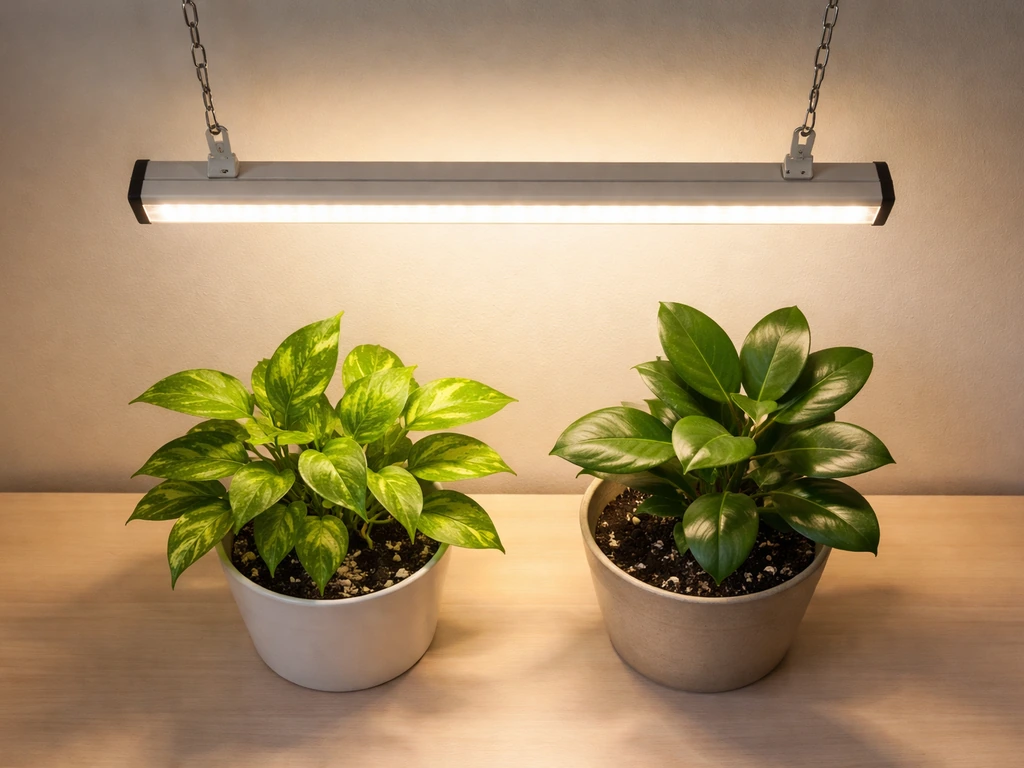
Placement for seedlings vs. houseplants
This is the part most people get wrong, and it's also the easiest to fix. Jump Start grow lights are T5 fluorescents, which produce good intensity close up but fall off quickly with distance. Placement is everything.
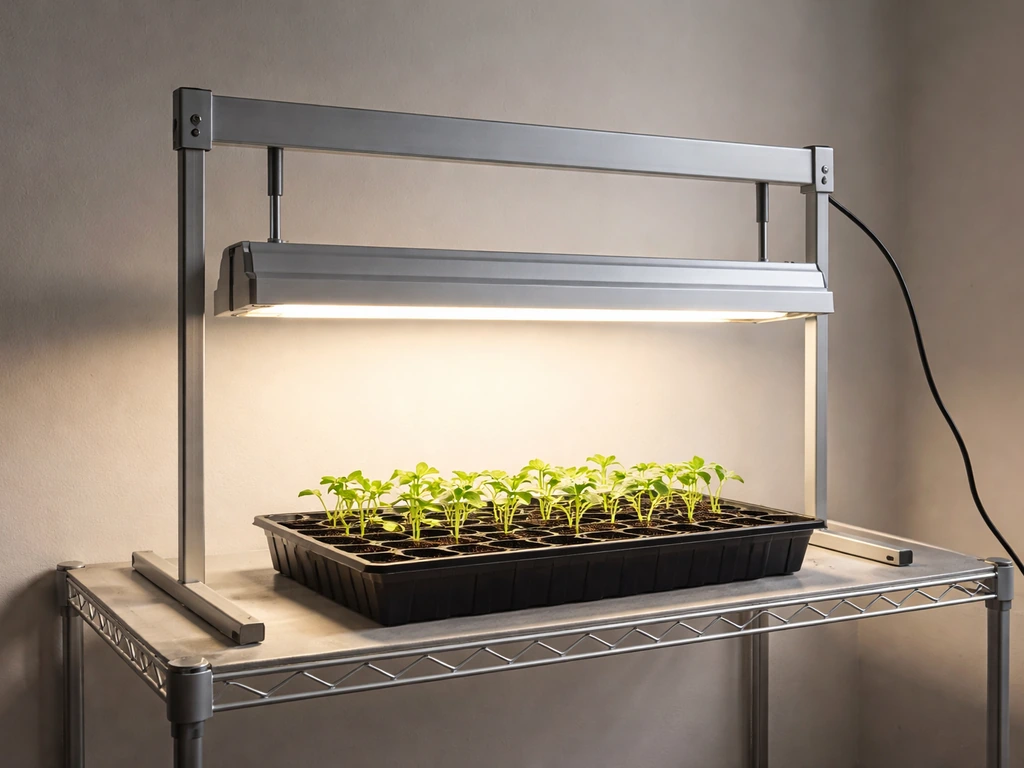
Seedlings and cuttings
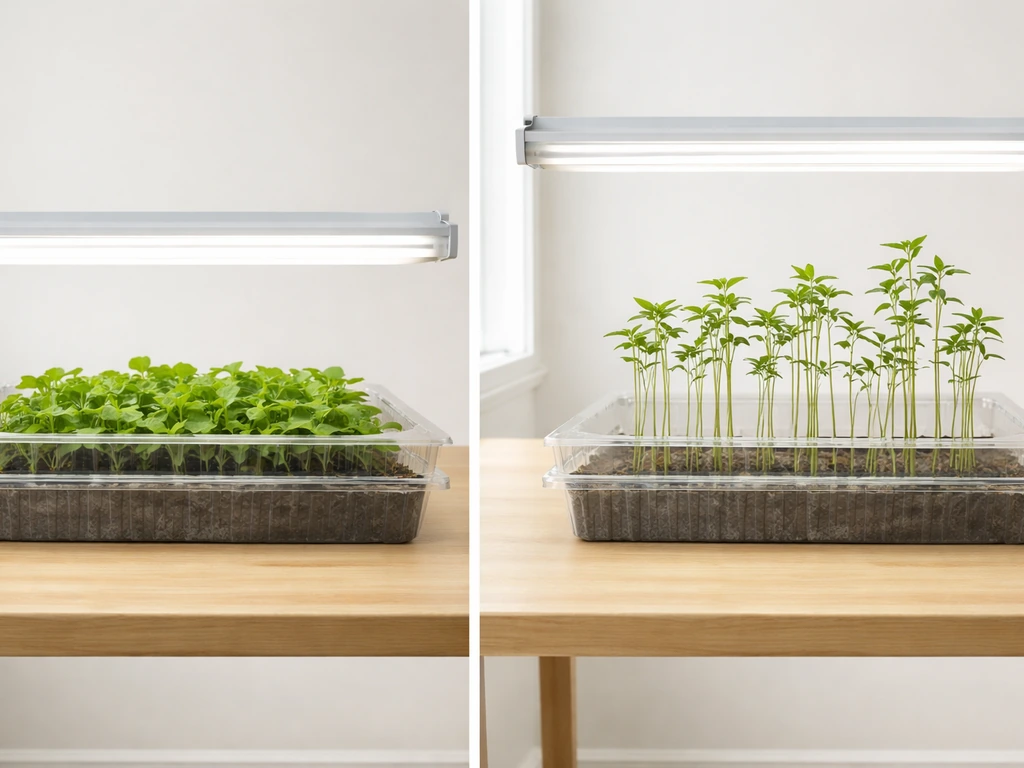
Keep the tubes 2 to 4 inches above the tops of your seedlings or cuttings. That range is not flexible for T5 fluorescents. If you go beyond 4 inches, seedlings stretch upward trying to reach the light and grow spindly with weak stems. That spindly look is the single clearest sign your light is too far away. As seedlings grow, raise the fixture daily or every couple of days to maintain that 2 to 4 inch gap.
Established houseplants
For established foliage houseplants that are just getting supplemental light, you have a bit more flexibility. Keeping the fixture 6 to 12 inches away is reasonable for most low to medium light houseplants. For plants that want stronger light, stay closer to the 4 to 6 inch range. If you're moving plants from low-light conditions to this setup, don't jump straight to maximum closeness. Give them a few days of exposure at a greater distance and then move them closer gradually, the same way you would acclimate a plant to outdoor sun.
| Plant Type | Recommended Distance from Tubes | Notes |
|---|---|---|
| Seedlings / cuttings | 2 to 4 inches | Raise fixture as plants grow to maintain gap |
| Established foliage houseplants (supplement) | 6 to 12 inches | Gradual acclimation needed if moved from low light |
| Houseplants needing stronger light | 4 to 6 inches | Watch for bleaching or leaf curl as a sign of too close |
| Flowering / fruiting plants | 2 to 4 inches | Shorter photoperiod applies, but keep same distance |
Beam spread and coverage
T5 strip lights cast a fairly narrow footprint directly below the tubes. If you have trays of seedlings wider than the fixture, the plants at the outer edges will get noticeably less light. Rotate your trays every day or two so edge plants get time under the center of the fixture. This single habit prevents the uneven growth that frustrates a lot of new growers.
Setting intensity and photoperiod: timers, schedules, and what to avoid
Jump Start T5 fluorescents don't have a variable intensity dial. You control effective intensity through distance. Closer equals more intense, further equals less. So when the instructions talk about intensity, they mean move the fixture, not turn a knob.
Recommended photoperiods
| Growing Stage / Plant Type | Recommended Daily Light Hours |
|---|---|
| Seed starting | 16 to 18 hours on |
| Growing / vegetative houseplants | 14 to 18 hours on |
| Maintaining or supplementing houseplants | 4 to 8 hours on |
| Flowering (short-day) plants | 10 to 12 hours on |
Using the built-in timer on JSFS models
If you have an JSFS18T, JSFS2T, or JSFS4T, the timer is built into the system and gives you two options: 12 hours on / 12 hours off, or 18 hours on / 6 hours off. To program it, press the 12 or 18 button at the exact clock time you want the light to turn on. That moment becomes the start of the cycle. For example, if you want the light on from 6:00 a.m. to midnight, press the 18 button at 6:00 a.m. The fixture will stay on for 18 hours and then shut off automatically for 6 hours.
The timer doesn't have a clock display, so precision matters at the moment you press the button. If you press it three minutes late, the cycle runs three minutes late every day. Set it when you can be exact, or within a minute. For most seedling trays, a few minutes of drift won't matter, but for flowering plants that are photoperiod-sensitive, try to be accurate.
Using a separate plug-in timer (stand-based kits)
For the JSV2 or GTV2/GTV4 kits that don't include a built-in timer, the manual specifically recommends using a grounded timer to make the light automatic. For stand-based kits, the manual specifies plugging the fixture into a 120V outlet and recommends using a grounded timer for automatic operation blank" rel="noopener noreferrer">grounded timer to make the light automatic. A standard mechanical outlet timer works perfectly. Set the on-time to your desired start and the off-time to match your target photoperiod. Plug the fixture's cord into the timer, and the timer into the wall outlet.
The dark cycle rule most people ignore
Plants use darkness to track time, and interrupting that dark period can cause real problems. If you have a 12-hour dark period set and you turn on a room lamp or even bright street light leaks in through a window, photoperiod-sensitive plants can get stuck in vegetative mode and refuse to flower. The Jump Start instructions call this out directly. Keep the dark period genuinely dark for plants that are flowering or are photoperiod-sensitive. For seedlings in a 16 to 18 hour light schedule, a brief interruption is less critical, but consistency is still a good habit.
Watering, heat, and airflow: keeping your plants healthy under the light
T5 fluorescents run cooler than HID or high-wattage LEDs, but at 2 to 4 inches above seedlings they still add warmth to the growing environment. Here's how to manage the basics without overcomplicating it.
Watering under grow lights
Seedlings and cuttings should stay consistently moist but never wet. That distinction matters more under grow lights because the added warmth can dry out trays faster than you expect, especially at 2 to 4 inches. Check moisture daily by pressing a finger an inch into the growing medium. At the same time, avoid letting water pool or stand at the bottom of trays. Standing water combined with warm, humid conditions is a fast path to damping off or root rot, which can wipe out an entire tray of seedlings in 48 hours.
Managing heat
At 2 to 4 inches, T5 tubes are close enough to raise canopy temperature by a few degrees. Use the back of your hand held at plant height for 30 seconds. If it feels uncomfortably warm to you, it's probably too warm for seedlings. Raising the fixture by an inch or two usually resolves it. If you're in a small tent or enclosed space, running a small fan on low to move air through the space helps keep temps even and prevents hot spots directly under the fixture.
Airflow basics
A gentle airflow across seedlings does two useful things: it prevents stagnant humid air from sitting on leaf surfaces (which encourages fungal problems), and the slight stem movement actually helps seedlings develop stronger stems. You don't need a dedicated grow tent fan for a small setup. A small oscillating desk fan on its lowest setting pointed at the wall nearby rather than directly at plants is enough.
Common problems and how to fix them

Light won't turn on at all
Check the obvious first: is the cord switch in the on position and is the outlet working? Test the outlet with a phone charger. If the outlet is fine, unplug the fixture, reseat both tubes by rotating them out and back in, and try again. A tube that feels seated but is off by a few degrees of rotation won't make contact with the socket pins.
Flickering
Brief flickering on a cold startup is normal for fluorescent tubes and usually stops within 30 seconds. If a tube flickers continuously, it's almost always a seating issue. Unplug, let it cool, reseat the tube, and retest. Persistent flickering on a properly seated tube can indicate a failing tube or a ballast issue. Try swapping the tube to the other socket position to see if the flicker follows the tube or stays in the same socket position. If the flicker follows the tube, replace the tube. If it stays in the socket, the fixture may need to be replaced or sent back.
Dim output
Fluorescent tubes lose intensity over time. If your tubes are older than 12 months of regular use or look noticeably darker near the ends (a grey or dark ring near the tube pins), replace them. Also double-check that you're using the correct wattage: 25W, 34W, or 40W rapidstart tubes that comply with EPACT standards. Using the wrong tube type or a non-rapidstart tube in a rapidstart ballast fixture will give you dim, unstable output.
Timer not working as expected
The most common timer error is pressing the cycle button at the wrong time. Remember: the moment you press 12 or 18 is the start of the on cycle. If you pressed it while testing and not at your intended start time, the cycle is now anchored to the wrong hour. To reset, simply press the button again at the correct time you want the lights to come on. For plug-in mechanical timers on non-timer kits, make sure the timer's dial is set to your local time and that the on/off trippers are placed correctly around the dial.
Uneven growth across the tray
If plants in the center of the tray are noticeably larger or more vigorous than those at the edges, the fixture footprint isn't covering the whole tray evenly. Rotate the tray 180 degrees every day or two. If edge plants are consistently behind, consider whether a wider fixture (like upgrading to a 4 ft model) better matches your tray size. Also confirm the fixture is hanging level. A tilted fixture concentrates light toward one end and leaves the other end noticeably dimmer.
Spindly, stretched seedlings
Stretching is the number one sign the fixture is too far away. Lower it until you're back in the 2 to 4 inch range from the tops of the seedlings. If you're already at 2 inches and still seeing stretch, check whether one of your tubes has failed or dimmed significantly, because half the fixture running at full output can look lit but deliver noticeably less total intensity.
Lamp replacement when needed
Always unplug the fixture and let the tubes cool completely before removing them. For modular T5 kits, detach the strip from the dock first. Then rotate the lamp clockwise to loosen it, lift it out, insert the replacement, and rotate counterclockwise to lock it into the socket. Plug back in and test before reassembling anything else.
How Jump Start compares to other grow light brands
Jump Start sits in a practical, beginner-friendly tier alongside other fluorescent and simple LED options. The stand-based design and modular T5 format make it a solid choice for seed starting and propagation, where you need a reliable close-range light without complicated controls.
If you've looked at other systems like Mosthink LED, Feit, Bestva, or Great Value grow lights, the key difference is that Jump Start's fluorescent models are specifically optimized for seedling trays and cuttings at very close distances, rather than general-purpose room lighting or high-intensity plant coverage. If you are switching from Mosthink LED grow light instructions, keep in mind that distance and photoperiod still drive performance under Jump Start T5 fluorescents.
The trade-off is that fluorescent tubes need replacing every 12 to 18 months, while LED options last longer. For a dedicated seed-starting setup, Jump Start's simplicity and proven performance at 2 to 4 inches is genuinely hard to beat for the price.
Your next steps after first setup
Check your plants every morning for the first week. You're looking for healthy green color, upright stems, and steady growth as signs everything is dialed in. Adjust fixture height as plants grow taller. Rotate trays every couple of days to even out coverage. Watch moisture levels more closely than you would with natural light, because the added warmth from the fixture dries media faster. And if anything looks off, distance and photoperiod are the first two variables to check before assuming something is wrong with the equipment.
FAQ
What’s the best way to confirm the tubes are fully seated after setup?
Do a one-time “socket contact” check before your first real run: with the fixture unplugged, confirm both tube ends are fully seated and straight in their sockets, then plug in and watch for stable lighting within about 10 seconds. If you see repeat flicker later, reseat only the tube that flickers, and test with the fixture cool so you are not masking a marginal connection.
My seedlings are stretching, but the fixture is already close, what should I check next?
If your seedlings are stretching, reduce height first (back into the 2 to 4 inch band). If height is already near 2 inches and you still see stretch, the next checks are the tube age and correct wattage (25W/34W/40W rapidstart). A failing tube can leave the fixture “partly lit” while delivering weak total intensity.
Can I use a dimmer with the Jump Start grow light if I’m only lowering brightness a little?
Switching from a dimmer to a timer is fine only if the timer output is a full-on, non-dimmer electrical connection. The key is that the fixture must see steady 120V when “on,” not a reduced-voltage or phase-controlled output.
If I need to change the daily start time, how do I reset the built-in timer schedule?
For the built-in timer (JSFS18T/JSFS2T/JSFS4T), the on/off schedule is anchored to when you press the 12 or 18 button. If you want a different daily start time, you must press the button at the new intended start time, because you cannot “shift” the cycle without resetting it.
What should I do if my plants are getting light during the “off” period?
If the room light leaks into the dark period, the most reliable fix is physical control, not just turning the timer on correctly. Use a closed shelf, blackout curtain, or cover that blocks daylight during the entire dark window for photoperiod-sensitive plants.
Are brief light interruptions during the dark period always a problem?
Yes, but you still need to keep the dark period truly dark. For seedlings on long light schedules, small interruptions are usually less damaging, but for flowering crops you should avoid any bright light in the off window, including headlights or a bright phone screen near the setup.
How much airflow is ideal, and how do I avoid drying out seedlings?
Aim airflow across the setup, not directly blasting the canopy. If leaves flutter hard or soil dries too quickly, point the fan to bounce off a wall or reduce speed, then re-check moisture daily because closer tubes can warm and dry trays faster than expected.
What’s the safe troubleshooting order if one tube stays dim or flickers?
Do not troubleshoot live. Unplug first, let tubes cool, then reseat. If a tube was removed and you put it back, wait for it to stabilize before judging performance, because cold fluorescent behavior can look abnormal briefly.
How should I adjust fixture height as seedlings develop?
Because intensity is distance-controlled, don’t treat “4 inches” as a suggestion for all growth stages. Keep 2 to 4 inches for seedlings and cuttings, then adjust upward gradually as they grow so you preserve strong contact intensity without forcing excess stretching.
What if rotating the tray doesn’t fix uneven growth across the ends?
If edge plants are always weaker, rotating the tray helps but may not be enough for very wide trays. After a week of rotation, if the center remains consistently bigger, consider matching the tray width to the fixture footprint or upgrading to a longer 4 ft model so both ends receive similar coverage.
My light seems dim, how do I tell if it’s the tube age versus the wrong tube type?
If your tubes look fine but output seems weak, check for two “silent” causes: correct rapidstart tube type for your ballast, and tube replacement timing. Fluorescents often dim from age and can show darker rings near the pins, even if they still glow.
What’s the correct process to replace a tube in the modular T5 setup?
For replacing modular T5 tubes, always unplug and cool first, detach the strip from the dock before removing a tube, then lock the new tube back by rotating in the correct direction. After replacement, plug in and confirm both tubes illuminate properly before fully reassembling.
Next Article
Great Value Grow Light Instructions Setup, Use, Troubleshoot
Great Value grow light step-by-step setup, placement, timer settings, and troubleshooting for healthy indoor plant growt