You can build a solid, adjustable grow light stand in an afternoon with about $30–$80 in materials, depending on whether you go with PVC pipe or steel conduit. The goal is a frame that holds your light at the right height, lets you raise it as plants grow, and won't tip over onto your seedling trays at 2 a.m. This guide walks you through every decision: dimensions, materials, assembly, mounting, and positioning, so you can get your stand built and your lights dialed in the same day.
How to Build a Grow Light Stand Step by Step

Marcus Tillman
9 Apr 2026
Choosing a stand design and dimensions
Before you buy a single piece of pipe, figure out what you're actually growing and where the stand is going. Those two things drive every dimension decision. A seedling setup and a houseplant setup have very different requirements, and building the wrong size is the most common mistake beginners make.
For seedlings, you need a stand that starts with the light only 4–6 inches above the tops of the plants, that's the distance University of Minnesota Extension recommends for artificial lighting when starting seeds. But seedlings grow fast, so you need a design that lets you raise the fixture incrementally. A stand that only works at one fixed height will frustrate you within a week.
For houseplants or larger transplants, you'll want more clearance, typically 12–24 inches between the light and the canopy, depending on the fixture type. The key principle is the same either way: height equals intensity control. As University of New Hampshire Extension research on LED light bars showed, the difference between mounting at 8 inches versus 20 inches above the crop can mean needing to run your light for 8 hours a day versus 16 hours a day to hit the same light dose. That's a huge difference, and your stand design is what determines your range of options.
Standard dimensions that work for most setups
- Width: Match the width of your growing tray or shelf, typically 20–24 inches for a standard 10x20 seedling flat
- Depth: 10–12 inches is fine for single-row trays; go 18–24 inches if you're covering a wider growing area
- Minimum height: 18 inches from the ground to the lowest light position (gives you room to work under it)
- Maximum height: 48–60 inches lets you accommodate mature plants or stack multiple shelf levels
- Uprights: Two vertical posts are enough for most single-light setups; use four posts if you're building a shelf-style multi-tier stand
If you're planning a more involved build, say, a full shelf system with multiple fixtures, it's worth reading up on setting up a DIY grow light system before you finalize your frame dimensions, since the shelf spacing will depend on what you're growing at each level.
Materials and tools: cheap vs. sturdy options
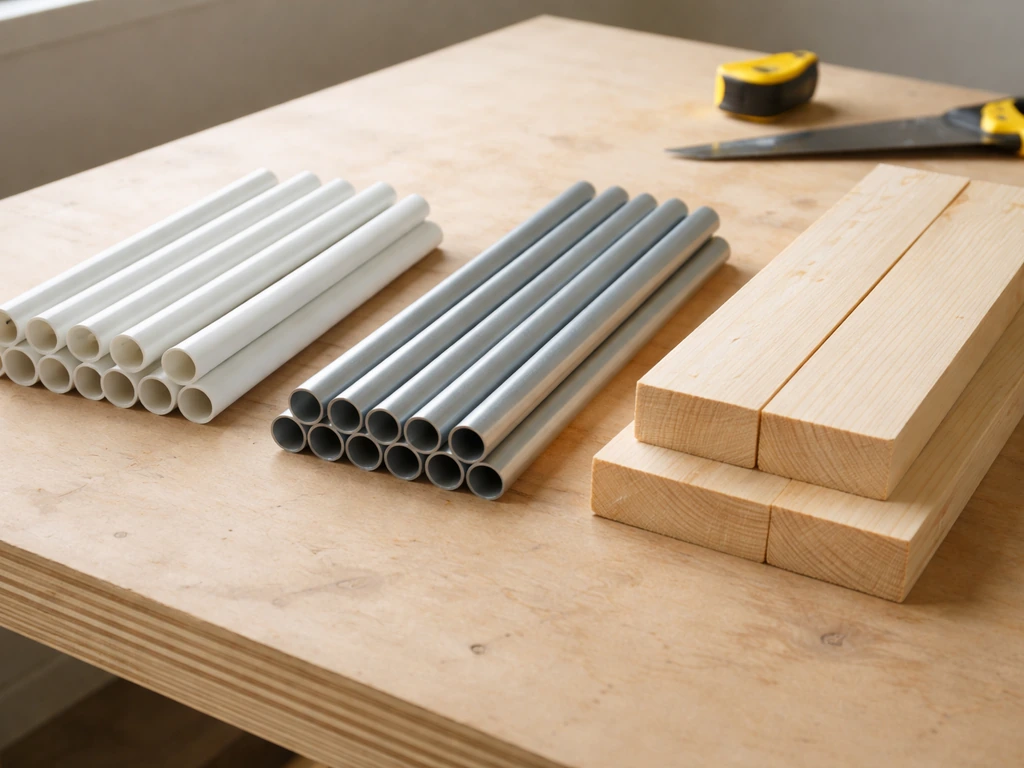
There are three realistic material choices for DIY grow light stands: PVC pipe, electrical conduit (EMT), and lumber. Each has real trade-offs. Here's a straight comparison:
| Material | Cost (basic stand) | Max load | Adjustability | Best for |
|---|---|---|---|---|
| PVC pipe (3/4" or 1") | $15–$30 | 5–10 lbs safely | Easy with slip fittings | Seedling trays, lightweight LED bars |
| EMT conduit (1/2" or 3/4") | $25–$50 | 15–25 lbs | Moderate (requires set screws or clamps) | Heavier fixtures, longer-term setups |
| 2x4 lumber | $20–$40 | 30+ lbs | Less flexible unless slotted | Permanent stations, heavy quantum boards |
| Unistrut / slotted channel steel | $40–$80 | 50+ lbs | Excellent (bolt-anywhere) | Serious growers, multi-light rigs |
For a first build, 3/4-inch PVC is genuinely good enough for most seedling and small houseplant setups. It's cheap, cuts with a hacksaw, glues together permanently or press-fits for temporary setups, and is light enough to move around. University of Maryland Extension actually points gardeners toward PVC tabletop light stand designs as a practical approach to proper lamp positioning for seed starting, so you're in good company starting there.
If you're hanging a heavier fixture, like a quantum board panel or a full-size LED bar over 3 lbs, go with EMT conduit or lumber. The last thing you want is a PVC joint creeping loose and dropping a light onto seedlings. If you're curious about building the fixture itself as well as the stand, there's a solid walkthrough on how to build your own grow lights that pairs well with this guide.
Tools you'll actually need
- Tape measure and pencil
- Hacksaw or PVC pipe cutter (for PVC), or a metal pipe cutter / angle grinder (for EMT)
- Drill with bits (for lumber builds or adding anchor holes)
- Level (a cheap torpedo level works fine)
- PVC cement and primer (if gluing PVC permanently) or zip ties / hose clamps for adjustable joints
- Sandpaper or a deburring tool to smooth cut edges
- Ratchet straps, S-hooks, or adjustable rope ratchets for hanging the fixture
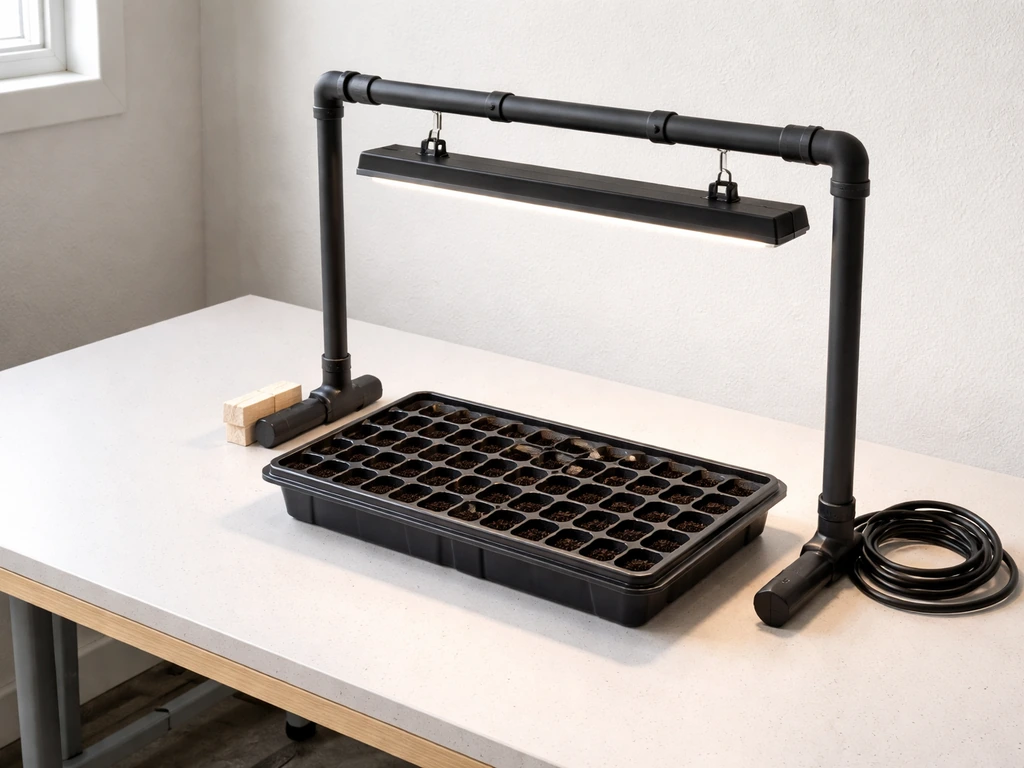
Assembly steps for a stable, adjustable stand
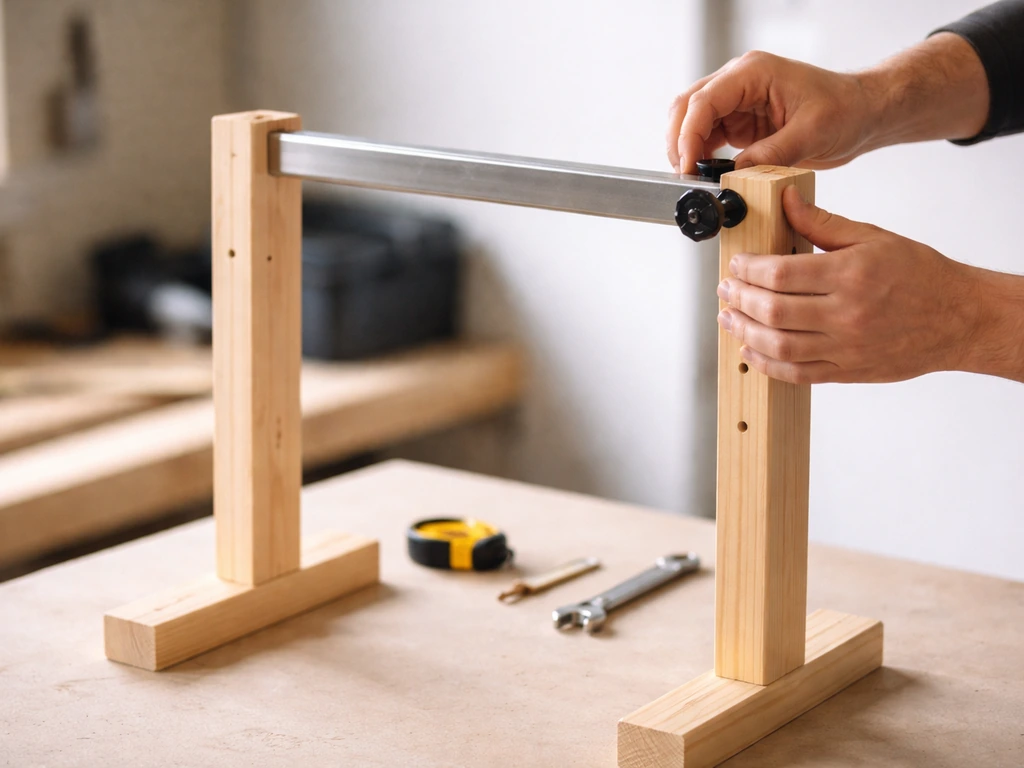
These steps apply to a basic two-upright, single-crossbar stand, which covers most single-light home setups. Adapt the approach for more complex designs, but get this version working first.
- Cut your uprights to height. For a 48-inch maximum height stand, cut two pieces to 48 inches. Add 4–6 inches if you're using feet or base fittings that eat into your height.
- Cut your base pieces. Two horizontal base pipes of 18–24 inches (matching your tray width) give the stand a stable footprint. T-fittings or elbow fittings connect them to the uprights at floor level.
- Cut your crossbar. This is the horizontal piece that spans the top and holds your light. Cut it to match your tray width, typically 20–24 inches for a standard flat.
- Dry-fit everything before gluing. Press all fittings together without cement first, check that it stands level, and verify the crossbar is actually centered over your grow area.
- Add adjustability before you commit. If you want the light to move up and down, do NOT glue the crossbar connection. Instead, use a slip-tee fitting or clamp-style fitting at the top of each upright so you can slide the crossbar up or down. Two hose clamps tightened on the upright below the fitting act as stops to lock height.
- Glue the base and uprights permanently, but keep the crossbar connection adjustable. This gives you a stable base with a movable light rail.
- Weigh the base down. Add a sandbag, a heavy potted plant, or zip-tie the base to a shelf to prevent tipping. A top-heavy stand with a light fixture is a real tip risk, especially on smooth floors.
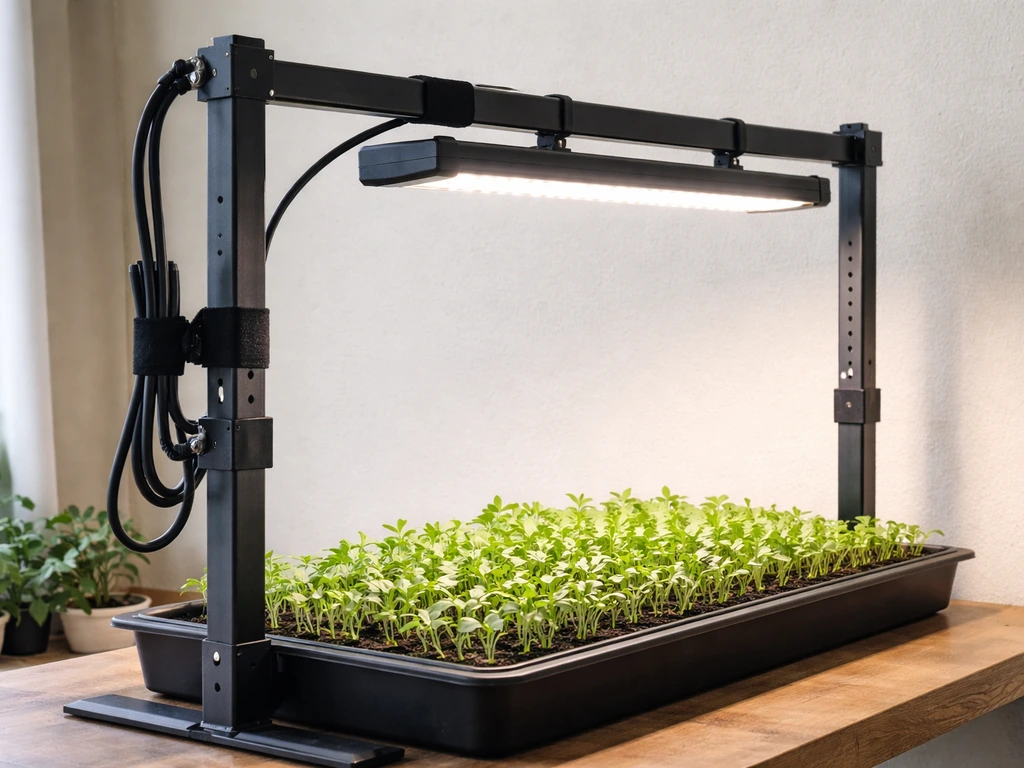
If you're building something more ambitious, multiple tiers, a dedicated grow tent alternative, or a stealth cabinet, the same core principles apply but you'll want to look at more complete plans. A resource on do-it-yourself grow light projects covers a wider range of build types and is worth a look before you over-engineer your first stand.
Mounting the light and managing cables safely
How you attach the fixture to the crossbar matters a lot for both safety and adjustability. Most LED bars and strip lights come with hanging hardware, use it. The typical setup is two adjustable rope ratchets (sometimes called yoyo hangers) clipped to the crossbar with S-hooks, with the fixture hanging from them. To reduce electrical safety risks like daisy-chaining extension cords or power strips, follow the University of Michigan EHS guidance for extension cord and power strip use. Rope ratchets let you raise or lower the light in seconds without tools, which is exactly what you need as seedlings grow.
For heavier fixtures like quantum board panels, make sure the crossbar can actually support the weight. A 3/4-inch PVC crossbar spanning 24 inches can handle around 5 lbs before it starts to sag noticeably. If your fixture is heavier than that, switch to a 1-inch PVC crossbar, a piece of 3/4-inch EMT, or a 1x2 lumber rail. If you're interested in building a quantum board light to go with your stand, there's a full guide on how to build a quantum board grow light that covers the hardware specifics.
Electrical safety basics you can't skip
- Always plug grow lights into a grounded (3-prong) outlet or power strip. Never use an ungrounded adapter.
- Use a power strip with a surge protector and an on/off switch — it makes daily operation much easier and adds a safety layer.
- Keep all cords off the floor and away from water sources. Use cable clips, zip ties, or adhesive cord guides to route cords up along the stand uprights.
- Don't daisy-chain multiple power strips. Run one good-quality power strip per station and plug it directly into the wall.
- Check the wattage draw of all your fixtures and make sure the circuit you're using can handle it. A standard 15-amp circuit can handle about 1,800 watts total — more than enough for most home grow setups, but worth confirming.
- Keep the fixture away from any flammable materials. Maintain at least 12 inches of clearance around LED fixtures and more around any HID or fluorescent fixtures that run hotter.
- Inspect cords before every grow season for cracks, fraying, or damaged insulation. Replace any damaged cords immediately.
Cable management also just makes your setup look better and more intentional. Virginia Tech EHS also warns against blank" rel="noopener noreferrer">daisy chaining power strips, meaning you should not plug a power strip into another power strip. If that matters to you, there's a useful guide on how to make your grow light setup look good that covers cord routing and stand aesthetics without sacrificing function.
Positioning your light for good coverage
Height is your primary tool for controlling both intensity and coverage area. Lower the light for more intensity over a smaller area; raise it for less intensity spread over a wider area. For seedlings, start at 4–6 inches above the seedling tops and raise the light as they grow, or lower the trays if your stand makes that easier. For example, a Reddit r/indoorgardening discussion also debates short hanging distances for LED seedling setups and emphasizes following the light manufacturer's guidance For seedlings, start at 4–6 inches above the seedling tops. For houseplants or established transplants, 12–18 inches is a reasonable starting point for most LED fixtures.
One thing that catches beginners off guard: intensity isn't uniform across the entire fixture. Oklahoma State University Extension specifically notes that fluorescent tubes lose intensity near their ends, meaning seedlings placed at the edges of a fluorescent fixture get meaningfully less light than those in the middle. This applies to some LED bars too. The fix is simple: rotate your trays 180 degrees every few days so every plant gets time under the center of the fixture.
For single-bar or single-fixture setups, position the light so it's centered directly over the middle of your tray. If you're covering a wider area with multiple fixtures, space them evenly and aim for about 50% overlap of their light footprints at your chosen hanging height, this smooths out the intensity variation between fixtures. The exact overlap you need depends on the beam angle of your specific fixture, but 6–8 inches of side-by-side spacing between bar lights is a good starting point for most 2-foot LED bars hung at 12 inches.
It's also worth remembering that light requirements change as plants develop, seedlings, transplants, and mature plants need different intensities and durations. A good reference on building and configuring grow lights covers how to think about those stage-specific adjustments in more depth.
Testing, troubleshooting, and improving your setup
Once your stand is built and the light is hung, don't just flip the switch and assume everything is right. Run a quick check before you put plants under it.
- Turn on the light and let it run for 30 minutes. Check that the fixture isn't getting unusually hot at the hanging point or at the power supply.
- Check that the stand doesn't wobble or shift. Give it a gentle push from the side and from the front. If it moves, add base weight or consider anchoring it.
- Verify the height is actually what you measured. Tape measures lie when you're working alone — hang a ruler or stick from the crossbar and confirm the distance to your tray surface.
- Check cord routing. Make sure no cords are pinched, hanging near water, or in a position where they could be pulled tight if someone bumps the stand.
- Do a visual alignment check from above. The light should be centered over your growing area, not offset to one side.
Common problems and quick fixes
- Seedlings are leggy and stretching toward the light: The light is too far away. Lower it to 4–6 inches above the seedling tops and check that it's running for at least 14–16 hours per day.
- Leaves are bleaching or showing white/yellow patches directly under the light: The light is too close. Raise it 2–4 inches and monitor for 48 hours.
- Uneven growth across the tray (one side taller than the other): The light isn't centered, or you have intensity drop-off at the fixture ends. Rotate trays and recheck positioning.
- Stand keeps tipping: Add weight to the base, widen the base footprint by extending the horizontal base pieces, or anchor the uprights to a wall or shelf with a simple L-bracket.
- Cords keep drooping or getting in the way: Use adhesive-backed cable clips on the uprights to route cords straight up and out of the grow area.
- Light isn't reaching all plants evenly: Either raise the fixture for wider (but lower intensity) coverage, add a second fixture, or use reflective material on the sides of your grow area to bounce light back toward the edges.
After your first grow cycle, you'll have a clear picture of what's working and what isn't. Most stands need at least one round of tweaks, a height adjustment, a sturdier crossbar, or better cable routing. That's completely normal. The best part of building your own stand is that you can iterate on it without starting from scratch. If you want to go deeper on the overall DIY setup and fine-tune how your lights are configured, a full breakdown of optimizing a DIY grow light setup is a good next step once your stand is running.
FAQ
How do I size a grow light stand if my plants are in different size trays at the same time?
Pick the stand height using the tallest plants in the immediate area, then use tray rotation to even out exposure. If the height difference is large, consider staged positioning (one tray per lighting session) instead of trying to dial intensity with one fixed height for everything.
Can I use the same stand for seedlings and later for houseplants without rebuilding it?
Yes, if your adjustment range is long enough. Build in at least a 24 to 30 inch vertical adjustment span (crossbar to tray surface) so you can start at roughly 4 to 6 inches for seedlings and move up toward 12 to 18 inches later.
What’s the safest way to secure the crossbar so it cannot slip or rotate?
Use mechanical connectors that lock together (for example, EMT set-screw fittings, proper conduit clamps, or through-bolts in lumber) and add a positive stop for the crossbar height. Avoid relying only on friction fit joints if you plan to move the stand often.
How much weight should I plan for in the crossbar if my fixture is heavy?
Use a safety margin, especially for span length and bending. If you estimate your fixture plus mount at 4 lbs and the crossbar is near your material’s “no-sag” limit, step up one size (for example, larger PVC diameter, EMT rail, or a lumber rail) or shorten the span by redesigning the footprint.
My LED bar has a wider beam than expected. How do I adjust tray coverage using spacing and height?
First, center the bar over the tray for single-fixture setups. For multiple bars, start with even spacing and aim for moderate overlap at the chosen height, then adjust one variable at a time (usually height first) while you check for edge plants looking dimmer than the center.
How do I prevent the fixture from swinging or wobbling when adjusting height?
Add a rigid mounting plate or use two adjustment lines per fixture that are symmetrical. For rope ratchets, keep the cords taut and clipped so there is no slack, and confirm the crossbar is square before tightening the hang hardware.
Should I anchor the stand to the floor or wall?
If the setup is tall, movable, or located where kids or pets can bump it, anchor it. A simple wall strap or floor anchor dramatically reduces tipping risk, particularly when you raise the light to the higher plant stages or during tray adjustments.
Is it okay to route the power cable around the stand frame?
Minimize cable strain and heat points by leaving a service loop, securing the cable so it cannot snag on the tray, and keeping it away from areas where the light or fixture can get hot. Also make sure the cable has enough slack to move through the full height adjustment without pulling on the fixture.
How do I know if my light is too intense when I’m using height adjustments?
Watch for consistent stress signals like leaf curling, bleached or overly pale growth, and drying at the tips after you change height. When in doubt, raise the light slightly and reduce runtime for a few days, then bring it back down gradually rather than making big jumps.
Do I need to rotate plants under a grow light even with LEDs?
Often yes, especially with single bars or any fixture where intensity varies across its length. A simple rotation schedule (for example every few days) helps ensure edge plants spend equal time under the brightest portion of the fixture.
What’s a practical way to test my stand and light before starting a full seed batch?
Run a “calibration” trial with a few representative plants or even sacrificial trays. Confirm height range, re-check stability when you adjust the fixture, then observe how quickly plants respond over 3 to 7 days before scaling up.
Next Article
How to Make Grow Lights Look Nice and Still Grow Well
Step-by-step tips to make grow lights look nice with clean placement, cable control, diffusers, and correct intensity fo