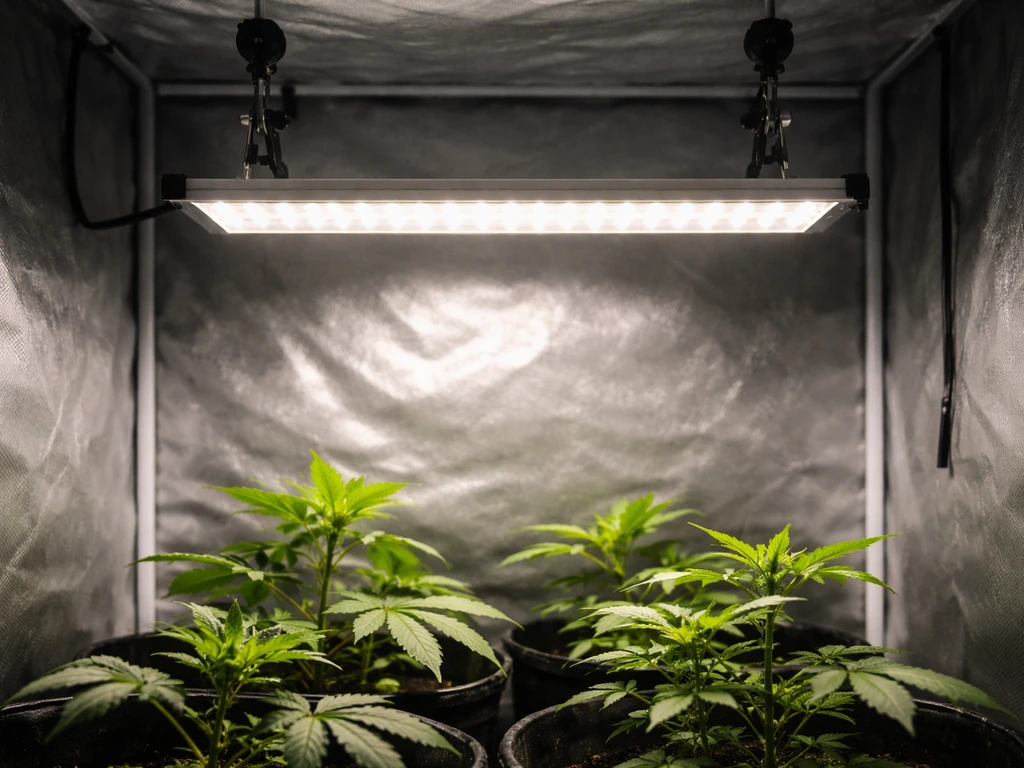
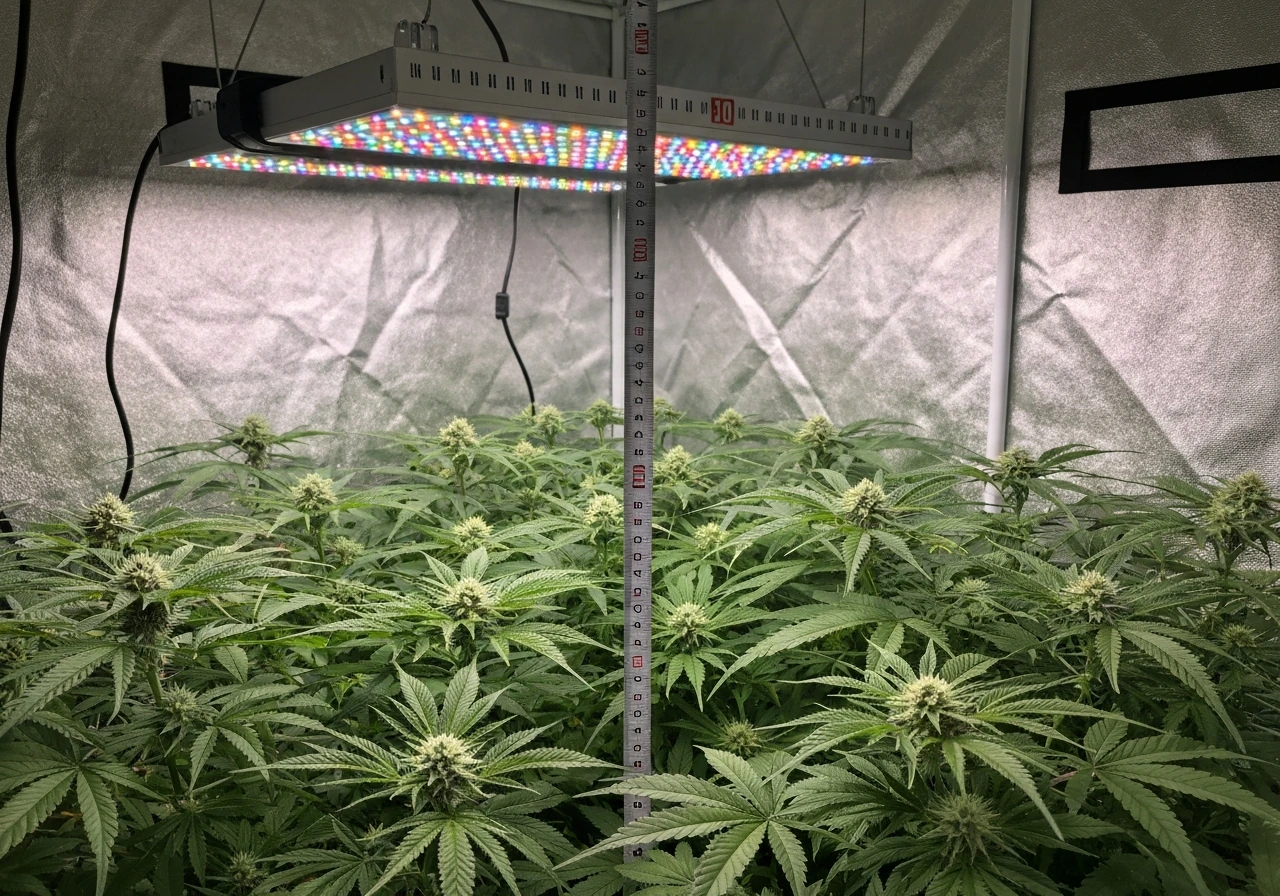
Start with your manufacturer's recommended distance, then fine-tune by watching your plants. For most LED panels and bars, that's somewhere between 12 and 36 inches above the canopy depending on the fixture's output and your plant's growth stage. Seedlings need gentler light (aim for 50–150 μmol·m⁻²·s⁻¹ PPFD at the leaf surface), while flowering or fruiting plants can handle 400–700+ μmol·m⁻²·s⁻¹. If you don't have a PAR meter, your plants will tell you what's wrong within a few days, and this guide will walk you through exactly what to look for and what to do about it.
How to Adjust Grow Light Height for Best Intensity

Marcus Tillman
5 May 2026
Why grow light height matters more than most people realize
The distance between your fixture and your plant canopy is the single biggest variable controlling how much light your plants actually receive. Here's the physics that makes this so important: blank" rel="noopener noreferrer">light intensity follows the inverse square law. Double the distance between your fixture and your canopy, and you don't get half the light, you get one quarter. Move a fixture from 12 inches to 24 inches above your plants, and intensity drops to 25% of what it was. That same doubling does spread light over a 4x larger area, which matters for coverage, but intensity per square meter at the leaf drops dramatically.
Too much intensity burns, bleaches, and stresses your plants. Too little and they stretch, go pale, and put all their energy into reaching for the light instead of growing leaves, roots, or flowers. Neither extreme is a small problem, both can stall or kill a grow. Getting height right is the fastest, cheapest way to fix most light-related problems without buying new equipment.
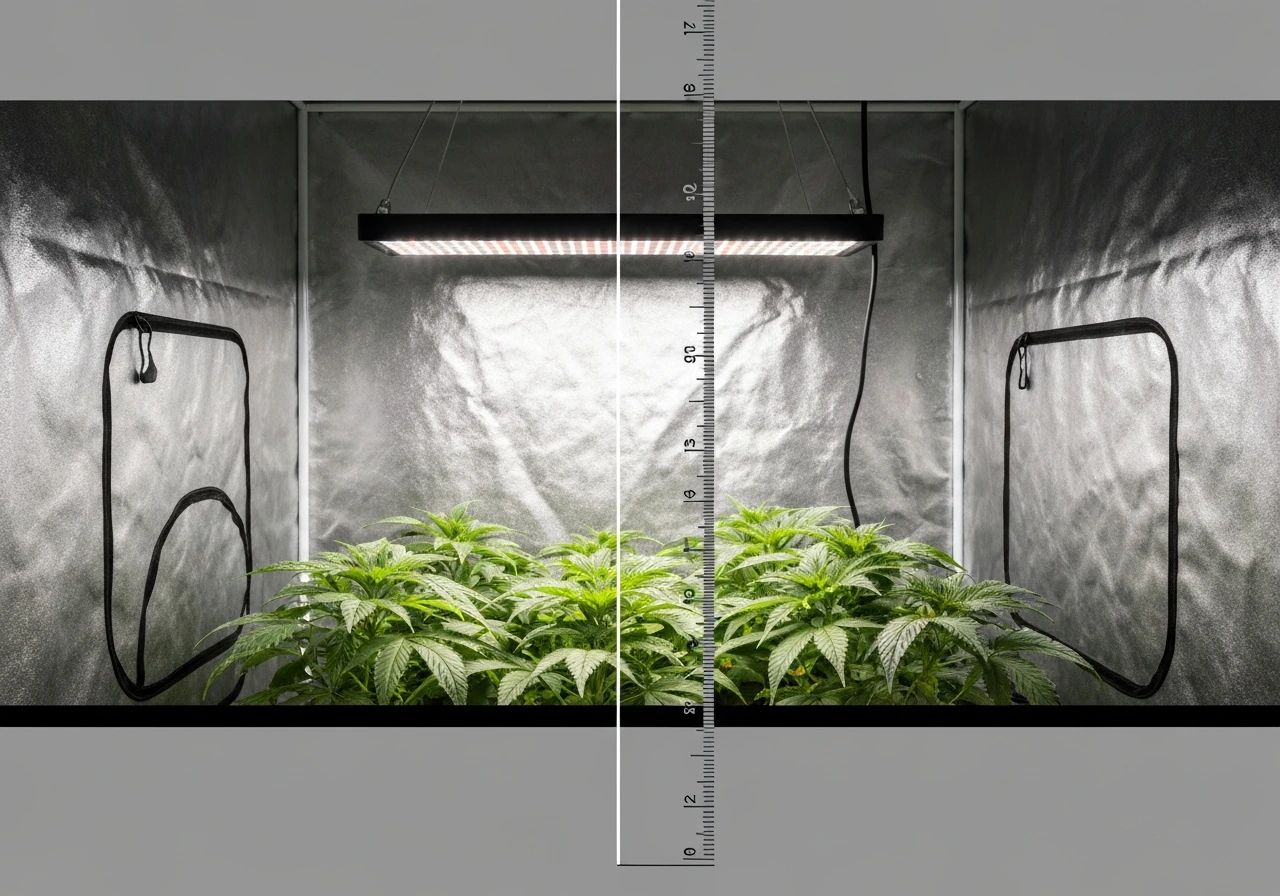
How to measure the right height for your setup
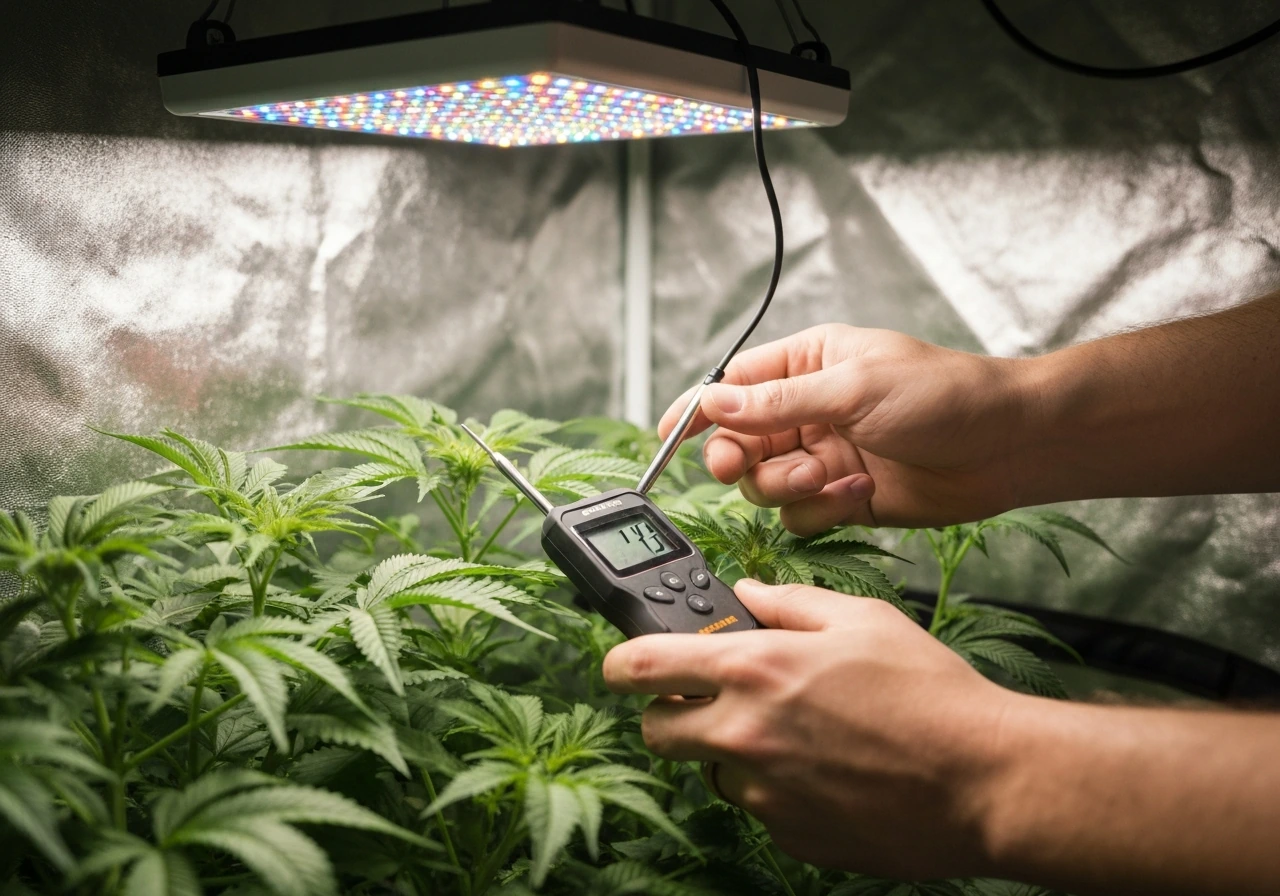
The most accurate way to set grow light height is to measure PPFD (photosynthetic photon flux density) at canopy level using a PAR meter. PPFD is measured in micromoles of photons per square meter per second (μmol·m⁻²·s⁻¹) and represents exactly what your plant's leaves are receiving. Tools like the Hydrofarm LGBQM quantum PAR meter or the Vernier Go Direct PAR sensor can give you a real reading in seconds.
Vernier’s Go Direct PAR sensor uses a quantum sensor head (from Apogee Instruments) for PAR and quantum light measurements Vernier Go Direct PAR sensor. Hold the sensor at canopy height, pointed at the light, and take readings at the center of the canopy and at the edges, because intensity is not uniform across your footprint.
If you don't have a PAR meter, the next best approach is your manufacturer's spec sheet. Most reputable brands publish PPFD vs. distance tables, for example, Fluence lists PPFD values at distances ranging from 8 inches all the way out to 72 inches above the canopy. Find your fixture, look up the distance that delivers the PPFD target for your growth stage, and start there. Then use plant response (more on that below) to fine-tune from that baseline.
One thing to keep in mind: real fixtures don't always behave like a perfect point source. Beam angle, reflector design, and optical spread all affect how light falls across your canopy. Wide-beam optics distribute light more evenly with less hotspot in the center, while narrow-beam optics concentrate intensity directly below the fixture with a steeper dropoff toward the edges. This is why measuring at multiple points across the footprint matters, and why PPFD targets are more reliable than just distance alone.
PPFD targets by growth stage
| Growth Stage | Target PPFD (μmol·m⁻²·s⁻¹) | Typical Starting Distance (LED) |
|---|---|---|
| Germination / Early seedling | 50–150 | 24–36 inches |
| Established seedling / clone | 150–300 | 18–30 inches |
| Vegetative growth | 300–600 | 12–24 inches |
| Flowering / fruiting | 400–700+ | 12–18 inches |
These are starting points, not hard rules. Your specific fixture's output, whether you have a dimmer, and how reflective your grow space is will all shift these numbers. Use them to get close, then watch your plants.
Step-by-step: how to adjust height for seedlings vs mature plants
For seedlings and clones
- Start at the higher end of the manufacturer's recommended range — typically 24–36 inches for most LED panels. Seedlings are fragile and easy to stress with too much intensity.
- Check PPFD at canopy level if you have a meter. You're aiming for 50–150 μmol·m⁻²·s⁻¹ for germination and early seedlings. T5 fluorescent fixtures (common for seedlings) are typically run much closer — 2–6 inches — because their output is far lower than a high-output LED.
- Watch for the first 48–72 hours. Healthy seedlings will stand upright, have compact internodes, and show some green deepening as chlorophyll develops.
- If seedlings are stretching upward or leaning, lower the fixture by 2 inches at a time every 24 hours until they straighten out.
- As seedlings mature into the vegetative stage, you can gradually lower the light or increase intensity on a dimmer — don't make large jumps. Move in 2-inch increments and give plants 2–3 days to respond before adjusting again.
For vegetative and flowering plants
- Start at the manufacturer's recommended mounting height for the growth stage. Many high-output LED bars have a minimum mounting height — Fluence's SPYDR HEX, for example, specifies a minimum of 6 inches above canopy. Never go below the stated minimum, even for high-light crops.
- Measure PPFD at canopy level and compare to your stage target. If you're vegetative, you want 300–600 μmol·m⁻²·s⁻¹. If you're in flower, nudge toward 400–700+ μmol·m⁻²·s⁻¹.
- Adjust height in 2-inch increments. Wait 2–3 days after each adjustment and observe the canopy before making another change.
- As your plants grow upward, your effective light height decreases automatically — so plan to raise the fixture regularly as the canopy approaches it. A good habit is checking the canopy-to-fixture distance every week and adjusting if the gap has closed by more than 2–3 inches.
- If you have a dimmer, use it in combination with height. Running a fixture at 75–80% power slightly raised often gives more uniform coverage than running at 100% very close to the canopy.
Signs your lights are too high or too low
Plants are actually pretty good communicators. Here's what to look for, and what each symptom is telling you:
Signs the light is too far away (too high)
- Stretching and legginess: stems grow long and thin between nodes as the plant reaches for more light. This is called etiolation and it's one of the clearest signs of insufficient PPFD at the canopy.
- Pale or yellowish leaves: chlorophyll production drops under low light. Leaves that should be deep green look washed out or light green.
- Leaning toward the light: plants tilt visibly in the direction of the fixture, or toward any secondary light source nearby.
- Slow growth: if your plant looks healthy but barely seems to grow week over week, it's often under-lit.
- Small leaves: new growth may come in smaller than expected because the plant doesn't have enough light energy to support full leaf development.
Signs the light is too close (too low)
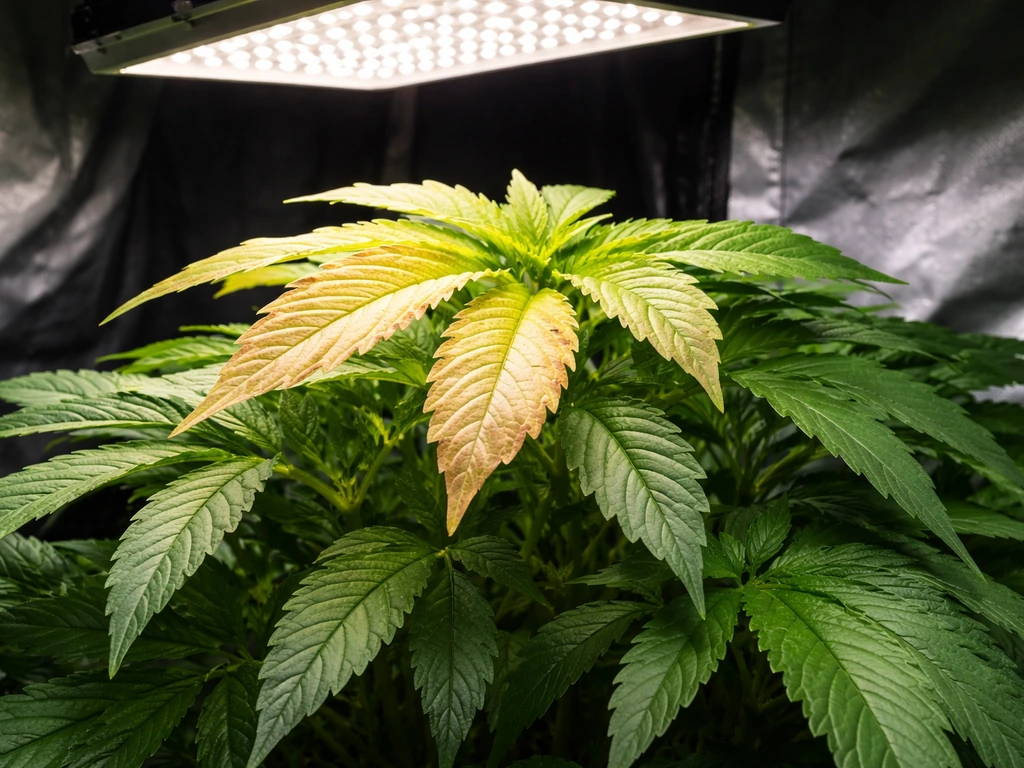
- Bleaching or whitening at the top of the canopy: this is light burn. The tissue closest to the fixture loses its green color and turns pale yellow or almost white, starting at the top leaves.
- Scorched or crispy leaf tips and edges: especially common on the uppermost leaves directly under the hottest part of the fixture.
- Leaf curling or clawing: leaves cup upward (taco shape) or the tips claw downward. This is a combination of light stress and often heat stress happening at the same time.
- Excessive drooping: plants that look wilted even when properly watered are often dealing with heat stress or light stress from a fixture that's too close.
- Stunted growth directly under the light: sometimes the center of the canopy grows slower than the edges because the center is being over-stressed, while outer plants in the same tent grow normally.
A quick rule of thumb: if problems appear only on the upper leaves and especially in the center of the canopy directly below the fixture, the light is too close. If problems are spread across the whole canopy and the plant is stretching upward, the light is too far.
Adjusting height by fixture type
Different fixtures behave differently, and the hardware you're working with changes how you physically make adjustments. Here's a quick breakdown by type:
LED panels (quantum board style)
These are the most common fixture for home growers today. They typically hang on adjustable rope ratchets or steel cables with a carabiner, making height changes easy, you just pull the cord to raise or release the ratchet to lower. The broad, even spread of a good quantum board means you have some flexibility with height, but always check uniformity at the edges of your canopy since PPFD drops toward the perimeter. Most quality LED panels recommend 18–24 inches for veg and 12–18 inches for flower as a starting point.
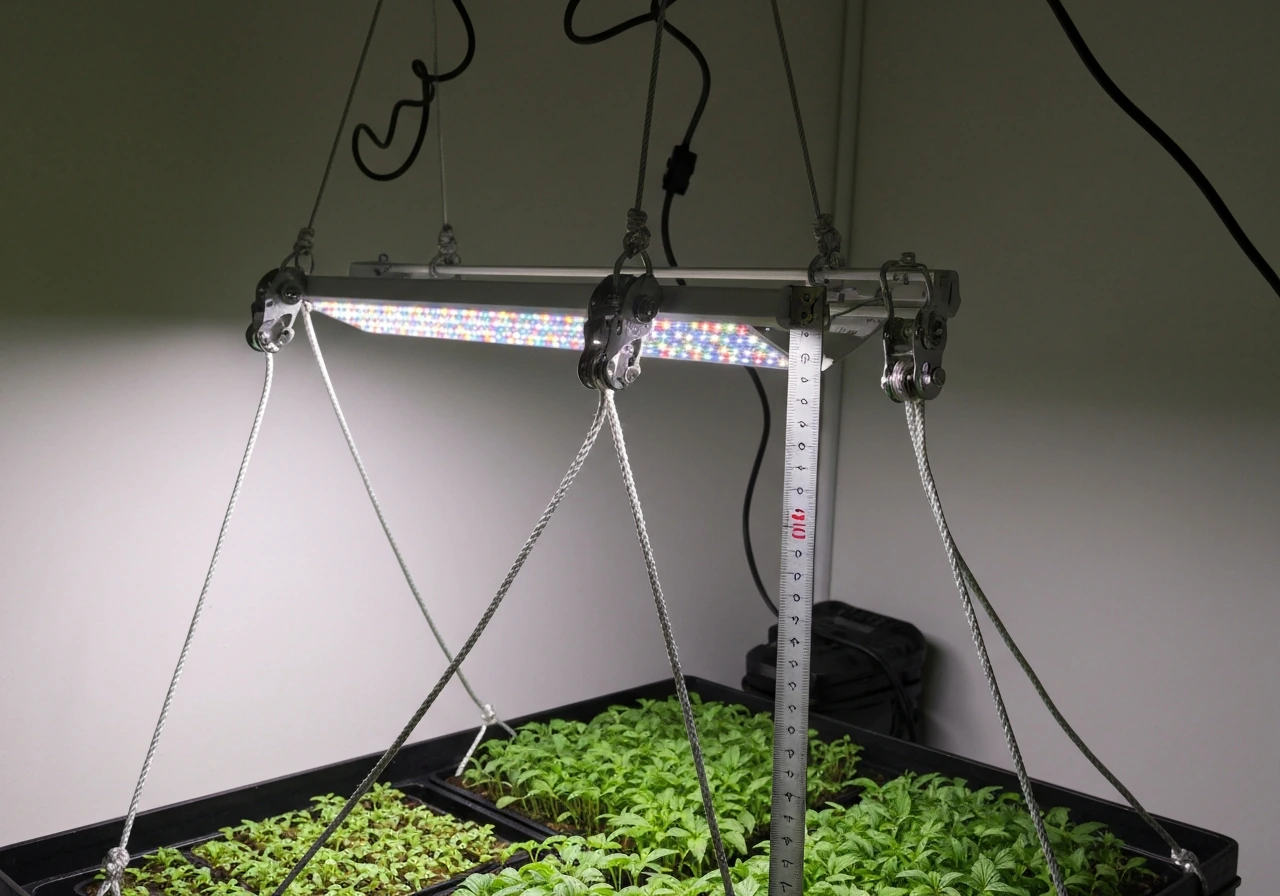
LED bars and strip-style fixtures
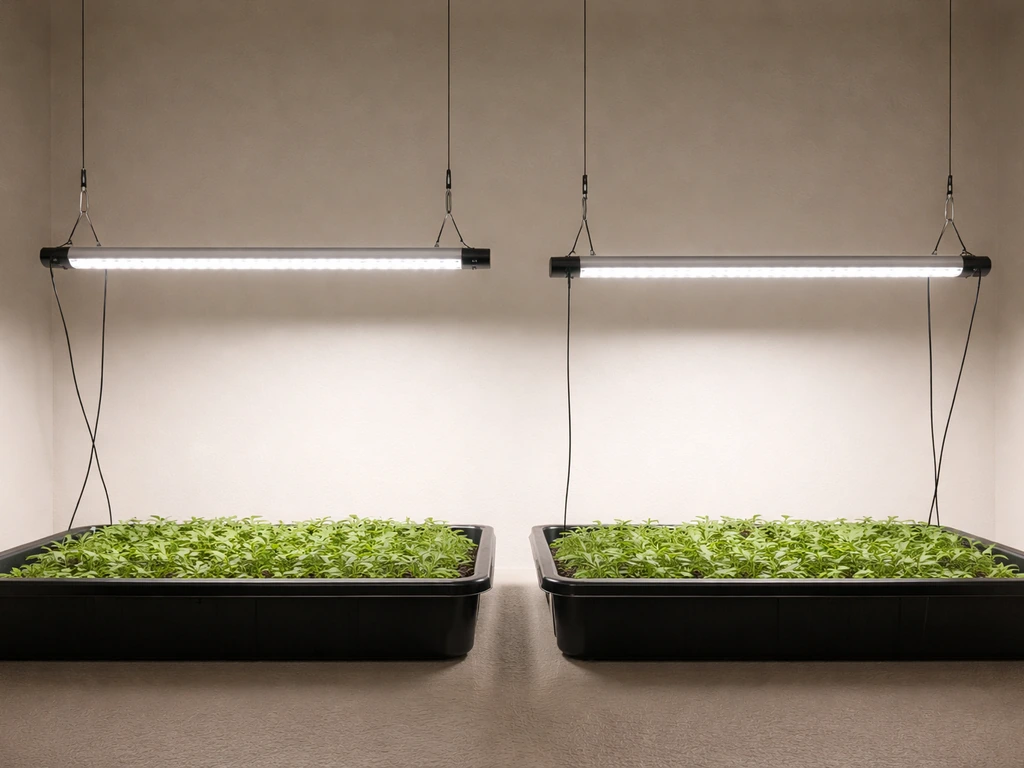
Bar-style LEDs (multi-bar fixtures like the Fluence SPYDR series) often hang on fixed-length hangers or adjustable cables. They're designed to spread light across a wide, even footprint, and many are used in vertical farming setups where they hang very close to the canopy, sometimes as little as 6 inches. If yours has fixed-length cables, you may need to add aftermarket rope ratchets to gain height flexibility. The even distribution of bars means hotspots are less of a concern than with a single-point LED, but minimum mounting height specs still exist and should be respected.
T5 and T8 fluorescent fixtures
These are low-output, low-heat fixtures commonly used for seedlings, cuttings, and low-light houseplants. Because their intensity is much lower than LEDs, they're run very close to the canopy, typically 2–6 inches for seedlings and up to 12 inches for established plants. Height adjustments matter here too, but you have more forgiveness since heat stress is rarely an issue. The Hydrofarm Jump Start T5 system, for example, is specifically designed for this seedling/clone use case. If you're using T5s for mature plants, be aware that the light may simply not be strong enough at any height to support flowering or fruiting.
Spot/bulb-style fixtures (PAR cans, clip-on, screw-base bulbs)
These concentrate light in a narrow cone. Height matters a lot here because the beam angle is tight and falloff at the edges is steep. A spot bulb 12 inches away might deliver great PPFD directly below it but near zero 8 inches to the side. For single-plant use, these work fine. For multiple plants, you'll likely need to angle or spread them. These fixtures are also harder to raise/lower mechanically, most are on fixed stands or clip-on arms, so adjust by moving the stand or repositioning the arm, then check canopy coverage carefully.
Fixed rails and unadjustable mounts
If you're working with a fixed-height rail or shelf system (common in compact grow cabinets), you may not be able to raise or lower the fixture at all. In this case, use your dimmer to control intensity, and control canopy height by training plants to stay below a certain height or by raising the pot itself (a simple riser under the pot can effectively lower the canopy-to-fixture distance without touching the light).
If you want to fine-tune performance, that same approach to raising and lowering grow lights is what you'll apply across fixture types, distances, and plant stages how to raise and lower grow lights. For more flexibility, it's worth considering aftermarket adjustable hanging hardware, a topic covered in more depth in guides about how to raise and lower grow lights and how to make adjustable grow lights.
If you want to DIY it, learn how adjustable hanging hardware works and how to set it up safely for your canopy height needs how to make adjustable grow lights.
Heat, airflow, and keeping your canopy safe
Heat and light stress often happen together, especially when a high-output LED is too close to the canopy. Most plants grow best between about 65–85°F. Above roughly 95–104°F at the leaf surface, you'll start to see heat stress symptoms regardless of whether PPFD is in the right range. The tricky part is that LEDs produce most of their heat upward through the heatsink, not downward toward the plant, but high-intensity fixtures can still raise canopy temperature if they're very close, especially in a tent with poor airflow.
A simple hand test: hold the back of your hand at the canopy level directly under the fixture for 30 seconds. If it feels uncomfortably warm or hot, your plants are feeling it too. Raise the fixture until it's comfortable. For more precision, a cheap infrared thermometer pointed at the top leaves is a better tool and worth the investment.
Airflow matters as much as distance. A fan moving air across the canopy (not blasting directly at it, but moving air through the space) can keep leaf surface temperatures several degrees lower than stagnant air. If you're seeing heat stress symptoms but the fixture is already at a reasonable height, improving airflow is often the fix. Make sure exhaust is moving hot air out of the grow space and that fresh air is being pulled in.
To avoid hotspots, check PPFD and temperature at multiple points across the canopy, not just directly under the center of the fixture. Hotspots are most common with single-point fixtures and narrow-beam optics. If your center plants are stressed but edge plants look fine, raise the light or switch to a wider beam angle. Some advanced fixtures include built-in canopy distance sensors and leaf temperature sensors to automate this monitoring, but a PAR meter and an infrared thermometer get you 90% of the way there for a fraction of the cost.
When adjusting height alone doesn't fix the problem
Sometimes you've adjusted the height, waited a week, and the plants still aren't responding the way you expected. Before you spiral into buying new equipment, work through this checklist:
Check your dimmer setting first
It sounds obvious, but many growers set their dimmer during initial setup and forget about it. If your fixture is at the right height but intensity is too low, a dimmer set to 50% will still underlight your plants. Conversely, running at 100% with the light too close amplifies heat and light stress. Use height and the dimmer together: find the height that gives you good coverage and uniformity, then dial in the dimmer to hit your PPFD target. The two controls work as a team.
Review your photoperiod schedule
If plants are getting the right PPFD but your light schedule is wrong, you'll still see problems. Seedlings and vegetative plants typically need 16–18 hours of light per day. Flowering plants (for most short-day species) need a shift to 12 hours on / 12 hours off. Check that your timer is actually working as set, it's worth verifying with a manual check rather than just trusting the timer.
Also remember that PPFD and photoperiod work together through Daily Light Integral (DLI). If you are trying to click and grow, DLI also helps you understand when to raise grow lights as your plants advance through growth stages Daily Light Integral (DLI). If your PPFD is slightly low, you can compensate by extending the photoperiod. If it's slightly high, shortening the day protects against over-accumulation.
Consider light spectrum
Height and intensity adjustments won't help if your fixture's spectrum is poorly matched to what your plants need. Most quality full-spectrum LED grow lights today cover the 400–700 nm PAR range adequately. But if you're using a fixture with a heavily blue-skewed or red-skewed spectrum, that can affect growth even when PPFD looks fine on paper. Check your fixture's spec sheet for spectrum distribution. For seedlings and veg, a broader full-spectrum or blue-heavy spectrum works well. For flowering, more red typically helps. This isn't usually the issue with modern LEDs, but it's worth ruling out if nothing else explains the problem.
Make changes in small increments and be patient
Plants don't respond overnight. After any height adjustment, give your plants at least 48–72 hours before evaluating the response, and ideally a full week for a complete picture. Making multiple changes at once (height, dimmer, schedule, and watering all in the same week) makes it impossible to know which change fixed the problem, or which one caused a new one. Change one variable at a time, observe, then move to the next. It's slower, but it's how you actually learn what your setup needs.
If you've worked through all of these steps and still have unexplained symptoms, it may be time to look beyond the light entirely, watering schedule, root health, nutrient levels, and pest pressure can all produce symptoms that look like light stress. Rule those out before concluding your grow light setup is the problem.
FAQ
How do I know if my light height adjustment is actually changing PPFD, not just moving the fixture?
Confirm the change with measurements (PPFD/PAR at canopy level) or, if you cannot measure, change height in small steps (for example, 2 to 3 inches) and track plant response over a few days. Also check the dimmer position stays the same while you test height, because the dimmer can mask the effect of distance.
Should I adjust light height differently for plants in different stages at the same time?
Yes. Plants with different growth stages need different PPFD targets, so you either separate them by shelf height, use a dimmer to create a lower intensity zone, or accept a compromise and fine-tune for the most sensitive stage (often seedlings). If you mix seedlings and flowering plants under one fixture, height alone usually cannot satisfy both.
What’s the safest way to lower a hanging LED if I suspect it is too close?
Raise it first to reduce risk of heat or bleaching, then drop in controlled increments while checking temperature and canopy uniformity. Use a quick temperature check (hand test or infrared thermometer) right after adjustments, and avoid sudden large changes that can shock plants.
My plants look fine at the center, but the edges are pale. What should I adjust?
Edge underlighting is usually a coverage or uniformity issue, not just total intensity. Try raising the fixture slightly for a wider spread, if your plants can tolerate it, or ensure the fixture footprint covers the canopy evenly. Measuring PPFD at center and edges will tell you whether you need to reposition the fixture or change beam angle/optics.
Can I use a phone camera or app to measure light intensity instead of a PAR meter?
Not reliably. Phone sensors and exposure settings do not provide accurate PPFD, and results vary by camera auto-processing. If you cannot buy a PAR meter, rely on manufacturer PPFD distance charts and validate with plant symptoms plus canopy temperature checks, but accept reduced precision.
How often should I re-check light height during a grow?
Re-check after meaningful canopy changes, especially once plants transition stages or start to stretch. A practical approach is to review height and uniformity weekly, and also whenever you change the dimmer, add side growth, or rotate the plants (if you do) because canopy geometry changes what the light reaches.
Do I measure PPFD at the topmost leaves or at the average canopy height?
For decision-making, measure at canopy level where leaves are actively receiving light, which is often the top of the main canopy. If plants have uneven heights, take readings at multiple points and at the heights where stress appears, because the tallest leaves can be overexposed while lower leaves are underlit.
If my LED has a warranty requirement or minimum mounting height, should I ignore it to reach my PPFD target?
Do not ignore it. Treat minimum mounting height as a safety constraint tied to thermal management and optical design. If you cannot hit your target without violating that constraint, the better fix is dimming, fixture quantity, repositioning, or using a different fixture output rather than breaking the manufacturer limits.
How do I adjust when my light is on a fixed shelf or rail and I cannot raise it?
Use the dimmer to control intensity, and manipulate canopy-to-fixture distance indirectly by raising the pots or training plants to stay shorter. Keep in mind that fixed mounts can still create hotspots with narrow optics, so you may need to rotate plants, adjust spacing, or change orientation rather than only changing distance.
What’s the most common mistake when adjusting grow light height without a meter?
Overreacting to one symptom and changing multiple variables at once. The fastest way to get stable results is to adjust only height (or only dimmer) in small increments, keep the schedule constant, then wait at least 48 to 72 hours before judging the outcome.
At what point is it really a heat problem rather than a light-intensity problem?
If you can feel or measure high leaf temperatures near the top of the canopy, heat may be the limiting factor even if PPFD seems acceptable. Check leaf surface temperature and airflow, because improving cooling and airflow can correct stress symptoms without reducing light as much as height changes would.
Next Article
Innova Grow Light Instructions: Setup, Use, and Troubleshooting
Step-by-step Innova LED grow light instructions: setup, mounting, distance, schedules, intensity, and fast troubleshooti