Yes, you can get your Bell & Howell grow light up and running today, and your plants growing well under it, without an engineering degree or a thick manual. The short answer: clip or mount the light near your plant, plug it in, set the built-in timer to the right preset for your plant type, and position the heads so light lands evenly across the leaves. The details below will walk you through every step, plus help you avoid the mistakes that cause stretching, yellowing, and wasted electricity.
Bell and Howell Grow Light Instructions Setup and Use

Marcus Tillman
7 Apr 2026
Quick reality check: what Bell & Howell grow lights actually are
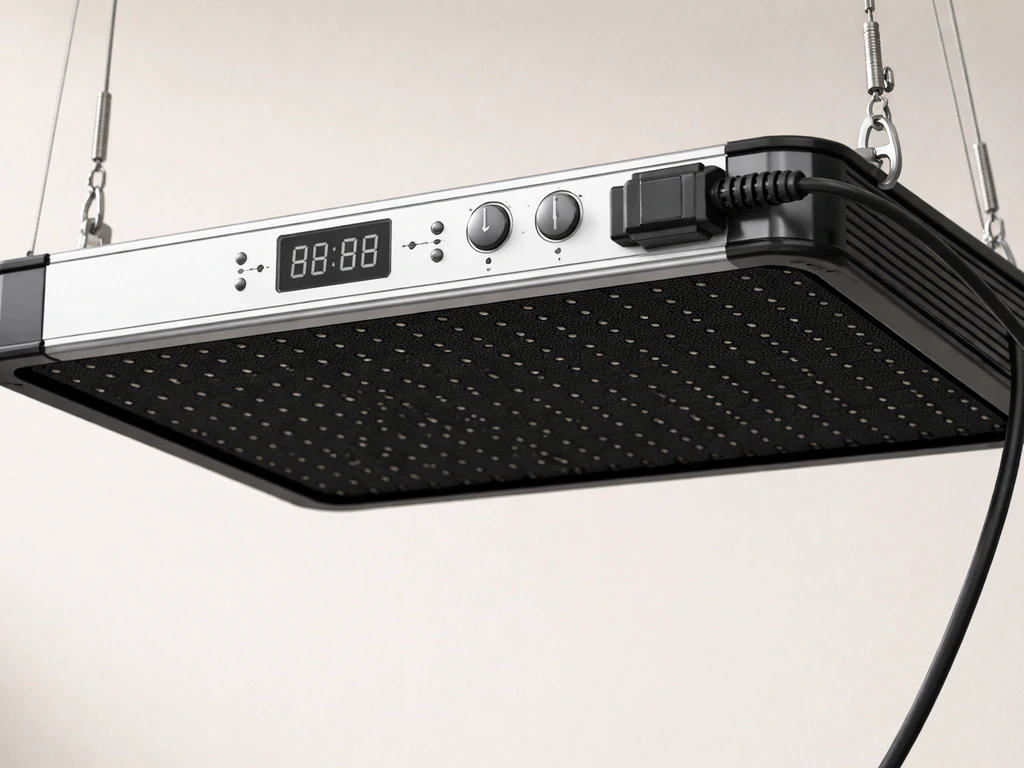
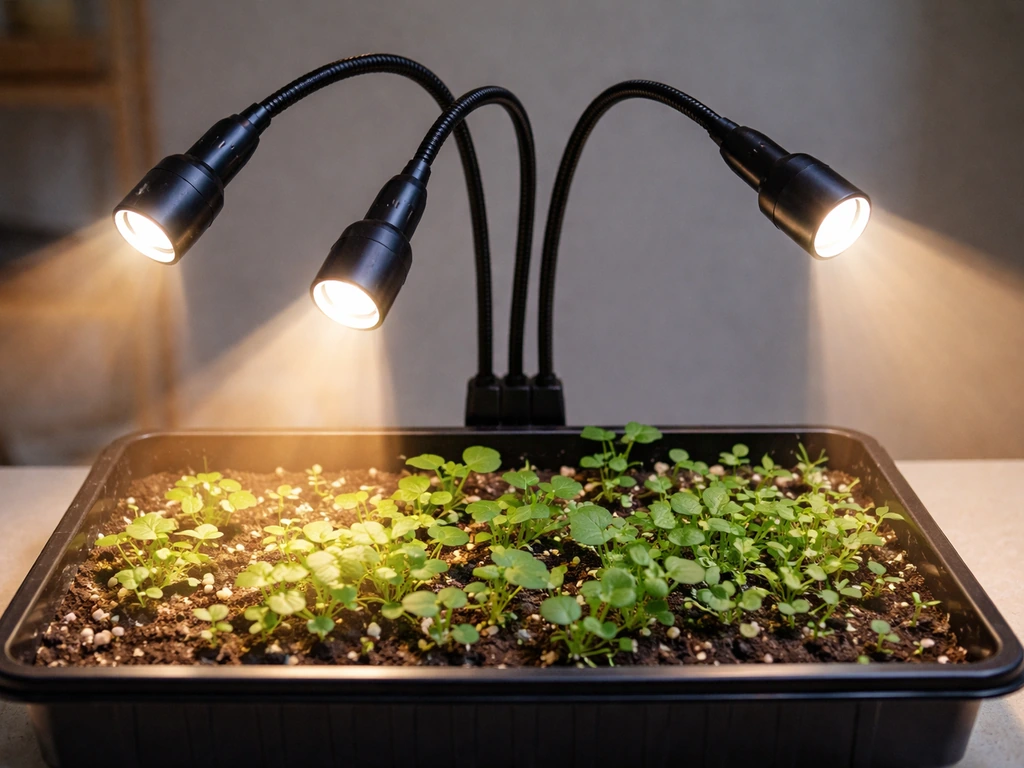
Bell & Howell is a consumer electronics brand, not a horticultural lighting company. Their grow light lineup, including the Bionic Grow Light (model 8573) and the GrowBurst (PLP11641), are entry-level, plug-in LED grow lamps aimed at casual indoor growers and houseplant hobbyists. The 8573 comes in 2-head, 3-head, and 4-head configurations with adjustable flexible arms, a built-in timer, and a clamp-or-mount installation system. The GrowBurst adds a brightness control (8 levels) and color mode options (blue, red, or mixed spectrum) on its control panel.
Neither model is going to replace a dedicated horticulture fixture in a serious grow tent. These lights are genuinely useful for houseplants, herbs on a windowsill, and seedlings getting started indoors, but they have real power limits. The 8573 runs at around 6 watts per head, so a 4-head unit delivers maybe 24 watts total. That is enough to supplement natural light or maintain low-to-medium light plants, but do not expect it to push fruiting vegetables through a full grow cycle by itself. Go in with that expectation, and this light can work great. Expect it to replace a 600-watt HPS and you will be disappointed.
Unboxing and parts checklist: what comes in the box and what it does
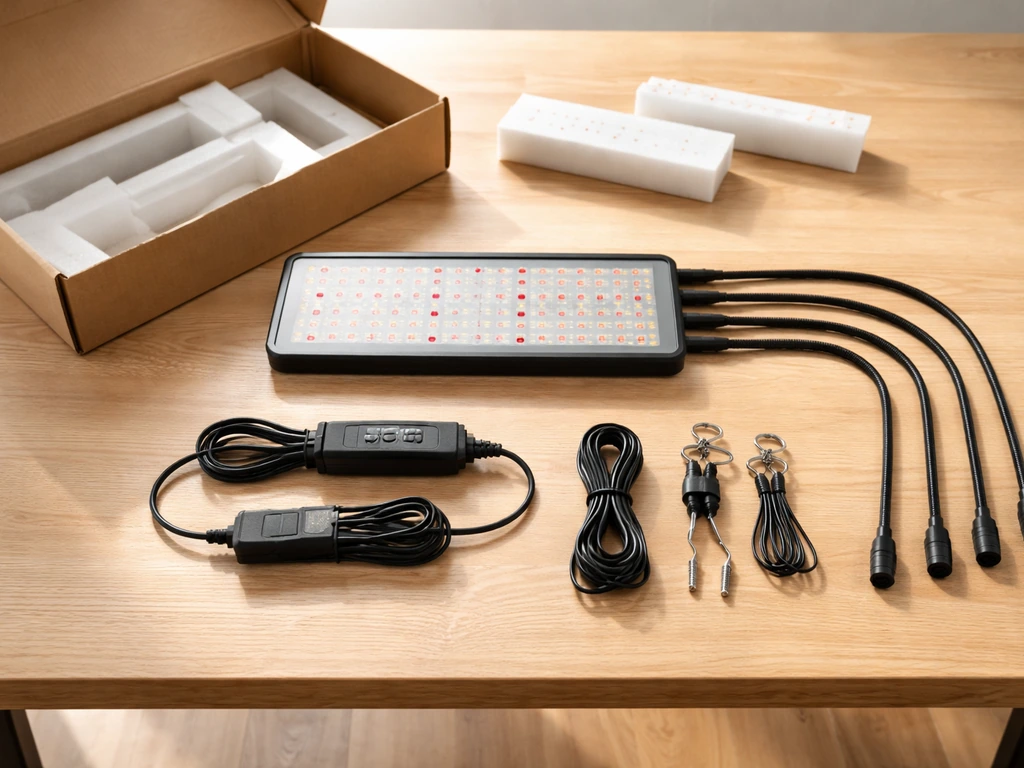
Before you start setting anything up, lay everything out on a table and match it against this list. If something is missing, stop and contact Bell & Howell support before proceeding.
- Main light unit with flexible gooseneck arms (2, 3, or 4 heads depending on your model) — these bend and stay in position so you can direct each head independently
- Mounting bracket — a small metal or plastic plate that lets you screw the base to a wall, shelf edge, or desk surface for a permanent or semi-permanent install
- Mounting screws — used with the bracket for the screw-on installation method
- Clamp base (integrated on most units) — lets you clip the light onto a shelf edge, pot rim, or tabletop without any tools
- Power adapter/cord — Bell & Howell grow lights are plug-in, not hardwired; some models use USB power, which affects how much power they can actually draw
- Control panel (on the unit itself) — houses the timer button, brightness control (on GrowBurst: 8 levels), color mode selector (blue/red/mixed on GrowBurst), and power on/off button
- Timer indicator lights — small LEDs on the control panel that show which timer preset (3, 6, or 9 hours) is currently selected
A quick note on the power cord: some Bell & Howell grow light variants sold at big-box stores use USB-only power. If yours does, that caps the wattage severely, and you should plug it into a wall adapter rated for at least 2 amps rather than a laptop USB port. Plugging into an underpowered source is one of the most common reasons these lights underperform or fail early.
Step-by-step installation: mounting, positioning, and powering up
The 8573 manual describes three installation methods. Pick the one that fits your setup and follow the steps below.
Method 1: clip-on (fastest, no tools)
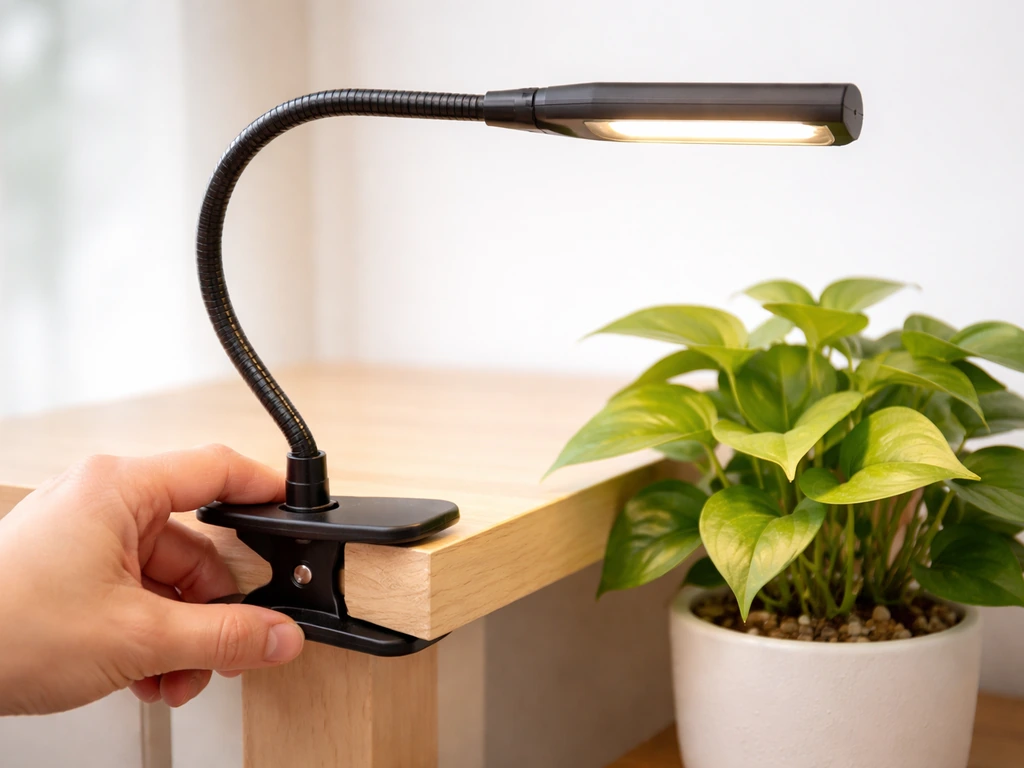
- Open the clamp at the base of the unit by squeezing the clamp lever.
- Position the clamp over the edge of a shelf, desk, pot rim, or table ledge near your plant.
- Release the lever so the clamp grips the surface. Give it a gentle tug to confirm it is secure.
- Bend the gooseneck arms so each light head points toward your plant canopy. Start with them aimed roughly 12 to 18 inches above the top leaves.
- Plug the power cord into a wall outlet or USB wall adapter. Do not use a power strip that is already heavily loaded.
Method 2: base into mounting bracket (more stable)
- Slide the unit's base into the mounting bracket slot. It should seat firmly without wobbling.
- Place the bracket on the surface where you want the light to stand, such as a shelf or grow station.
- This method does not require screws but gives you more stability than the clip alone, especially for 3- or 4-head units that are heavier.
- Adjust the arms and plug in as described above.
Method 3: screw the bracket to the surface (permanent install)

- Hold the mounting bracket against the wall, shelf underside, or desk surface where you want to mount it. Mark the screw hole positions with a pencil.
- Drill pilot holes if mounting into wood or drywall. Use the included screws to fasten the bracket.
- Insert the light base into the secured bracket.
- Bend the arms into position and plug in the power cord.
- Check that the cord is routed away from any water sources (pots, misters, drainage trays).
Powering on and basic control panel setup
Press the power button on the control panel to turn the unit on. On the GrowBurst, you will then select your color mode (red promotes flowering and root growth, blue supports vegetative leaf development, and the mixed/full-spectrum setting is the most practical all-purpose choice for most indoor growers). Next, use the brightness button to cycle through the 8 levels, starting at a medium setting (level 4 or 5) until you know how your specific plants respond. Finally, press the timer button to select your photoperiod preset: 3, 6, or 9 hours. The indicator light next to your selected duration will illuminate to confirm the selection. The unit will then automatically cycle on and off according to that preset.
Getting placement, height, coverage, and intensity right
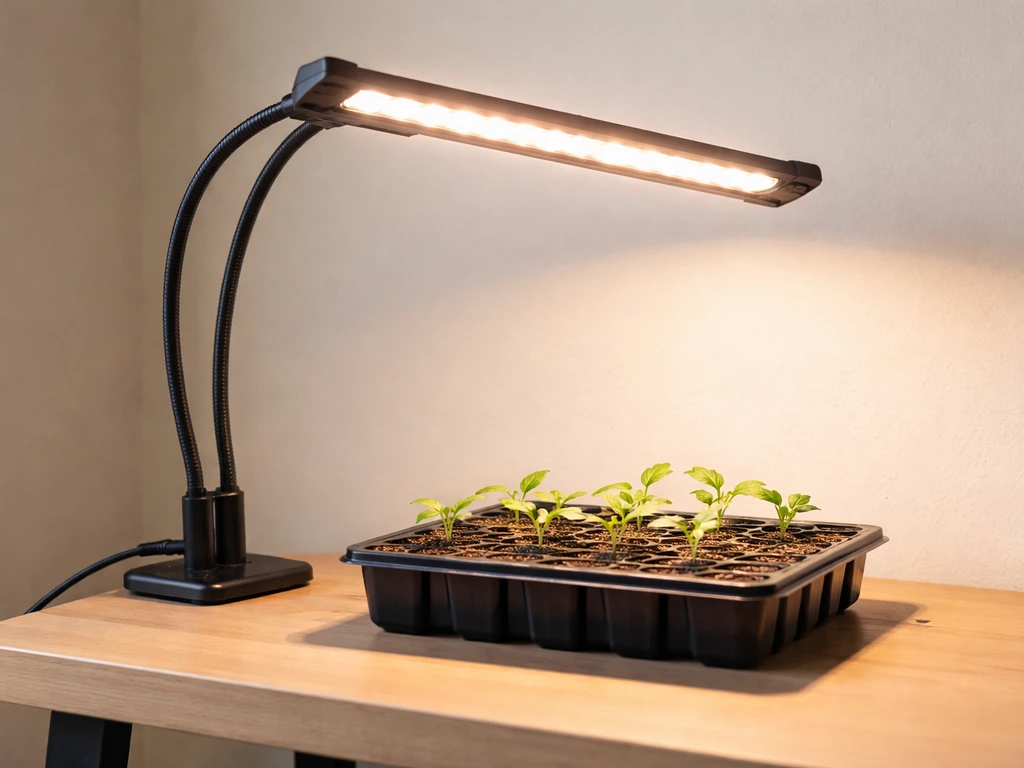
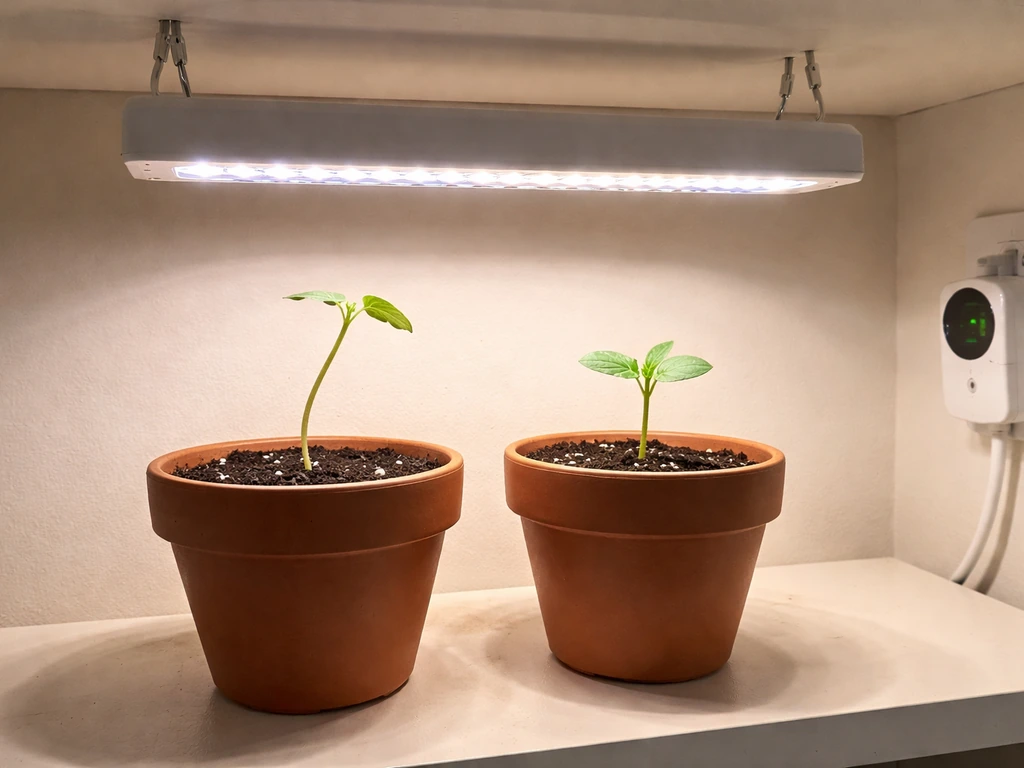
The manual tells you to place the unit near your plant and adjust each light head as needed, which is accurate but not very specific. Here is what that looks like in practice. For most houseplants and herbs, start with the light heads 12 to 18 inches above the top of the plant. For seedlings that are more sensitive to heat and light intensity, start at 18 inches and watch for the first 48 hours.
If you see leaf curl or bleaching (leaves turning pale or white near the center), raise the light by 4 to 6 inches. If plants are stretching hard toward the light (long, spindly stems with wide gaps between leaves), lower it by 3 to 4 inches or increase brightness.
Coverage is limited on these units. A single 4-head 8573 will realistically cover one to three small-to-medium plants within a roughly 12-inch radius of the center. If you have a row of herb pots, bend two heads toward one end and two toward the other. For a single large plant, position all heads toward different quadrants of the canopy rather than all pointing at the same spot. Rotate your pots a quarter turn every few days so all sides get even exposure.
Bell & Howell does not publish PPFD (photosynthetic photon flux density) targets in their instruction materials, so you are working from visual feedback rather than a meter reading. If you want to measure grow light intensity more precisely, an inexpensive PAR meter or even a smartphone app can give you a ballpark reading. Seedlings generally want 100 to 300 µmol/m²/s, herbs and leafy greens 200 to 400, and fruiting plants 400 to 600. These small LED units will likely max out around 100 to 150 µmol/m²/s at 12 inches, which is fine for maintenance and supplemental light but undersized for fruiting crops.
Schedules and photoperiods: seedlings vs. houseplants, plus what to do when things go wrong
The built-in timer gives you three preset options: 3, 6, or 9 hours. Bell + Howell’s Bionic Grow Light model 8573 uses an automatic timer with 3, 6, or 9 hour settings built-in timer. That is a narrower range than most plants ideally want, so here is how to use those presets practically.
| Plant Type | Recommended Daily Light Hours | Best Bell & Howell Preset | Notes |
|---|---|---|---|
| Seedlings (starting indoors) | 14 to 16 hours | Run 9-hour preset twice (plug into smart outlet to double cycle), or use 9 hours as supplemental to window light | Too much intensity early can burn cotyledons; keep at 18 inches |
| Herbs (basil, mint, parsley) | 12 to 16 hours | 9-hour preset plus natural window light | Place near a south-facing window and use the light as a supplement |
| Low-light houseplants (pothos, snake plant) | 8 to 10 hours | 9-hour preset | These plants do fine with less; do not overdo it |
| Medium-light houseplants (peace lily, philodendron) | 10 to 12 hours | 9-hour preset plus window light | Rotate pot weekly for even growth |
| Succulents and cacti | 12 to 14 hours | 9-hour preset plus bright window | Use full-spectrum or blue+red mixed mode |
| Fruiting plants (tomatoes, peppers) | 14 to 18 hours | Not recommended as sole light source | Use as supplemental only; power output is too low for primary fruiting light |
The 3-hour and 6-hour presets are genuinely useful when you want the light to run for just part of a morning or evening, such as giving a windowsill herb garden a short boost at dawn before natural light kicks in. If your plants need 14 to 16 hours of total daily light, the math works out to the 9-hour preset plus 5 to 7 hours of decent window light. Do not assume window light counts for nothing; on a clear day near a south window, it can contribute meaningfully.
Troubleshooting common growth problems
If your plants are stretching (etiolation), the light is either too far away, running too few hours, or both. Lower the heads and bump the timer to the 9-hour preset. If leaves are yellowing, check whether the yellowing is uniform (possibly too little light or the wrong spectrum) or starts at the bottom (often a watering or nutrient issue, not a light issue at all).
If growth is just slow, confirm the timer is actually cycling, because the built-in auto-timer can sometimes fail to re-engage after a power interruption. Unplug the unit for 10 seconds and re-select your timer preset to reset it. If the light itself stops working entirely, that is a separate issue covered in detail for people dealing with a Bell & Howell grow light not working.
Maintenance, safety, and keeping the light running longer
These lights are low-maintenance, but a few habits will extend their life significantly and keep your plants safe.
- Dust the LED heads every two to three weeks with a dry microfiber cloth. Dust buildup on the lens can reduce light output by 10 to 20 percent over time.
- Check the power cord and connection points monthly for any signs of fraying, discoloration, or heat damage. Bell & Howell grow lights are not hardwired, which means the plug and adapter take wear over time.
- Keep the light and cord away from water. Route cords up and away from drainage saucers and misting zones. Do not let condensation accumulate on the control panel.
- Do not leave the unit running 24 hours continuously. LEDs do generate some heat, and constant operation shortens their lifespan. The built-in timer is there for a reason: use it.
- If the unit feels unusually warm to the touch at the base or control panel, unplug it and inspect the power connection. A loose USB or barrel connector can cause resistance heating.
- If you have mounted the bracket with screws, check the screws every few months to make sure they have not loosened, especially if the unit is mounted overhead above plants.
One safety note worth repeating: some Bell & Howell grow light models are USB-powered. If yours uses USB, always plug into a wall adapter, not a computer port or a low-rated power bank. Underpowered USB sources have been linked to the lights stopping working prematurely. If you have a general grow light not working situation, the power source is always the first thing to check before assuming the unit has failed.
Honest Bell & Howell grow light review: pros, cons, and who this is actually for
Let me be straight with you here, because the review side of this matters as much as the instruction side.
What works well
- The built-in auto timer (3/6/9-hour presets) is genuinely convenient for beginners who do not want to buy a separate outlet timer.
- The flexible gooseneck arms are a real practical advantage: you can aim individual heads at different plants or different parts of one large plant.
- Full-spectrum LED output is appropriate for maintaining houseplants and starting seedlings.
- Clip-on installation takes under two minutes and requires zero tools, which makes it easy to reposition as your plants move or grow.
- The GrowBurst's 8-level brightness control and color mode selector give you more flexibility than most lights in this price range.
- At this price point, the build quality is reasonable for occasional/seasonal use.
Real limitations you should know before you buy
- Power output is low. At roughly 6 watts per head, a 4-head unit puts out about 24 watts total. That is supplemental territory, not primary grow-light territory.
- The timer presets (3, 6, 9 hours) are restrictive. Most plants want 12 to 16 hours of light, and the unit does not offer those presets natively. You will need to supplement with natural light or use a separate smart outlet.
- Durability concerns are real. Customer reports, including feedback from Lowe's listings, include lights stopping working after a few months, particularly on models with USB power inputs. This is a consumer-grade product, not a professional fixture.
- No published PPFD data means you are guessing at intensity. There are no photon flux specs in the manual, so optimizing placement is trial-and-error.
- Coverage area is small. Even a 4-head unit covers maybe a 12- to 15-inch diameter area effectively. For a full-scale herb garden, you would need multiple units.
Who should buy it (and who should not)
This light is a good fit if you have a few houseplants that are struggling through winter with low natural light, you want to start seedlings indoors in early spring, or you have herbs on a kitchen counter that need a daily light boost. It is not the right tool if you are trying to grow fruiting vegetables indoors year-round, you have more than three or four plants to cover, or you need reliable professional-grade output. If you want to know whether your unit is actually delivering useful light to your plants after setup, there is a quick way to know if your grow light is working effectively, beyond just seeing that the LEDs are on.
Quick comparison: Bell & Howell 8573 vs. GrowBurst
| Feature | Bell & Howell 8573 (Bionic) | Bell & Howell GrowBurst |
|---|---|---|
| Timer presets | 3 / 6 / 9 hours | 3 / 6 / 9 hours |
| Brightness control | Not specified in manual | 8 levels |
| Color/spectrum modes | Full spectrum | Blue / Red / Mixed |
| Head configurations | 2, 3, or 4 heads | Flexible arms |
| Installation methods | Clip-on, bracket insert, screw mount | Clip-on, bracket mount |
| Best for | Houseplants, herbs, seedling starts | Herb gardens, seedlings, versatile indoor use |
| Power type | Plug-in (some USB variants) | Plug-in (USB variants exist) |
| Durability concern | Moderate (consumer grade) | Moderate (consumer grade) |
If you already own one of these lights, the GrowBurst's color mode and brightness control make it worth learning to use well. The 8573 is simpler but still effective for basic plant maintenance. Either way, the instructions in this guide apply to both.
Bottom line: get the light mounted, aim the heads 12 to 18 inches above your plants, set the timer to 9 hours (and supplement with window light where you can), use the mixed/full-spectrum color mode, and start at medium brightness. Watch your plants for the first week and adjust from there. That hands-on feedback loop is going to teach you more than any spec sheet, and with a plant that is actually growing rather than stretching toward the window, you will know you got it right.
FAQ
My Bell and Howell light has a timer preset, but my plants still seem inconsistent day to day. What should I check first?
Confirm the light is actually power-cycling the way you expect. If the light was unplugged or the power flickered, the built-in timer can stop re-engaging until you reset it (unplug for about 10 seconds, then re-select the 3, 6, or 9-hour preset). Also make sure the outlet is not controlled by a wall switch or smart plug that might cut power mid-cycle.
The heads are adjustable, but I am not sure how to aim them for multiple plants. Is there a simple aiming rule?
Aim to avoid lighting empty air. For a cluster, spread the heads to cover the canopy zones rather than stacking them toward the center. If you have 4 heads, try two heads toward one end of the group and two toward the other, then rotate pots about a quarter turn every few days for even exposure.
Is mixed spectrum always the best color mode for the Bell and Howell GrowBurst?
Mixed or full-spectrum is usually the safest all-purpose default, especially for herbs, seedlings, and maintenance growth. Use the blue setting if you mainly want compact leafy growth, and switch to red if you are prioritizing flowering or root growth, but keep an eye on yellowing or stretching, since too much time in one mode can make light intensity feel “off” for your specific plant.
How do I tell if my plants need the light closer versus more brightness when I only have limited settings?
Use plant response signs. If leaves are bleaching or curling, the light is likely too intense, so raise it 4 to 6 inches. If plants stretch with long stems and wide gaps between leaves, the light is likely too weak or too far, so lower by 3 to 4 inches (and, if needed, move to the 9-hour preset).
What if my light is USB-powered and I used a laptop port, but it seemed dim or stopped working. Should I replace the light or the power setup?
Do not replace it yet. If it is USB-only, use a wall adapter rated for at least 2 amps (and ideally a reputable, stable adapter). Underpowered USB sources are a common reason for poor output or premature failure symptoms, including the light not sustaining operation.
The article mentions PPFD targets, but my light is low output. Should I still measure or can I rely on visual checks?
You can rely on visual checks for most casual setups, especially since these units lack published PPFD targets. Measure only if you want clarity or troubleshooting. A PAR meter gives a better “distance and brightness” decision than guessing, since two inches of height change can noticeably alter results for small LED setups.
Can I run the light longer than the 9-hour preset by using an external timer?
Possibly, but the built-in timer already only offers 3, 6, or 9 hours. If you add an external timer, ensure it does not repeatedly interrupt power in a way that forces frequent resets. A safer approach is to pick the built-in longest preset (9 hours) and supplement with consistent window light rather than stacking multiple timers.
How close can I safely place the light to tender seedlings?
Start higher than you would for mature houseplants. Begin around 18 inches for seedlings, then evaluate the first 48 hours. If you see bleaching (pale or white spots, especially near the center) or leaf curl, raise the light 4 to 6 inches instead of pushing it lower.
My plants are yellowing. How can I tell if it is a light problem or something else?
Check where the yellowing starts and whether it is uniform. Uniform pale color can indicate insufficient light or spectrum mismatch, while yellowing that begins at the bottom is often more consistent with watering or nutrient issues. Also confirm the timer is cycling, because a light that is only staying on part-time can look like nutrient trouble.
What is the most common mistake that makes these lights underperform even when they are turned on?
Using the wrong power source or an underpowered outlet connection, especially with USB-powered variants. If the light is dim, flickers, or does not run reliably on the built-in schedule, test the power setup first (wall adapter for USB models, stable outlet for plug-in models) before adjusting height and brightness repeatedly.
Next Article
Bell & Howell Grow Light Not Working: Troubleshooting Guide
Step-by-step fixes for Bell & Howell LED grow light not working: power checks, driver/timer, wiring, and reset tests.