The short answer: position your grow light 2–4 inches above your seedlings, run it for 16 hours a day, and raise the fixture as the plants grow to keep that gap consistent. Do those three things and you will get compact, healthy seedlings instead of the pale, floppy stems that plague so many indoor seed-starting attempts. Everything else in this guide is about dialing that in for your specific setup, light type, and crops. best grow light schedule 1
How to Use Grow Light for Seedlings Step by Step

Marcus Tillman
24 Mar 2026
Picking the right grow light for seedlings
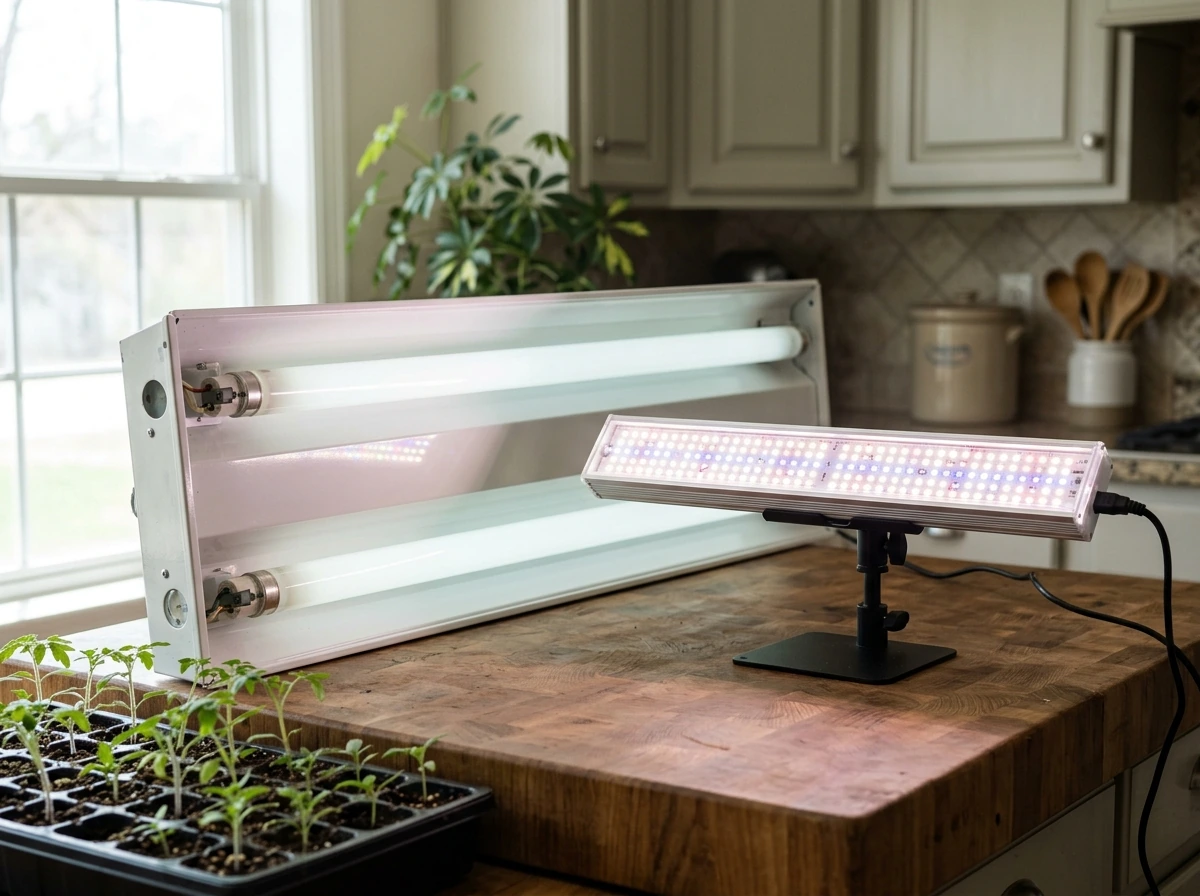
You do not need expensive, specialized equipment to start seeds well. The University of Maryland Extension has long recommended basic 4-foot fluorescent shop lights with T-8 tubes as a capable, budget-friendly option that produces stocky vegetable transplants when kept close to plant tops. The key phrase there is 'kept close.' The technology matters less than proper placement and runtime.
That said, here is how the main options stack up for seed starting specifically:
| Light Type | Upfront Cost | Heat Output | Ideal Distance to Seedlings | Best For |
|---|---|---|---|---|
| T5/T8 Fluorescent Shop Light | Low ($20–$50) | Low-moderate | 2–6 inches | Budget seed starting, beginner setups |
| T5 HO Fluorescent (dedicated grow) | Moderate ($40–$80) | Moderate | 2–4 inches | Denser trays, slightly faster growth |
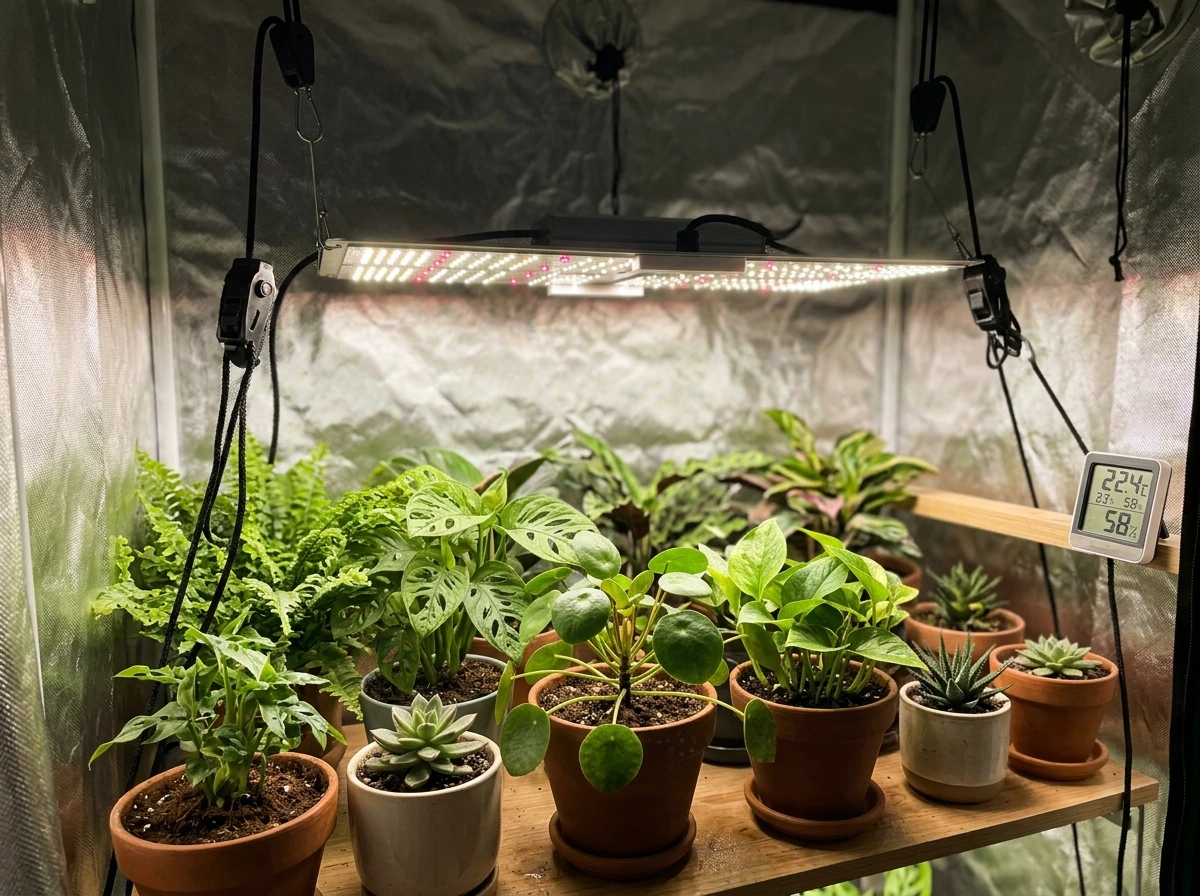
| LED Panel (full-spectrum) | Moderate–High ($40–$150+) | Low | 4–12 inches (varies by wattage) | Efficient, long-term use, low heat |
| LED Strip/Bar Light | Low–Moderate ($20–$60) | Very low | 2–6 inches | Shelf setups, small trays |
| HID/HPS | High | Very high | 12+ inches | Not recommended for seedlings |
For most beginners starting vegetable or flower seedlings at home, a T5 or T8 fluorescent shop light or a modestly powered LED bar is the practical sweet spot. Cool-white or daylight-spectrum fluorescent tubes (5000–6500K color temperature) lean toward the blue end of the spectrum, which promotes compact, leafy growth, exactly what you want at the seedling stage. For starting seeds indoors, UMN Extension recommends using fluorescent tubes described as “cool white” per fixture, noting they are inexpensive and adequate blank" rel="noopener noreferrer">“cool white” fluorescent tubes. Purpose-built full-spectrum LED panels cover both the blue and red wavelengths that plants use most, and they run cooler, which reduces the risk of heat stress when lights are positioned close. If you are curious about how spectrum choices affect plant growth beyond seedlings, our guide on how to use full spectrum grow lights goes deeper on that topic.
Avoid anything that generates a lot of heat close to seedling trays. High-intensity discharge bulbs and high-pressure sodium lamps are simply not designed for this application. Stick with fluorescent or LED and you will be fine.
The gear you actually need (fixtures, timers, stands, reflectors)
Beyond the light itself, a few supporting pieces of equipment make a real difference in how easy the whole setup is to manage.
Fixtures
A standard 4-foot fluorescent shop fixture holds two T8 tubes and covers roughly one standard 1020 seedling tray per fixture. If you are running multiple trays side by side, get multiple fixtures or a wider LED panel. The fixture should be adjustable in height, either via chains, rope ratchets, or a stand with adjustable arms, because you will be raising it regularly as seedlings grow.
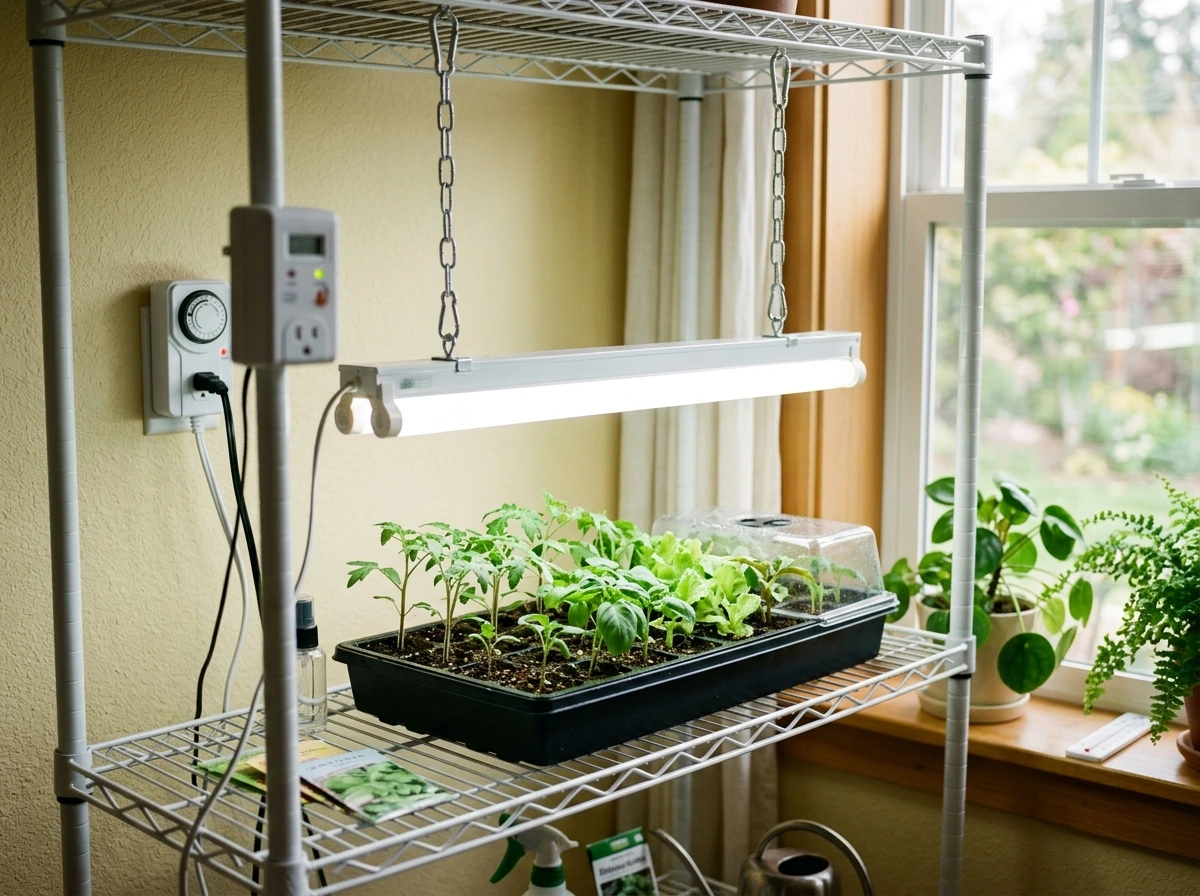
Timers
A mechanical or digital outlet timer is non-negotiable. You need consistent daily light cycles, and doing it manually is unreliable. A basic mechanical timer costs under $15 and works perfectly. Set it once and forget it. Running lights by hand almost always leads to inconsistent hours, which leads to inconsistent growth.
Stands and chains
The ability to raise your light easily is just as important as the light itself. Wire shelving units with lights hung on adjustable chains or zip-tie ratchets are the most popular DIY approach. Dedicated seed-starting stands with adjustable arms are cleaner but cost more. Either works. The goal is that you can raise the fixture by 1–2 inches every few days without a hassle, because you will need to.
Reflectors
If your fixture does not have a built-in reflector (many shop lights do), adding a white or silver reflective surface behind and around the light bounces stray photons back onto your plants. White foam board or mylar emergency blankets work well and cost almost nothing. This is more of an optimization than a requirement, but it does help with edge coverage if your tray is wider than the fixture.
How to position grow lights for seedlings (height and distance)
This is where most beginners go wrong. They hang the light at a comfortable, convenient height, usually 12–18 inches above the tray, and then wonder why their seedlings are stretching toward the ceiling. Seedlings need light that is close. Really close.
The practical starting points, backed by extension recommendations from Clemson, UGA, and NMSU, are: If you want a step-by-step way to dial this in, see how to use grow light for related guidance on placement and scheduling.
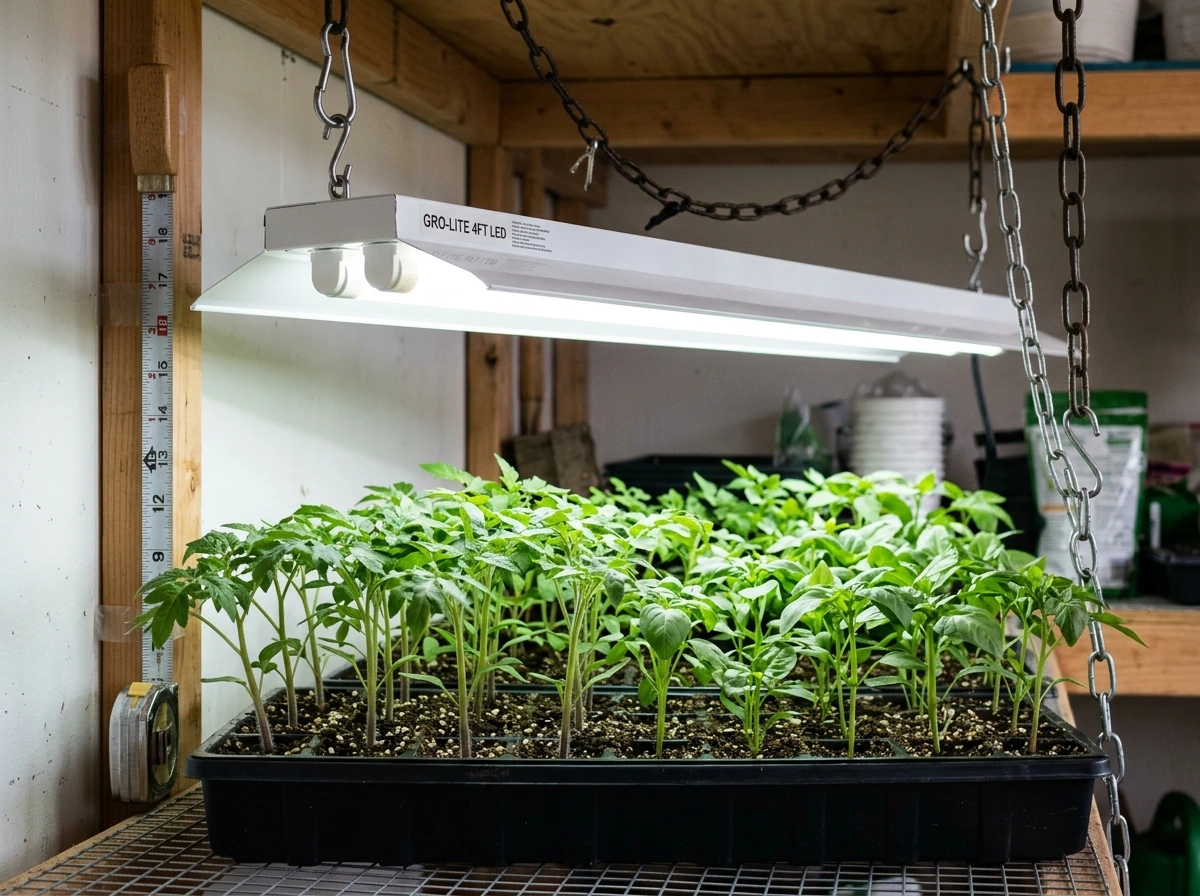
- Fluorescent T5/T8 shop lights: start at 2–4 inches above seedling tops
- LED bars and strips (lower wattage): start at 2–6 inches above seedling tops
- LED panels (higher wattage, 100W+): start at 6–12 inches, check manufacturer guidance and watch for heat or bleaching
- First week after germination: position light just above soil level, then raise to maintain the 2–4 inch gap as sprouts emerge
Why does distance matter so much? Because light intensity drops off dramatically as you move the fixture further away. UNH Extension ran a concrete test on this: a specific LED light needed only about 8 hours per day to deliver adequate light energy when mounted 8 inches above the crop. Move that same light to 20 inches above the crop and you need roughly 16 hours per day to deliver the same amount. Double the distance, double the runtime, and even then you might not fully make up the difference with some low-output lights.
The rule in practice: keep the light as close as you safely can without burning leaves, check plants daily for signs of heat stress or bleaching, and raise the fixture as seedlings grow to maintain that target gap. Once you have your height and timer dialed in, you can apply the same approach to houseplants so they get consistent light without stretching how to use a grow light for houseplants. Do not wait until seedlings are pressing against the fixture. Wisconsin Horticulture specifically warns that leaves touching or growing into lights will burn.
Light schedule and intensity: how many hours, how bright
Daily hours (photoperiod)
For most vegetable and flower seedlings, 16 hours of light per day is the standard recommendation. Clemson Extension, Wisconsin Horticulture, UGA Extension, and UMN Extension all land in the 16–18 hour range for producing stocky seedlings. The logic is simple: seedlings are not yet adapted to full outdoor sun intensity, so you compensate by giving them more hours of the weaker indoor light.
A few crop-specific notes matter here. NDSU guidance flags that lettuce and spinach are sensitive to long photoperiods and can start to bolt if you push past 14 hours per day. So for leafy greens, keep it at 14 hours or under. For tomatoes, peppers, cucumbers, and most annual flowers, 16 hours is your target. Do not run lights 24 hours a day. Plants benefit from a dark period, and UNH Extension is clear that running lights constantly is not better and does not replace good intensity management.
| Crop Type | Recommended Daily Light Hours | Notes |
|---|---|---|
| Tomatoes, peppers, eggplant | 16–18 hours | Sun-loving; need high DLI |
| Cucumbers, squash, melons | 16 hours | Sun-loving; keep light close |
| Herbs (basil, parsley, cilantro) | 14–16 hours | Flexible; watch for bolting in basil |
| Lettuce, spinach, arugula | 12–14 hours | Long days can trigger bolting |
| Annual flowers (impatiens, petunias) | 16 hours | Standard seedling schedule |
| Brassicas (broccoli, cabbage, kale) | 14–16 hours | Cool-season; 14 hours often enough |
Understanding intensity without the heavy theory (PPFD and DLI basics)
You will see the terms PPFD and DLI in grow-light specs and extension fact sheets. Here is what they actually mean for your setup. PPFD (micromoles per square meter per second) is a measure of how many photons are hitting your plant canopy at any given moment. Think of it as the 'flow rate' of light. DLI (Daily Light Integral, measured in moles per square meter per day) is the total amount of light energy delivered over a full day. Think of DLI as the 'total dose.'
For seedlings of sun-loving crops like tomatoes and peppers, you are aiming for a DLI of roughly 10–20 mol/m²/day. For shade-tolerant seedlings and most greens, 6–12 mol/m²/day is workable. You do not need a quantum meter to hit these targets. The practical approach from UNH Extension is this: use close placement (which increases PPFD) and run the light for 16 hours (which delivers more total DLI). If seedlings are compact and green, you are in the right zone. If they are stretching, you need more light, meaning closer placement, more hours, or a brighter fixture. Adjusting height and schedule is your main tool for managing effective intensity, not just buying a bigger light.
Dimming
If your light has a dimmer, use it strategically rather than guessing. A light at 50% output mounted 4 inches away delivers more usable light to your seedlings than the same light at 100% mounted 12 inches away. For seedlings specifically, close placement at moderate intensity beats distant placement at full power. If you have a dimmable LED panel, start at 60–75% intensity at 4–6 inches and only increase intensity (or distance) as plants develop true leaves and begin to handle more light.
The full seed-starting workflow under grow lights
Here is the complete process from sowing to transplant-ready plants. Follow these steps in order and you will avoid most of the common mistakes.
- Sow seeds into pre-moistened seed-starting mix. Cover with the appropriate depth of mix (check your seed packet). Place the tray in a warm location. Most vegetable seeds germinate best at 65–75°F. You do not need the grow light on during germination, since seeds do not need light to sprout.
- Place the grow light at its lowest safe height above the tray surface. Keep it on for 16 hours per day starting now, even before sprouts appear. This warms the top of the tray slightly and means the light is ready the moment cotyledons break the surface.
- Check daily. The moment you see the first seedlings emerging, make sure the light is at the right height (2–4 inches for fluorescent, 4–6 inches for lower-wattage LED). Seedlings reaching for light in their first 24–48 hours above soil will stretch immediately if light is too far away.
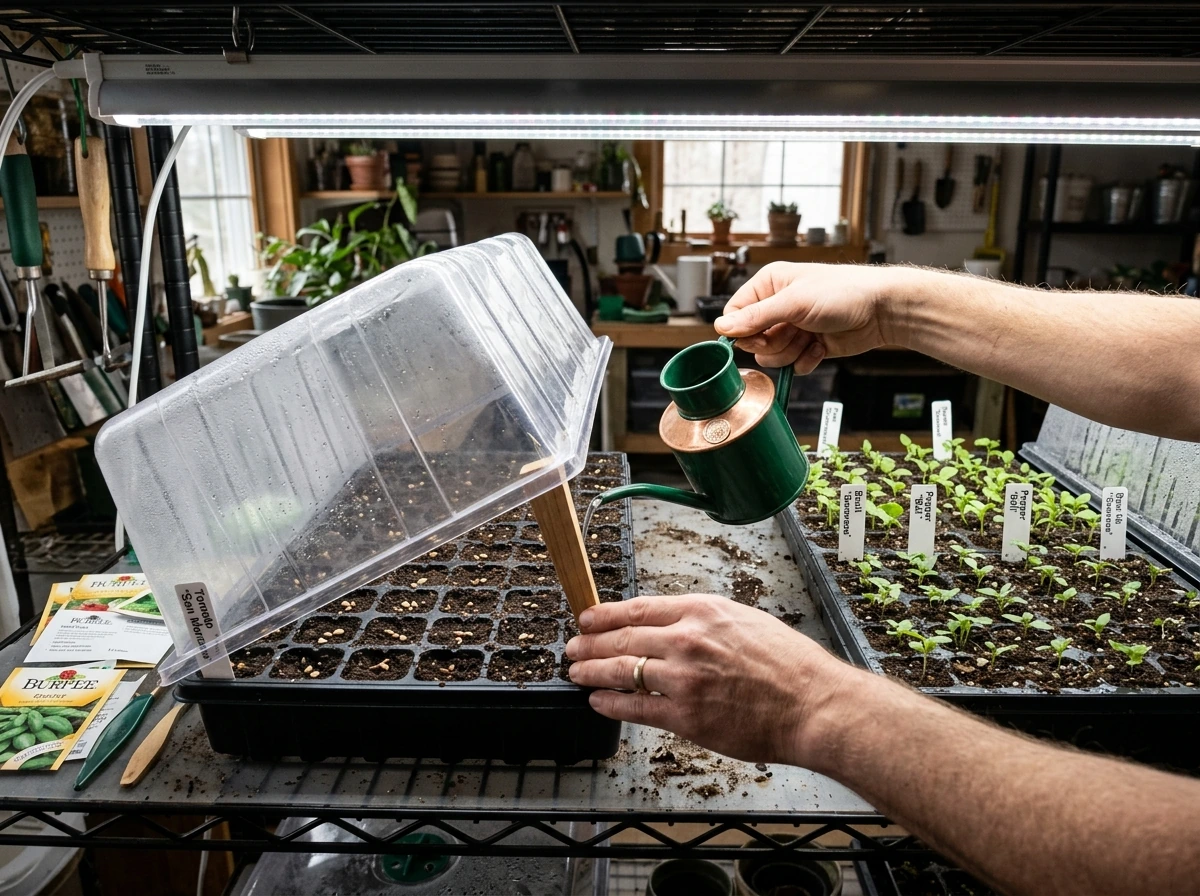
- Water carefully from below by placing the tray in a shallow container of water and letting the mix absorb moisture upward. Overwatering from the top keeps the surface too wet and promotes damping-off, a fungal disease that rots stems at the soil line. Good air circulation around seedlings also reduces damping-off risk.
- Raise the light every 2–4 days to maintain the 2–4 inch gap as seedlings grow. This is the step most people skip. The light position that was correct on day 5 will be too high by day 10.
- Once seedlings develop their first set of true leaves (not the seed leaves or cotyledons, but the second set of leaves that look like the plant), they are ready for a bit more light and can handle slightly brighter conditions. If your light is dimmable, you can step intensity up gradually.
- Continue the 16-hour daily schedule and maintain close placement through the full seedling stage.
- About 1–2 weeks before transplanting outdoors, begin hardening off: move seedlings outside for a few hours each day in a sheltered spot, gradually increasing outdoor exposure over 7–10 days. Reduce indoor light time to reflect the transition. This step is critical. Seedlings grown under artificial light have not experienced wind, variable temperatures, or full sun intensity, and they will be damaged if you skip acclimation.
One temperature note: UMD Extension recommends keeping your seed-starting area at 65–75°F. Temperature and light work together to control stretch. Cool temperatures (closer to 60–65°F) actually help keep seedlings compact even when light levels are not perfect. If your setup runs warm, compact growth becomes more dependent on getting the light placement exactly right.
Troubleshooting: leggy seedlings, weak growth, heat, and uneven coverage
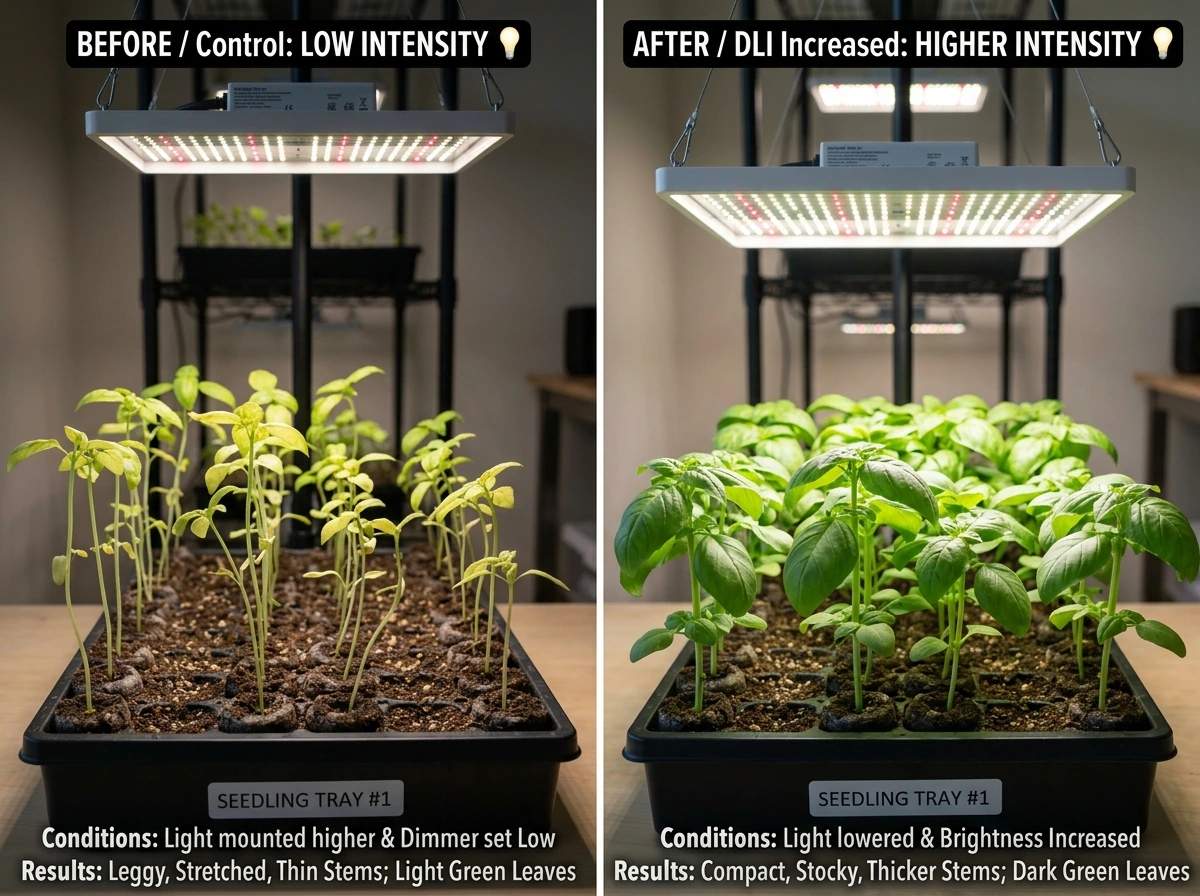
Leggy, stretching seedlings
This is the most common problem and almost always comes down to light that is too far away or too few hours per day. UMN Extension is direct: inadequate light causes pale growth and increases internode spacing, meaning the stem gets long and thin between leaf sets. The fix is not to buy a new light. First, move the existing light closer. Then check that your timer is actually running 16 hours. If you have done both and still have stretch, your fixture may simply not be bright enough for the crop, and you may need to either supplement with a second fixture or upgrade.
Pale or yellowing seedlings
Chlorosis (pale, light-green or yellow leaves) in seedlings under lights usually means one of three things: not enough light, too much water causing root problems, or a nutrient deficiency. Rule out light first. Move the fixture closer and check that runtime is correct. If the light setup looks right, check moisture: seedlings in constantly wet mix cannot absorb nutrients properly. Damping-off, described by Penn State Extension as fungal rotting of seeds and newly emerged seedlings, can begin with yellow, weakened growth before stems collapse.
Heat stress and leaf bleaching
If you see crispy, bleached, or curled leaf edges on seedlings closest to the light, the light is either too close or generating too much heat. Hold your hand at the seedling canopy level: if it feels uncomfortably warm after 30 seconds, raise the light. This is most common with higher-wattage LED panels and older fluorescent fixtures. The fix is straightforward: raise the light by 1–2 inches at a time until the heat is manageable, then compensate with extra runtime if needed.
Uneven coverage (edge seedlings weaker than center)
If seedlings at the edges of your tray are consistently weaker or leggier than those in the center, your light is not covering the full tray. Options: add a second fixture alongside the first, rotate the tray 180 degrees every few days, or add reflective material around the sides to bounce light inward. This is especially common with single-tube fluorescent fixtures over wide trays.
Seedlings falling over at the base (damping-off)
If seedlings look fine one day and then collapse with a pinched, darkened stem at soil level, that is damping-off. Wisconsin Horticulture describes the symptom exactly this way: the stem withers at the base and the seedling falls over due to rotted roots. This is a fungal disease driven by excess moisture and poor air circulation, not a lighting problem directly. However, UMN Extension notes that a proper light schedule (12–16 hours) is part of overall environmental management that reduces damping-off risk, because good light promotes stronger, faster growth that resists fungal pressure. UMN Extension’s damping-off problem-solution guidance explains how damping-off pathogens spread in warm, wet seedling-tray conditions and outlines prevention measures for seedlings reduces damping-off risk. The main fixes are to reduce surface moisture, improve air circulation (a small fan works well), and use fresh, sterile seed-starting mix.
DIY grow light setups: how to build a simple, safe system
You do not need to buy a purpose-built seed-starting station. Many successful home growers build their own setups for under $50. Here is what works and what to watch out for.
The wire shelf setup (most popular DIY option)
A metal wire shelving unit with 4–5 tiers is the backbone of most home seed-starting setups. Hang one or two 4-foot T8 shop lights from each shelf using adjustable chains or zip-tie ratchets. Place seedling trays on the shelf below each light. This gives you multiple independent growing zones in a small footprint. Total cost for one shelf tier with two shop lights: roughly $40–$60. Wisconsin Master Gardener guidance specifically recommends this type of approach and emphasizes keeping lights close (1–4 inches from tops) and keeping water away from lights and cords.
Simple single-shelf or table setup
If you only have one or two trays, a single shop light hung from a curtain rod, ceiling hook, or homemade PVC frame above a table works perfectly. The adjustability is what matters: use S-hooks and chains so you can raise the light without tools.
Safety rules for DIY setups
This part is not optional. Water and electricity in close proximity is the risk you are managing. Keep these rules in mind:
- Never allow water to drip onto or splash the fixture, cord, or outlet. Water trays on shelves below lights, not above them.
- Use fixtures rated for the environment. UL 8800 is the safety standard for horticultural lighting. Look for UL-listed fixtures, especially if running them in humid conditions. UL 1598 covers general luminaire safety including wiring, grounding, temperature limits, and overheating protection.
- Do not use extension cords as permanent wiring. Plug timers and fixtures into a grounded outlet on a dedicated circuit if possible.
- Keep cords secured and away from water, heat sources, and foot traffic.
- Inspect fixtures and cords regularly for damage, especially in humid seed-starting environments.
- Never leave lights on a flammable surface or pressed against seedling trays with no clearance.
Building your own setup is straightforward and safe as long as you follow basic electrical common sense. The goal is a functional, adjustable, easy-to-raise fixture system, not anything elaborate. Simple works.
Adjusting your approach for different seedling types
Vegetable seedlings (tomatoes, peppers, cucumbers, brassicas)
Tomatoes and peppers are the most light-hungry seedlings most home growers will start. They need that 16–18 hour photoperiod and benefit from being as close to the light as heat allows. Slow, weak growth in these crops almost always traces back to insufficient delivered light. Brassicas (broccoli, cabbage, kale) are slightly more forgiving and do fine at 14–16 hours. They also prefer cooler temperatures (60–65°F), which naturally promotes compactness even under less-than-ideal light.
For vegetable transplants specifically, the goal is to produce a stocky plant with a thick stem, dark green color, and short internodes (tight spacing between leaf sets). That plant will establish faster after transplanting outdoors. A tall, pale, thin-stemmed seedling, even if it looks 'big,' will struggle in the garden. Keep chasing compactness, not height.
Lettuce, spinach, and leafy greens
These crops are both easier and trickier. Easier because they tolerate lower light levels than fruiting crops. Trickier because long photoperiods (over 14 hours) can push them toward bolting (sending up a flower stalk prematurely), which makes them bitter and unusable. Keep lettuce and spinach at 12–14 hours per day and they will be happy. They also tolerate slightly more distance from the light than tomato seedlings, so if you have limited fixture adjustability, start leafy greens on the shelf and fruiting crops closest to the light.
Herbs
Basil is treated like a fruiting crop: it wants 14–16 hours of light and warm temperatures (above 65°F). Parsley and cilantro tolerate cooler conditions and are less demanding. Mint and chives are quite adaptable. For herbs in general, the same close-placement rule applies: keep the fixture 2–4 inches from tops to prevent stretching.
Flowers
Annual flowers like petunias, impatiens, marigolds, and snapdragons follow the standard 16-hour seedling schedule. Some perennials are less demanding. If you are starting a mix of vegetable and flower seedlings together, the 16-hour schedule at close placement is a safe default for the whole group, with the exception of any bolting-sensitive greens.
One final thing: UMN Extension notes that if your seedlings are not actively reaching or leaning toward the light source, that is actually a good sign. It means they are getting enough light and are not straining for more. That simple visual check, along with thick stems, dark color, and tight internodes, is your best real-time indicator that your setup is working. If you want to go deeper on general grow light scheduling principles beyond the seed-starting stage, the guide on how to use a grow light covers broader scheduling and intensity concepts across plant types.
FAQ
Can I run my grow light 24 hours a day to make seedlings grow faster?
No. Seedlings need a consistent dark period for normal development, especially for leafy greens. A practical approach is to run lights during your daytime hours (for example, start early morning to early evening) with a full night-off window, then adjust height and hours if plants show stretching or pale color.
My seedlings are stretching even though my light is on for 16 hours, what should I check first?
Yes, but only if you can keep the light close without overheating. If your fixture is dimmer or your seedlings are stretching, change the runtime first within the recommended range, then fine-tune by raising or lowering the fixture by 1 to 2 inches. If your timer is set incorrectly, the effect can look like “not enough light.”
What do bleached or crispy leaf edges mean, and how do I correct them?
If you see bleaching or crisping on the leaves closest to the fixture, it usually means either excessive heat or the light is too intense at that height. The fix is to raise the fixture slightly (1 to 2 inches) and check leaf temperature at canopy level with your hand for about 30 seconds. After heat is controlled, only then consider whether you need more hours.
How do I decide the right distance for my seedlings if they grow at different rates?
Use a simple “start close, then observe” method rather than a one-time guess. Begin at the recommended 2 to 4 inch gap, then raise gradually as plants grow. Wait until they are clearly leaning or touching? Avoid that, since leaf contact can cause burning and leaves can permanently scar.
Why are my seedlings at the edges leggier than the ones in the center?
If your schedule is correct but the center looks better than the edges, the light distribution is uneven. Quick fixes include rotating the tray 180 degrees every few days and adding reflective material around the sides. For persistent edge problems, add a second fixture or use a wider panel that matches the tray width.
How do I choose between cool white, daylight, and full-spectrum if the seedlings already look weak?
Don’t rely on color temperature alone when comparing fixtures. Two lights with the same K rating can differ a lot in brightness. If your seed trays look pale or stretched, prioritize delivered intensity (by maintaining close distance and correct runtime) rather than only choosing “cool white” versus “full spectrum.”
If my room runs cool, should I change my grow light setup?
It can. Many seedlings tolerate cooler air, but overly cold conditions slow growth and can make light-management problems worse. If your room is near the low end of the recommended range, use the full 16 to 18 hours and keep the light close, because cooler setups have less “help” from faster growth.
Does adding airflow help prevent damping-off, or is it only a watering problem?
A small fan is more about air movement than light, but it can reduce damping-off by helping the soil surface dry slightly faster and improving airflow around stems. Keep the fan gentle and avoid blasting directly at fragile seedlings, since wind stress can cause other issues.
My seedlings look yellow, how do I tell if it is a light problem or a nutrient problem?
Some chlorosis is nutrient-related, but you should confirm light first. If leaves are pale and stretching is also happening, it’s likely insufficient delivered light. If the plants are compact yet yellow, then investigate watering (overly wet mix) and consider whether you have adequate nutrition as seedlings develop true leaves.
How should I use a dimmer if I’m trying to avoid stretching but also prevent heat stress?
Yes, but the default strategy is to use a dimmer to compensate for distance changes. If you increase intensity, do it gradually and watch for bleaching or heat stress. A common approach is starting around 60 to 75% output at close height, then increasing only as seedlings develop true leaves.
What’s the best way to schedule the light if my daily routine varies?
You typically should not start with a timer that changes day-to-day or relies on manual “on/off” habits. If you must work around your schedule, choose fixed wake hours for the lights and keep the start and stop times stable. Consistency matters because fluctuations can affect internode length.
How can I tell whether my fixture is large enough for my seedling tray?
Depth matters. If the tray is deeper than the fixture’s effective coverage, lower plants or far edges can receive less usable light. Match fixture width to tray size, or plan to rotate trays and add reflective surfaces for uniform growth across all seedlings.
Next Article
How to Use Full Spectrum Grow Lights for Indoor Plants
Step-by-step guide to set up full spectrum LED grow lights for indoor plants, plus DIY build tips and safety.